Get to Know BeeCut
As a video creator, I’ve tried all kinds of video editing software over the years. Some were too complicated, making it hard for me to get the job done quickly; others were too basic to meet my professional video-editing needs. That is, until I tried BeeCut, a tool that perfectly meets my needs. Here’s an overview of the software.
What Is BeeCut
BeeCut is a video editing tool designed for both beginners and professionals, which supports Windows, Mac, Android, and iOS platforms. It strikes the perfect balance between simplicity and functionality. In addition to its user-friendly interface, BeeCuut offers basic editing features such as splitting, merging, trimming, cropping, rotating, cutting, and more.
BeeCut also comes with an extensive media library that helps me create personalized videos. What impressed me most was its speech recognition technology, which automatically identifies speech and generates multilingual, synchronized subtitles, saving me the tedious task of manually entering them.
Moreover, I found that BeeCut's performance was exceptionally good. Not only does it not consume excessive system resources, but it also runs smoothly even on older computers.
Is BeeCut Free
BeeCut isn’t entirely free. After trying the free version, I noticed that the videos had watermarks and some features were still locked. Later, I learned from the official website that BeeCut offers three subscription plans, and I chose the one that best suited my needs. Here are the specific subscription prices:
- Monthly subscription: $29.95
- Annual subscription: $39.95
- Lifetime subscription: $59.95
The Supported Input Formats of BeeCut
Before using it, I checked the input formats supported by BeeCut, which include the following:
- Video: MP4, WMV, MPEG, AVI, MOV
- Audio: MP3. WAV, AAC, WMA, M4A, MID, FLAC.AU, OGG, AIFF
- Image: PNG, JPG, BMP. TIF, HEIC
Can You Add a YouTube Video to BeeCut
The answer is yes. However, this doesn’t mean I can import videos from YouTube into BeeCut directly, since BeeCut doesn’t have a built-in button for adding YouTube videos. The easiest way is to use third-party download software to save the YouTube video to the local device, and then import it into BeeCut for editing.
How to Add YouTube to BeeCut
In this section, I’ll walk you through how to import YouTube to BeeCut, including my recommended download tools and a step-by-step guide.
Part 1: Save a Video from YouTube
I’ve tried various methods for downloading YouTube videos. Some are simple and fast, some require payment, and others even carry the risk of malware infection. After weighing all these factors, I finally settled on two tools that meet my needs: MiniTool Video Converter and viddown.net.
Option 1: MiniTool Video Converter
MiniTool Video Converter is a free, offline Windows application. Based on my long-term experience using it, it has become my go-to tool for saving YouTube videos on a daily basis.
Why Recommend MiniTool Video Converter
- Easy to Use: When I first opened MiniTool Video Converter, I was impressed by its intuitive interface. The tool’s functional areas are clearly laid out. Unlike other complex tools, I didn’t have to spend time going out of my way to find specific features. Whenever I needed a particular feature, I simply went to the corresponding section and could get started right away.
- No Bundled Software or Ads: After downloading and installing MiniTool Video Converter, I found that no bundled software was automatically installed on my computer. While using the software, I didn’t encounter any ads that interrupted my work.
- Download Content from Multiple Platforms: The main reason I chose MiniTool Video Converter is that it supports getting content from many major platforms. In addition to downloading 4K-quality YouTube videos, podcasts, music, and other content, this tool also supports saving videos from TikTok, Facebook, Twitter, and Instagram. What surprised me even more is that MiniTool Video Converter even supports getting subtitles from YouTube videos.
- Batch Download: Another reason I chose MiniTool Video Converter is that it supports batch downloading of videos. I tried using this feature to get a YouTube playlist and was pleasantly surprised to find that I could download up to 10 videos at once simply by copying a single link, without having to copy multiple links one by one.
- No Watermarks: Best of all, videos downloaded using MiniTool Video Converter not only lack the source platform’s watermark, but the software also doesn’t add any watermarks of its own.
How to Save YouTube Videos with MiniTool Video Converter
Step 1: Download and Install MiniTool Video Converter
Click on the button below to download MiniTool Video Converter. Then, follow the prompts to install it on the computer.
MiniTool uTube DownloaderClick to Download100%Clean & Safe
Step 2: Copy the YouTube Video Link
1. Go to the YouTube website and find the target video.
2. Then, copy the URL of the YouTube video from the address bar.
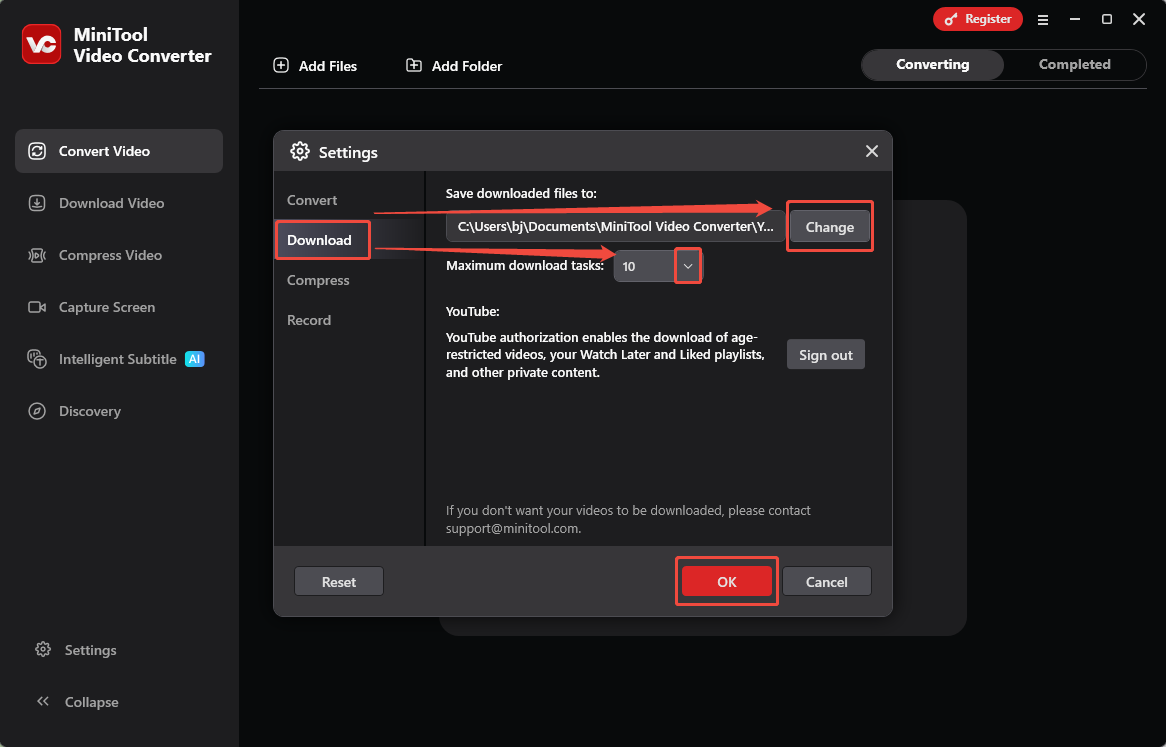
Step 3: Configure the Video Downloading Settings
1. Launch MiniTool Video Converter.
2. Click the More options in the top-right corner of the main interface. Then, choose the Settings option.
3. In the Settings panel, switch to the Download section.
4. Then, click the Change button to select where to save the downloaded file. To set the maximum number of downloads, expand the drop-down menu next to the Maximum download tasks option and make a choice.
5. Finally, click on the OK option to save the changes.
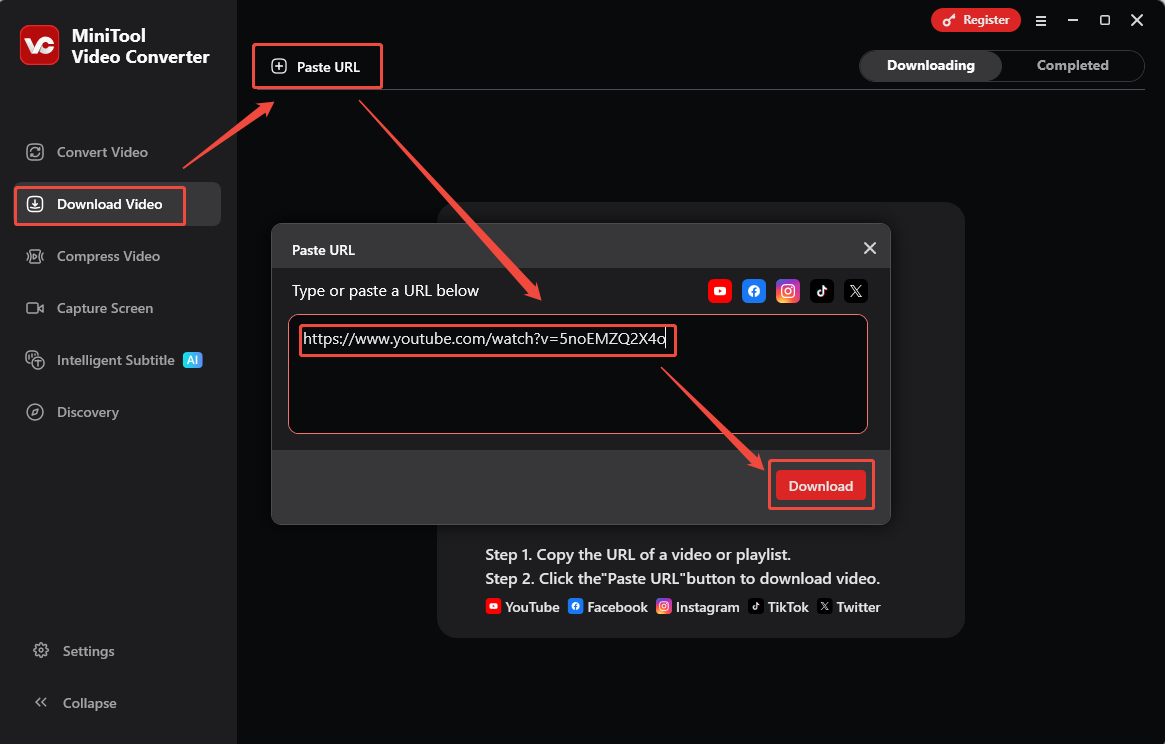
Step 4: Analyze the Video Link
1. In the main interface, navigate to the Download Video module.
2. Click the Paste URL option and paste the copied YouTube video link into the box, then click the Download option to analyze the link.
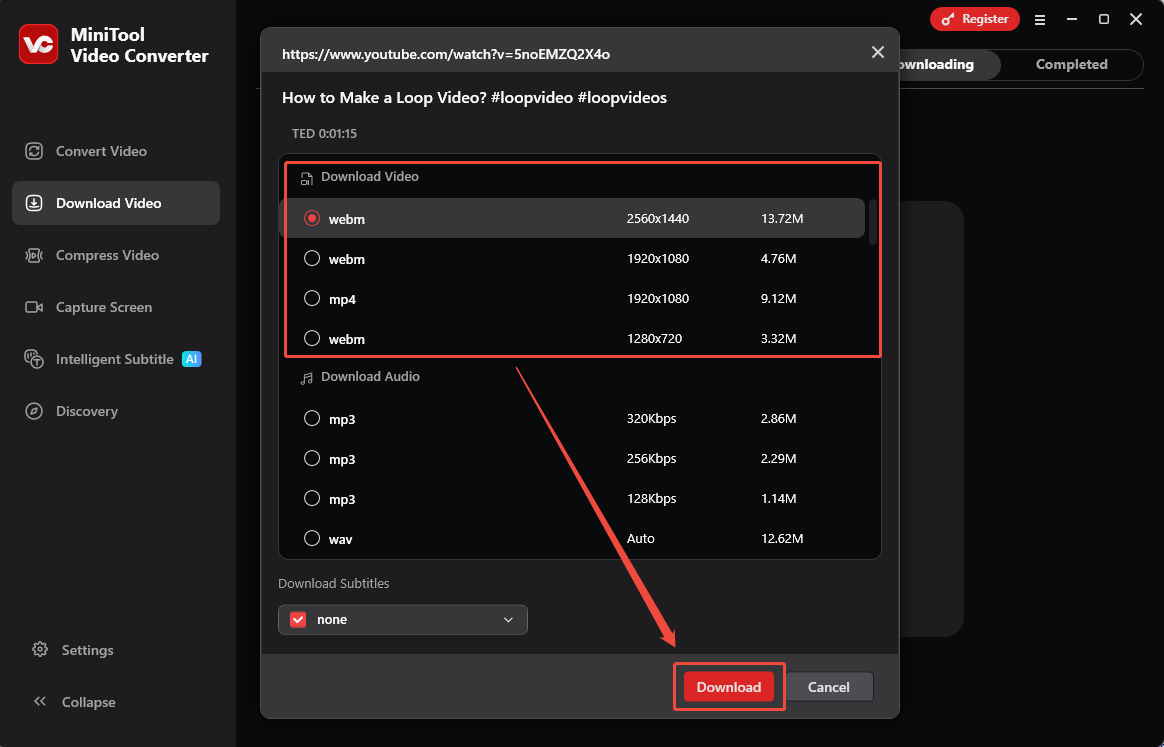
Step 5: Download the YouTube Video
1. In the new pop-up window, choose the appropriate format and resolution for the YouTube video.
2. Then, click on the Download option again to get the YouTube video.
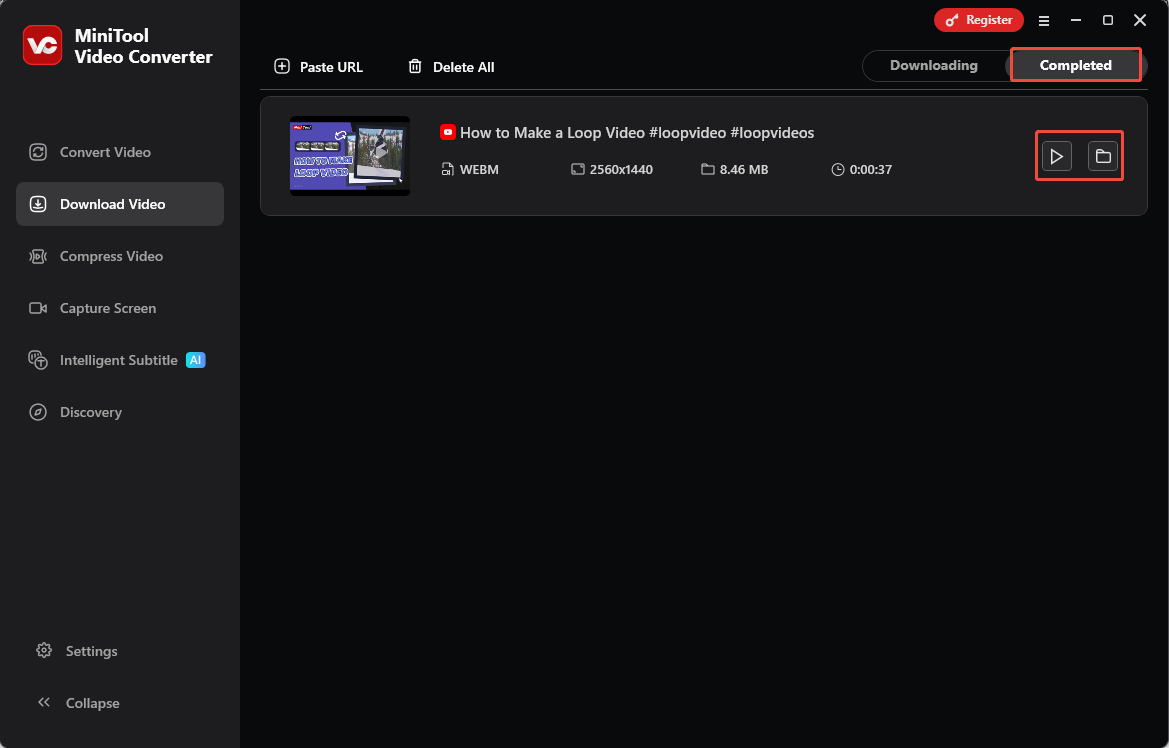
Step 6: Check the Downloaded YouTube Video
1. When the video downloading process ends, MiniTool Video Converter will automatically switch to the Completed section, where the downloaded video is listed.
2. Then, click the Play icon to check the downloaded YouTube video and click the Folder icon to locate it.
As mentioned above, MiniTool Video Converter allows me to easily and quickly get single or multiple videos. In addition, I often use this software to compress, convert, or transcribe YouTube videos.

Option 2: viddown.net
Sometimes, when I’m not using my own computer and don’t want to install software, I choose to use an online download tool. Among the many online download tools available, I chose viddown.net. What I appreciate most about this tool is its commitment to protecting user privacy; I can enjoy all its features without having to register or pay.
Additionally, viddown.net's excellent compatibility is another reason I chose it. Not only does it work seamlessly with major browsers like Opera, Safari, Chrome, Edge, and Firefox, but it also supports video downloads across all devices, including desktops, laptops, tablets, and smartphones.
What’s more, viddown.net supports getting videos from YouTube, Facebook, and Twitter, and can download watermark-free Instagram videos and TikTok videos. Surprisingly, the tool also allows me to save YouTube thumbnails. Just like downloading videos, simply paste the video link into the website’s address bar to quickly retrieve the thumbnail.
Here are specific steps to add videos from YouTube to BeeCut using viddown.net.
Step 1: Copy the YouTube Video URL
Open the browser and go to the YouTube website. Then, find the target video and copy its URL from the address bar.
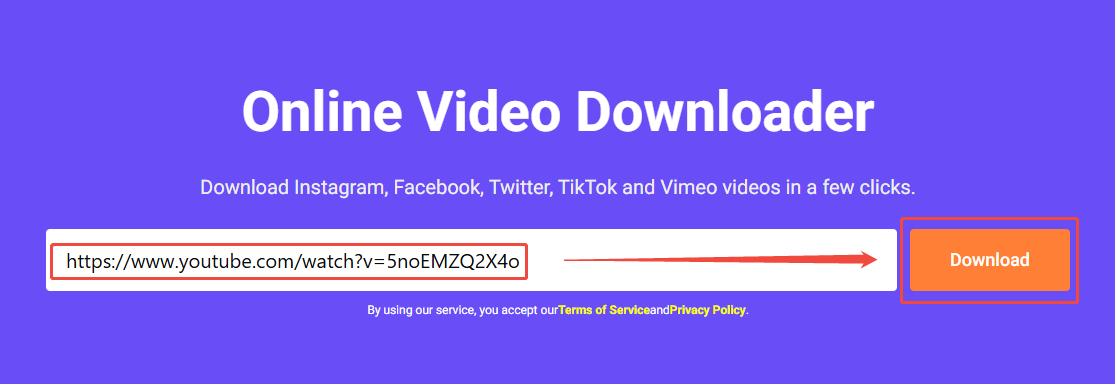
Step 2: Analyze the Video URL
1. Open the browser and go to the viddown.net website.
2. Paste the copied URL into the box and click on the Download option to analyze the video URL.
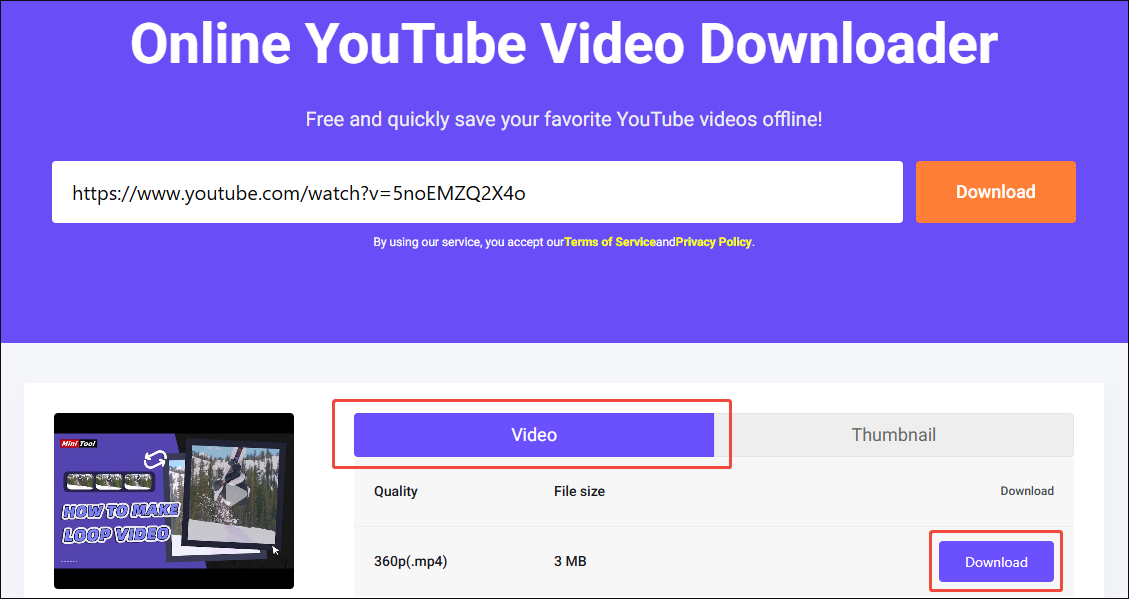
Step 3: Download the YouTube Video
1. Once the video link analysis is complete, a list of output formats will appear below the address bar.
2. Here, select the desired video quality and format under the Video section. Then, click the corresponding Download option to get the YouTube video.
3.If you jump to the video playback page, click the More option in the bottom-right corner of the player, then select the Download option to start downloading the video.
4. Once the video has finished downloading, locate and watch the downloaded YouTube video in the Downloads section of the computer's browser.
All in all, both MiniTool Video Converter and viddown.net can save YouTube videos easily and quickly. Therefore, when choosing between the two, the decision should be based on specific needs.
Part 2: Add the Downloaded YouTube Video to BeeCut
After downloading the YouTube video, I tried importing it into BeeCut and did some basic editing. Here are the specific steps.
Step 1: Open BeeCut
Launch BeeCut on the computer.
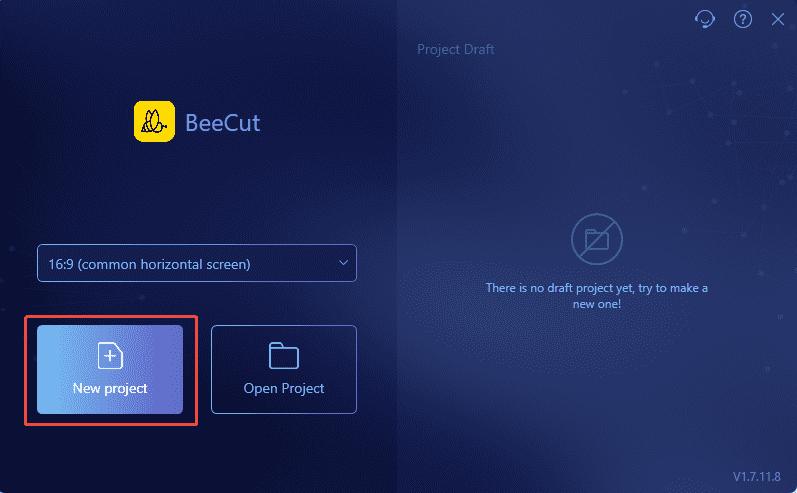
Step 2: Select Video Aspect Ratio and Create a New Project
1. In the main interface, expand the drop-down menu on the right side of the box, then select the appropriate aspect ratio.
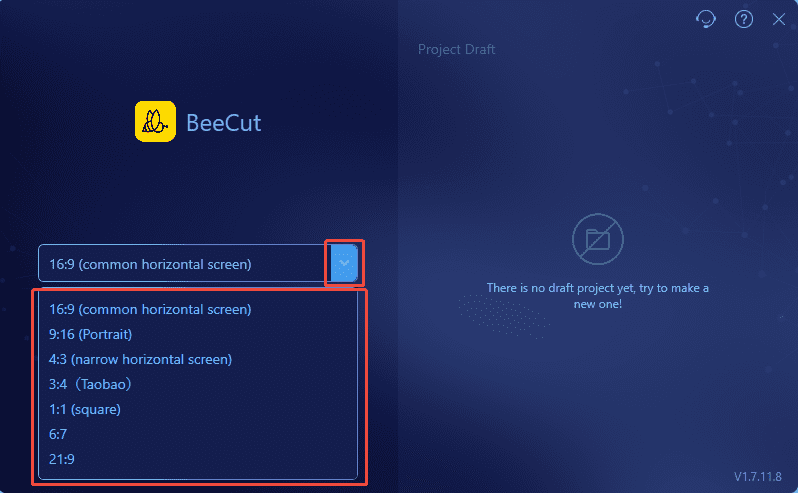
2. To create a new project, click the New project option to enter the video editing interface.
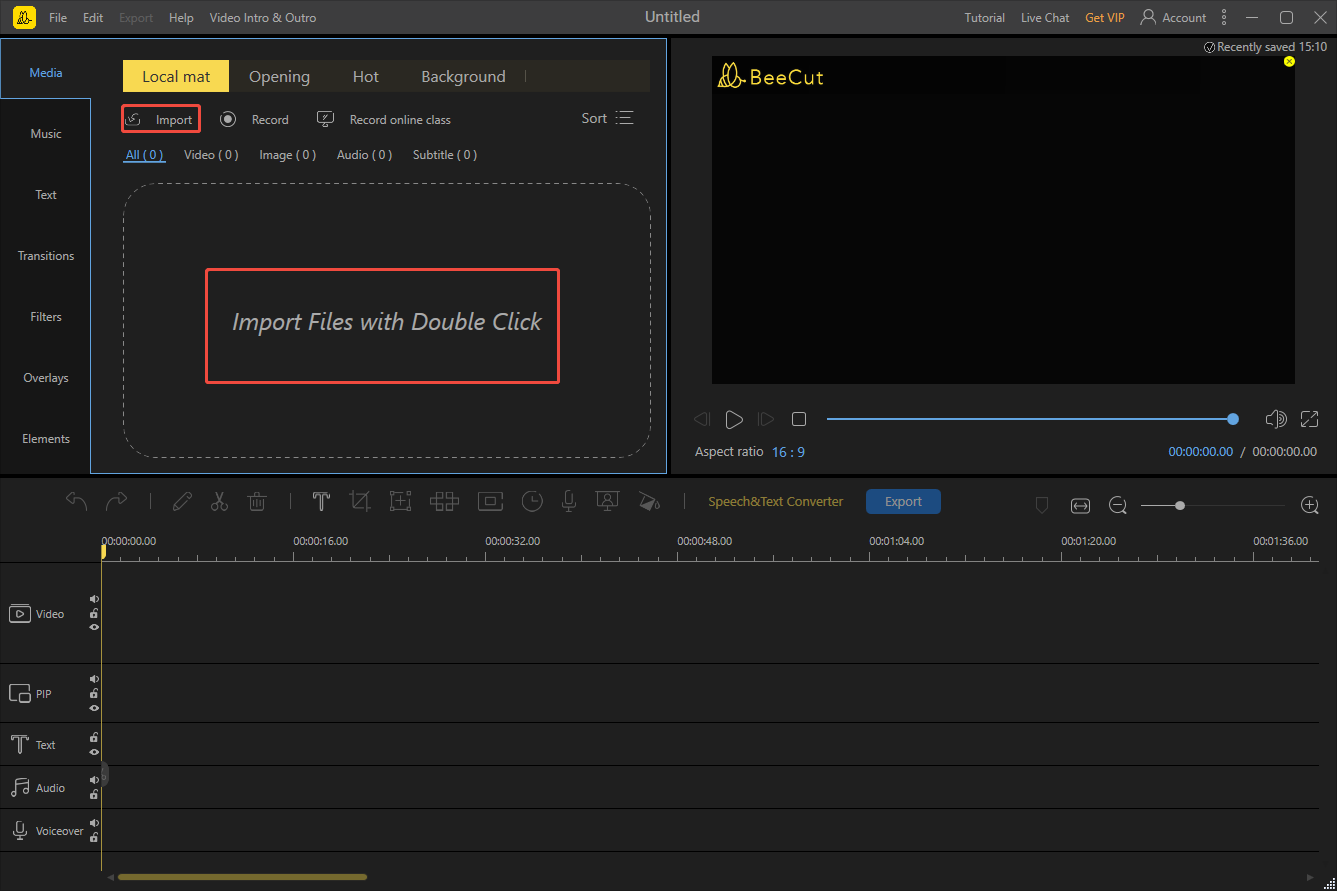
Step 3: Add the Downloaded YouTube Video
In the editing interface, to add the downloaded video from YouTube to BeeCut, click the Import option or click the Import Files with Double Click area.
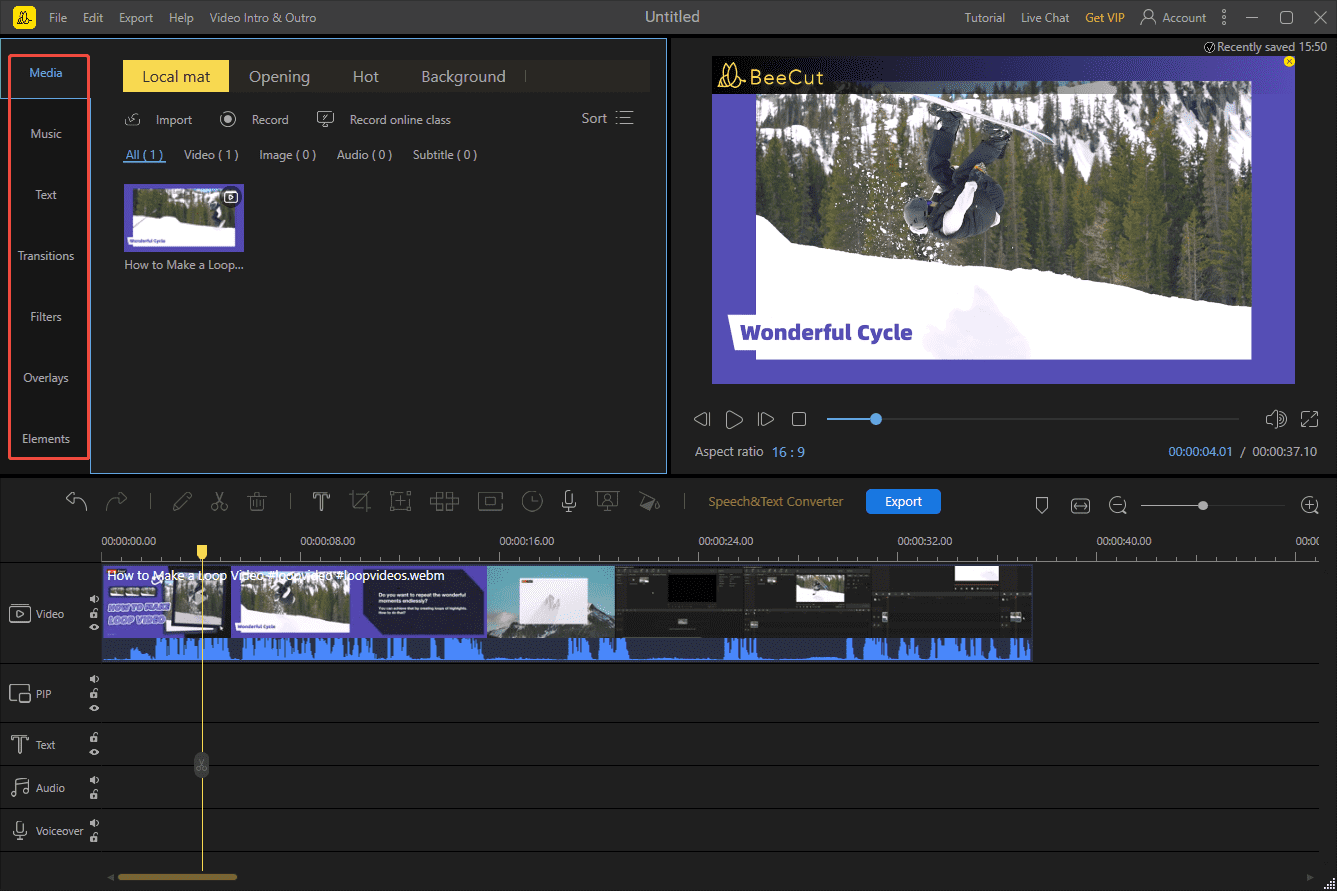
Step 4: Edit the Downloaded YouTube Video
1. Click the + icon to add the video to the timeline. Or, drag the video onto the timeline directly.
2. At this stage, I usually start by adding elements to the video in the Media library on the left, such as music, filters, text, transitions, and more. Then I trim and split the video, adjust the volume, and so on.
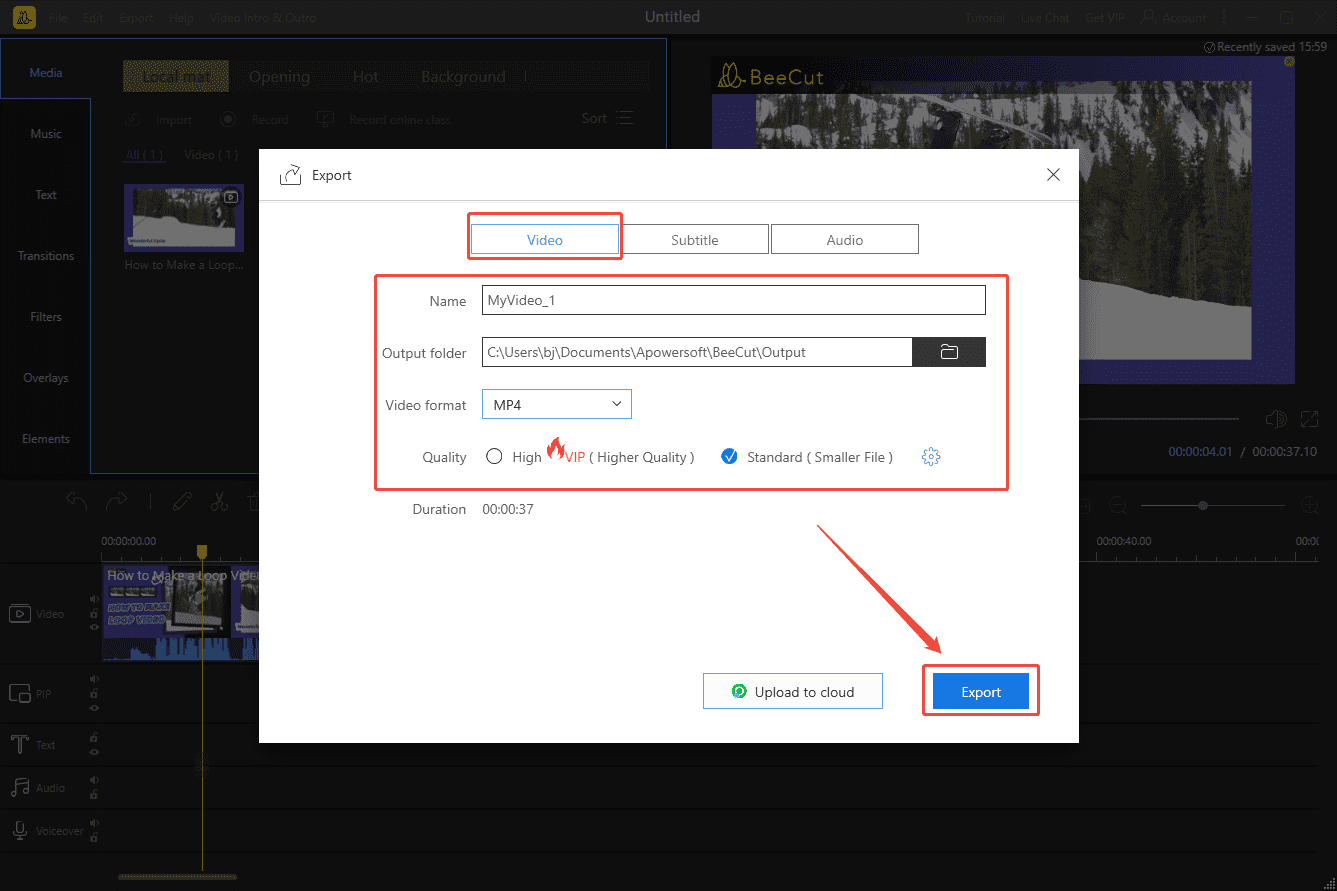
Step 5: Export the Video
1. After editing and previewing the video, click the blue Export option above the timeline.
2. Next, in the pop-up window, edit the video name. Then, select the save location, video format, and quality under the Video section.
3. Finally, click the Export option again to save the video.
As you can see from the steps above, adding a video from YouTube to BeeCut for editing is a breeze. MiniTool Video Converter and viddown.net greatly improve efficiency during this process.
Bottom Line
It is not complicated to add a video from YouTube to BeeCut. The two download tools mentioned in this article, MiniTool Video Converter and viddown.net, can save a lot of time during this step. I hope these methods will help you complete the task.
If you encounter any issues while using MiniTool Video Converter, send an email to support@minitool.com.
About The Author

Position: Columnist
Jade is an experienced multimedia tech writer who has authored hundreds of guides on screen recording, video editing, and software troubleshooting. Dedicated to bridging the gap between complex technical concepts and user-friendly solutions, she specializes in providing clear, actionable advice.