Adobe Premiere Pro is a powerful video editing software that allows you to create professional-quality videos. Good audio quality is crucial for videos. And YouTube Music is one of the best places to add music tracks to your video projects. This MiniTool Video Converter article will guide you on how to add music to Premiere Pro from YouTube. Let’s get started!
Part 1: Can You Add Music from YouTube to Premiere Pro Directly
Premiere Pro is a powerful video editor that allows you to create professional-looking videos with various effects, transitions, titles, etc. One of the most important elements of a video is the audio, which can enhance the mood, tone, and atmosphere of your video scenes. Adding music to your video can make it more engaging, entertaining, and appealing to your audience.
But where can you find the right music for your videos? One of the most popular sources of music is YouTube, which has millions of songs and tracks from different genres, artists, and creators. YouTube also offers a lot of royalty-free and Creative Commons music that you can use legally in your videos without worrying about copyright infringement.
However, you cannot add YouTube music to Premiere Pro directly. Why? YouTube does not provide a way to download the audio or video files directly unless you have a YouTube Music Premium or YouTube Premium subscription. On the other hand, Premiere Pro requires files to be stored locally on your computer in order to use them in your video projects.
So, how can you add music to Premiere Pro from YouTube? Next, we will show you how to add music from YouTube to Premiere Pro so that you can import and edit the music in Premiere Pro as you wish.
Part 2: How to Download YouTube Music to Premiere Pro-Supported Files
One of the easiest ways to add music to Premiere Pro from YouTube is to use a third-party tool that can convert YouTube videos to Premiere Pro-supported audio formats like MP3, AAC, AC3, WMA, WAV, etc. You can find many online and offline tools that can perform this task. In this guide, we’ll list some of the best options and provide step-by-step instructions to help you download YouTube music in Premiere Pro-supported audio formats.
#MiniTool Video Converter
MiniTool Video Converter is a free and powerful software that can help you download YouTube music and convert it to various audio formats, such as MP3, WAV, etc. In addition to music, this tool supports high-speed, high-quality downloading of videos, playlists, and subtitles from YouTube.
MiniTool Video Converter is also a free file converter that allows you to convert video files to another format, like MP4, AVI, MKV, MOV, and more. Furthermore, it allows you to record what is happening on your computer screen with no time limit.
Here’s how to download music from YouTube to Premiere Pro with MiniTool Video Converter:
Step 1. Download and install MiniTool Video Converter on your computer. You can get it by clicking the download button below.
MiniTool Video ConverterClick to Download100%Clean & Safe
Step 2. Launch the program and go to the Video Download tab on the top menu.
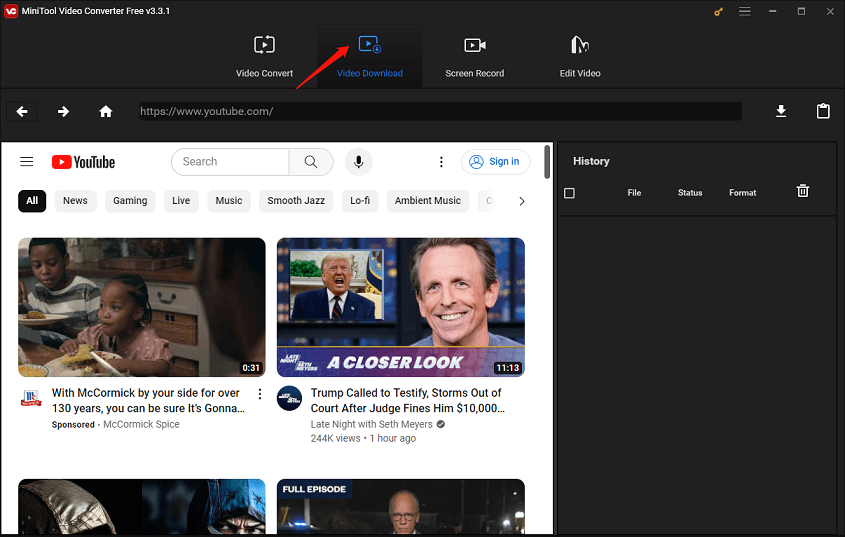
Step 3. Go to YouTube and copy the URL of the YouTube music video you want to download.
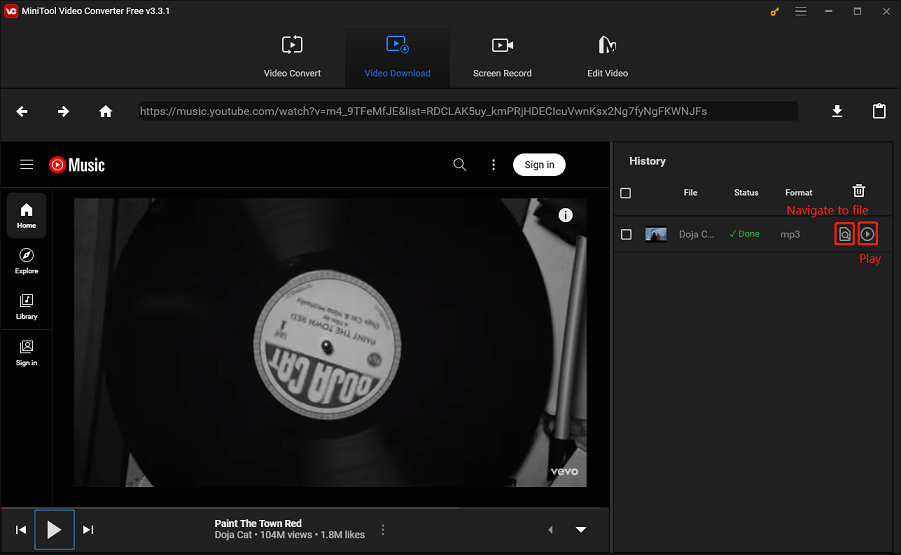
Step 4. Return to MiniTool Video Converter, paste the music link into the address bar, and press the Enter key on your keyboard to load the music video.
Step 5. Click on the Download icon next to the address bar.

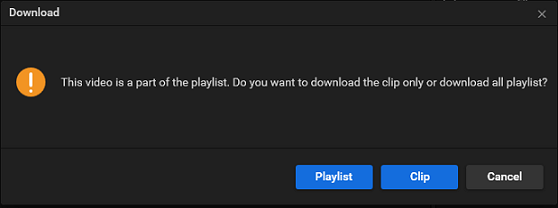
Step 6. If your music video is part of a playlist, a popup will appear asking if you want to download the clip or the entire playlist.
Step 7. Choose the output format and quality for the music. You can select MP3 and WAV according to your preference and then click the DOWNLOAD button to start downloading the music.
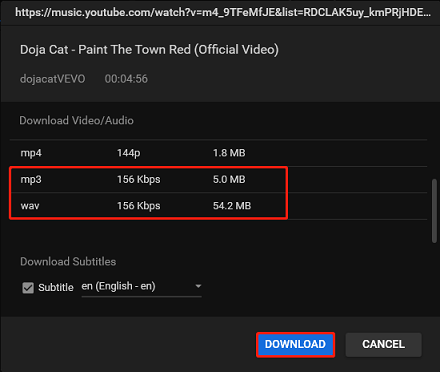
Step 8. After the conversion is done, you can find your downloaded music in the History panel. Click the Navigate to file button to locate your music or use the Play button to listen directly.
You have successfully downloaded YouTube music with MiniTool Video Converter. You can enjoy the music offline or transfer it to your Premiere Pro video projects.
#Y2Mate
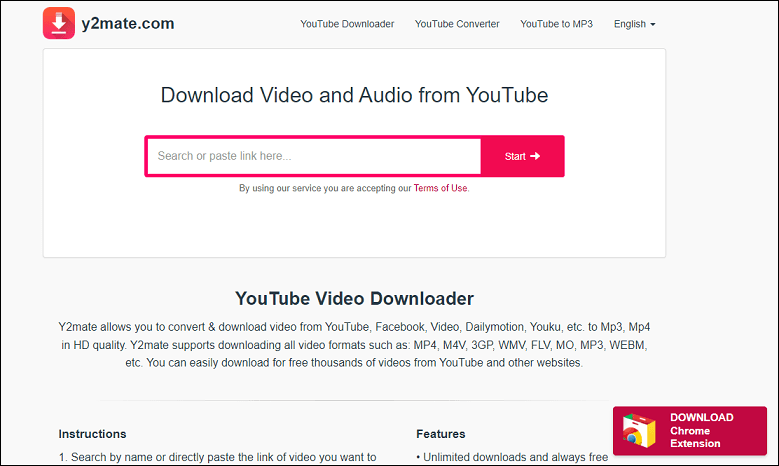
Y2Mate is a free and safe online platform that offers users the ability to convert and download videos from various streaming platforms. It enables you to convert videos from YouTube, Facebook, Youku, Dailymotion, and others into different formats, such as MP3, MP4, WEBM, and more. You can use Y2Mate to save your favorite videos for offline viewing or transfer them to your devices for playback.
Here’s a step-by-step guide on how to download YouTube music using Y2Mate:
Step 1. Copy the music URL: Go to YouTube, find the music video you’d like to download, and copy its URL from the address bar.
Step 2. Visit Y2Mate: Open a new tab in your web browser and go to the Y2Mate website.
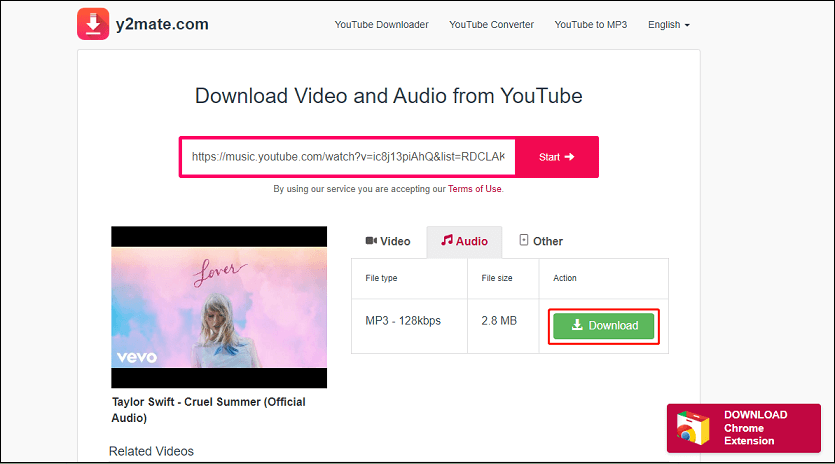
Step 3. Paste the URL: On the Y2Mate website, you’ll see a text box where you can paste the URL of the YouTube music. Paste the URL you copied earlier into this box.
Step 4. Choose Format: After pasting the URL, Y2Mate will process the video and give you several download options in different formats and qualities. Choose MP3 if you only want to download the audio.
Step 5. Download: Click on Download next to your preferred format and quality.
#4K Video Downloader
4K Video Downloader is a cross-platform and free video downloader that allows you to download videos, playlists, and music from popular video sites like YouTube, Facebook, Vimeo, and others. This software offers high-quality downloads and is compatible with Windows, macOS, and Linux systems.
With 4K Video Downloader, you can download annotations and subtitles along with your YouTube videos. These annotations and subtitles can be saved in SRT format, and you can select from over 50 different languages. Moreover, its Smart Mode enables you to download YouTube videos in bulk. You can even subscribe to YouTube channels using this software and get new videos downloaded automatically.

This is a tutorial on how to get music from YouTube to Premiere Pro with 4K Video Downloader:
Step 1. First, you need to download and install the 4K Video Downloader application on your computer. You can download it from the official website.
Step 2. Find the music video you want to download on YouTube and copy its URL from the address bar of your web browser.
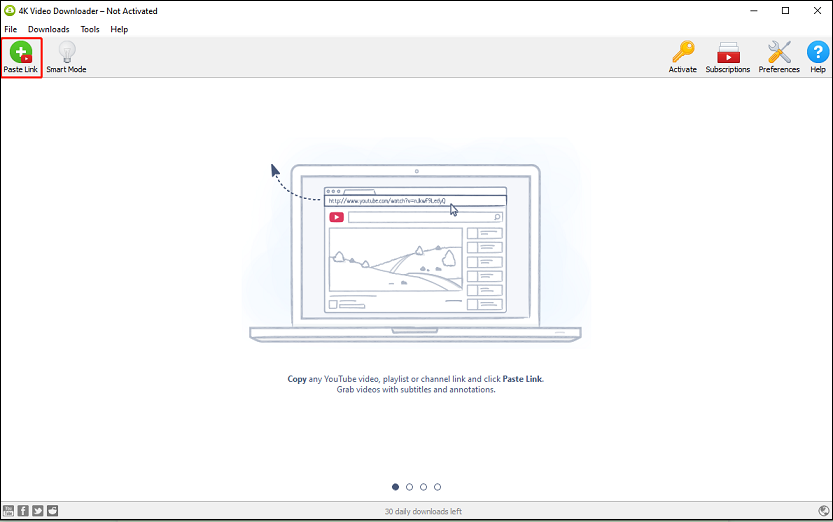
Step 3. Open the 4K Video Downloader and click on the Paste Link button in the top-left corner of the screen. The application will then fetch the video information.
Step 4. Once the video information is fetched, a dialog box will appear where you can choose the format and quality of the audio. Select the Extract Audio option and choose your preferred format (MP3, M4A, or OGG) and quality.
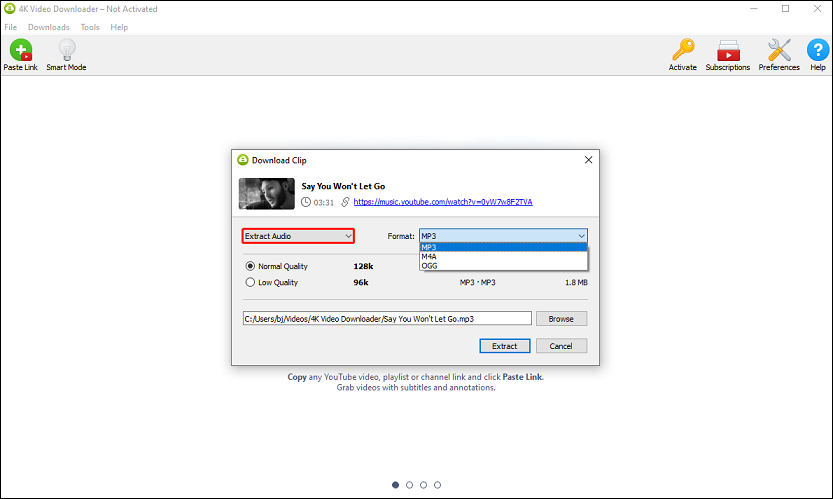
Step 5. After selecting your preferences, click on the Extract button. The audio will then be downloaded to your computer.
#KeepMusic YouTube Music Converter
KeepMusic YouTube Music Converter is another platform for downloading and converting music from YouTube. It supports a range of audio formats, including MP3, WAV, AAC, FLAC, AIFF, and ALAC. This software is available on both Windows and Mac computers.
This tool can save multiple songs, albums, and playlists in batch mode. Besides, it also provides multiple ways to name and organize the converted files, so you can easily organize your YouTube music in a better way.
Here’s a step-by-step guide on how to download YouTube music using KeepMusic YouTube Music Converter:
Step 1. Download and install KeepMusic YouTube Music Converter on your desktop.
Step 2. Launch this tool and log in to YouTube Music Web Player.
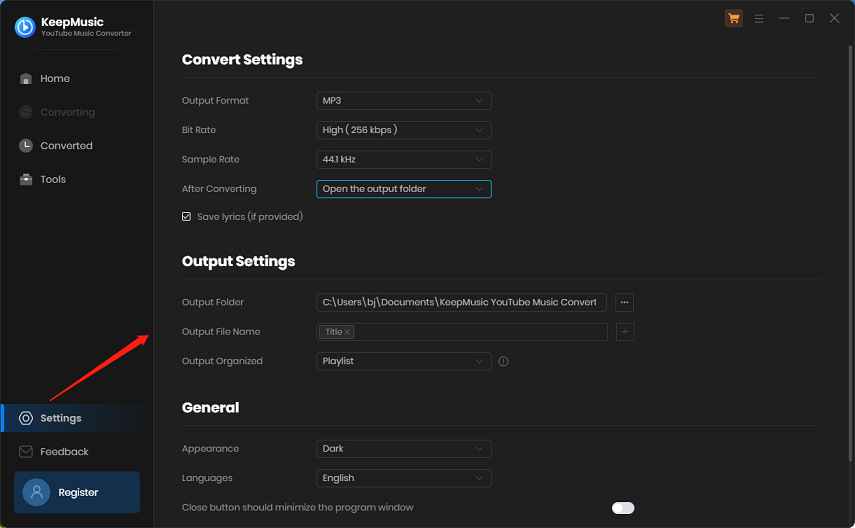
Step 3. Click the Settings icon in the lower-left corner and select your preferred output format (MP3, AAC, WAV, FLAC, AIFF, or ALAC). You can also set up the bit rate, sample rate, and output folder here.
Step 4. Open a playlist and click the floating Add icon to select music from the playlist to add it to the conversion panel.
Step 5. Click Convert Now to start exporting the YouTube songs to your computer. The downloaded songs can be found in the output folder you set up earlier.
Part 3: How to Add Downloaded Music from YouTube to Premiere Pro
After downloading music tracks from YouTube using one of the YouTube audio downloaders we mentioned in the previous section, it’s time to add the downloaded YouTube music to your Premiere Pro projects.
To add YouTube music to Premiere Pro, refer to the following steps:
Step 1. Import the music to Premiere Pro
- Go to File > Import.
- Navigate to the location where you saved the downloaded music file.
- Select the file and click Open.
The imported music file will appear in the Project panel.
Step 2. Add the music to your video
Now that your music track is imported into Premiere Pro, you can add it to your video:
- Drag the music file from the Project panel onto the timeline panel.
- Position it in the desired location on the timeline.
You can adjust the duration of the music track by dragging its end on the timeline.
Step 3. Adjust audio levels
To ensure that your music doesn’t overpower your video’s original audio, you can adjust its audio level:
- Click on the music track in the timeline to select it.
- In the Effect Controls panel, adjust the Level under Audio Effects.
Remember, it’s important to keep a balance between your video’s original audio and your added music.
Step 4. Export your video
Once you’re satisfied with how your video sounds with the added music, you can export your video:
- Go to File > Export > Media.
- In the export settings dialog box, choose your desired format and preset.
- Click Export.
And there you have it! You’ve successfully added music from YouTube to your Premiere Pro project.
Wrapping Up
To conclude, you can’t import YouTube music to Premiere Pro directly. You have to download music from YouTube in common output formats supported by Premiere Pro.
Luckily, there are several YouTube music downloaders that can do this for you, including MiniTool Video Converter. With them, you can download YouTube music in MP3 or other desired audio formats for free. And then, you could add the downloaded music to your Premiere Pro video projects easily.
If you have any questions or suggestions while using the MiniTool Video Converter, please feel free to leave a comment below or contact us via support@minitool.com for help.