How to burn a CD from YouTube to Windows Media Player? Or put it simply, how to burn a CD from YouTube? There are two steps: first, download music from YouTube through a YouTube downloader like MiniTool Video Converter; then burn the downloaded music to the CD through Windows Media player. Now scroll down to see more details about the two steps.
Lots of people come up with the question “how to burn a CD from YouTube to Windows Media Player”. And, aside from it, there are many questions as follows:
- How to burn a CD from YouTube?
- How to burn music to a CD from YouTube?
- How to download music from YouTube to CD?
All these questions, in nature, are related to the topic of “convert YouTube music to CD”. Converting YouTube music to CD allows people to enjoy YouTube content offline. But there is another question “is it illegal to burn music to CD from YouTube”. It is illegal to download music from YouTube unless the creator allows it. If you have the permission, you can burn it to your CD but this CD can be only for your own use.
Well, how to burn music from YouTube to CD? It is easy to be achieved as only two steps are required. Firstly, download the YouTube music using a YouTube downloader; then burn the downloaded YouTube music to a CD using Windows Media Player or other utilities. Now follow the guide below to complete this burning.
Step One: Download Music from YouTube
YouTube won’t provide you with a download icon for downloading a YouTube song or video unless you subscribe to YouTube Premium ($11.99 per month). But luckily, there is a free trick to download audio from YouTube for free — you can utilize a YouTube downloader that can help you download content from YouTube. Which YouTube downloader should be chosen? Here MiniTool Video Converter, a desktop YouTube downloader, is highly recommended. Why? Keep reading!
MiniTool Video ConverterClick to Download100%Clean & Safe
Choose MiniTool Video Converter
Nowadays, YouTube downloaders can be roughly divided into three types as follows:
- Online YouTube downloaders
- YouTube downloader extensions
- YouTube downloader apps
Online YouTube downloaders are convenient to use as no installation is required and they support multiple media file formats but they might share you with some risks when you use them.
Then as to YouTube downloader extensions, they are also very convenient to use, because once they are installed, you will see a download icon under the video playback window and you can download the video or soundtrack of the video via the icon. However, they support fewer file formats and seem to respond slowly.
Compared with the above two types of YouTube downloaders, most YouTube downloader apps are safer and more powerful, and MiniTool Video Converter is a quite reliable one among them and is worth a try.
First, MiniTool Video Converter is a free, safe, and ad-free YouTube downloader for Windows 10. Next, it supports four file formats, namely MP4, WebM, MP3, and WAV, so you can not only extract the music from YouTube videos but also download these videos in high quality. Then, it can automatically download subtitles if the YouTube video has. Lastly, it can download YouTube music and videos in bulk.
Therefore, you can give MiniTool Video Converter a try to perform the first step of how to burn a CD from YouTube to Windows Media Player.
Use MiniTool Video Converter
Several steps are required to download a YouTube song with MiniTool Video Converter, and here are the steps:
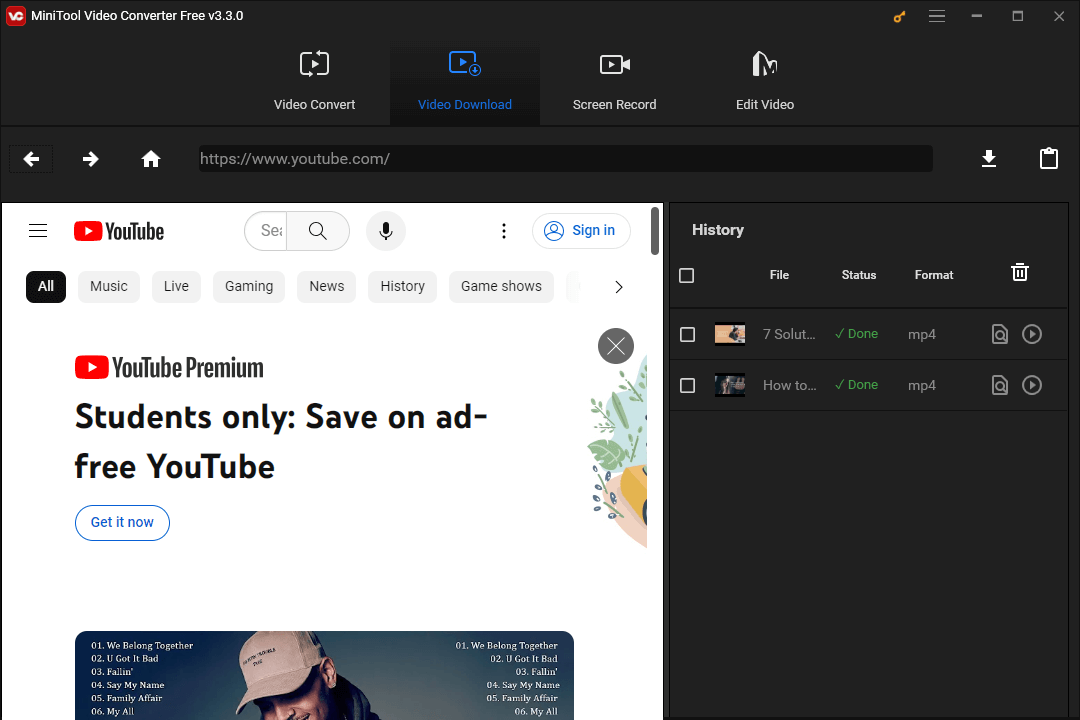
Step 1: Launch the YouTube downloader app to access its interface.
MiniTool Video ConverterClick to Download100%Clean & Safe
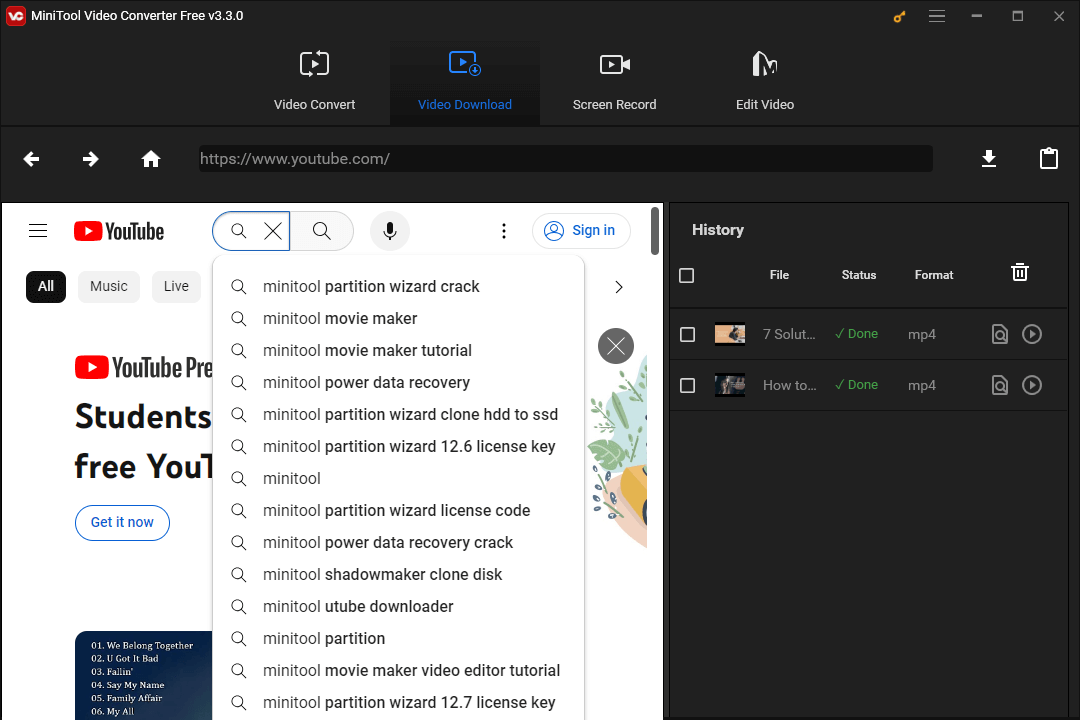
Step 2: Under the Video Download tab, search the app for the music you want to download.
YouTube is included in the app and displayed on the left of the app interface, so you can directly find the music you want to download through the app by typing the keywords into the search bar and hit the Enter key.
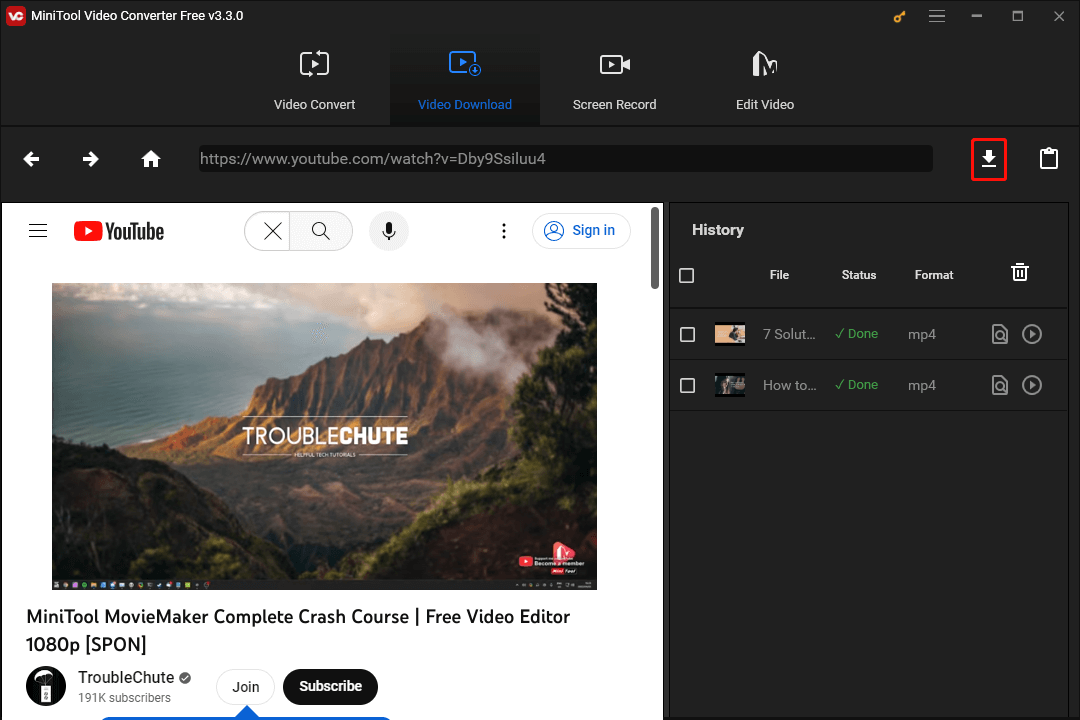
Step 3: Play the video and then click the download icon next to the link bar at the top of the interface.
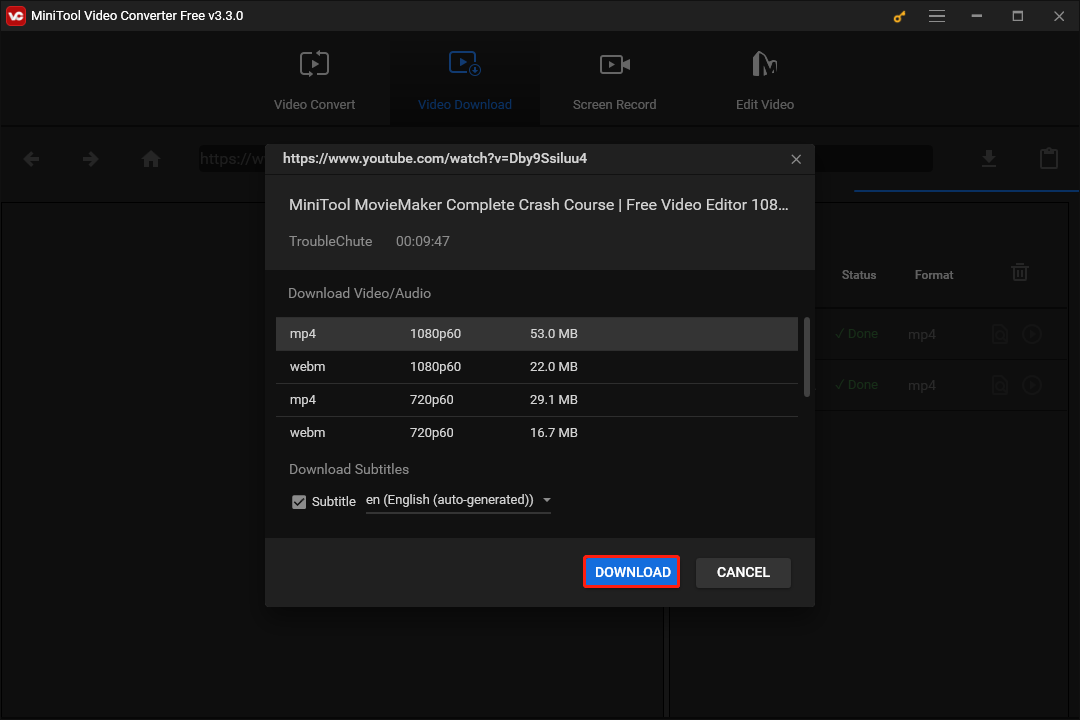
Step 4: On the pop-up window, choose a media file format and click the DOWNLOAD button.
Generally, four media file formats are provided and they are MP4, WebM, MP3, and WAV. To burn YouTube music to a CD, please choose MP3 or WAV because both are in the list of file types supported by Windows Media Player.
After the four steps, the song will be downloaded immediately, and the process can be finished in a few seconds. If you just download a few songs from YouTube, you can repeat the above steps. But if you want to download lots of contents from YouTube at once, please perform the following steps:
- Create a public YouTube playlist and add all the music you want to download to the playlist.
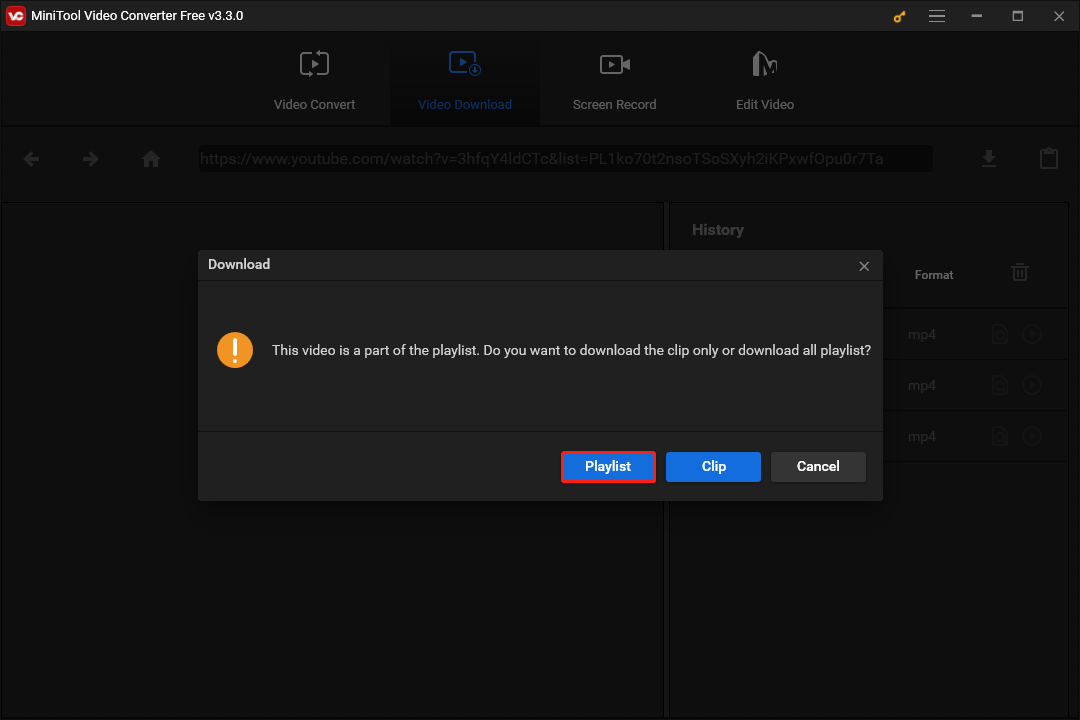
- Copy and paste the playlist link into the link bar of the app and click the download icon (Alternatively, you can click the Sing in button to log in to your YouTube account, and open the created playlist).
- Click the Playlist button on the Download window.
- Choose the media file format you prefer.
- Click the DOWNLOAD button.
For more details about downloading a YouTube playlist with MiniTool Video Converter, please refer to Popular YouTube 70s and 80s Music [Music Sharing and Downloading].
When you download all the contents you want from YouTube, you can perform the second step of how to burn a CD from YouTube to Windows Media Player.
Step Two: Burn YouTube Music to a CD
To burn the downloads from YouTube to a CD in Windows 10, you can utilize Windows Media Player. It was developed by Microsoft for playing audio and videos, and viewing images on a computer that runs a Windows operating system like Windows 10.
However, if Windows Media Player does not work as expected, you can try burning a CD from YouTube via File Explorer or iTunes. Now perform the following operations to burn YouTube music to a CD.
Use Windows Media Player
Step 1: Insert a blank CD for storing music from YouTube in your Windows computer.
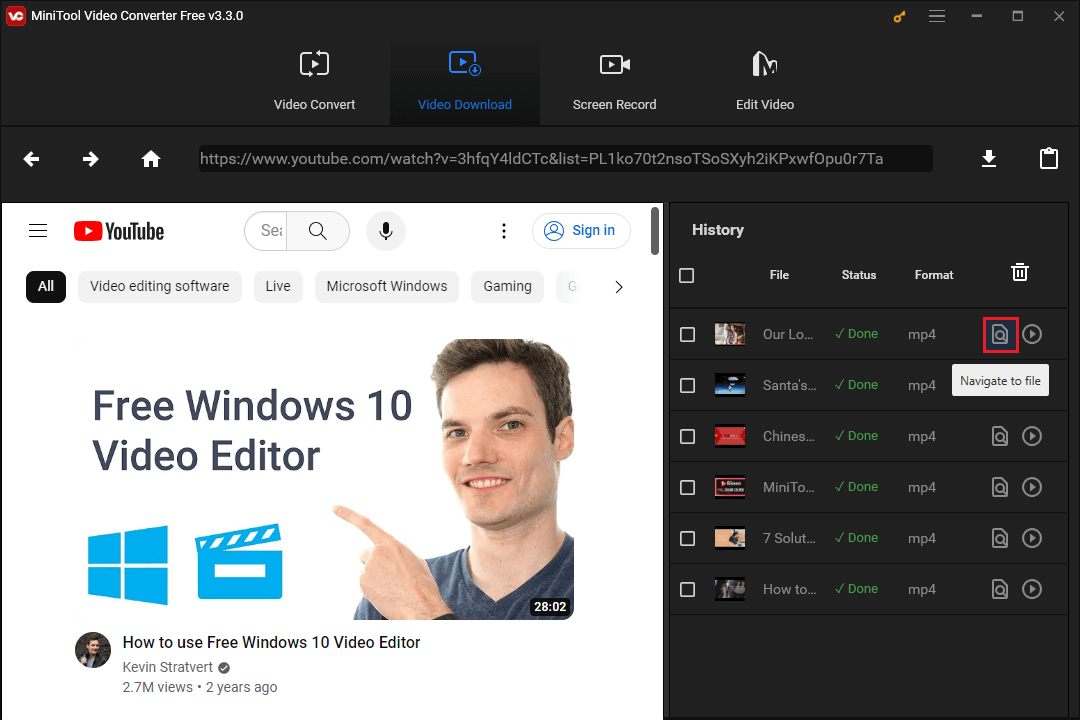
Step 2: (Optional) Switch back to MiniTool Video Converter and click the Navigate to file icon to find the location of the YouTube downloads on your computer.
Step 3: Type Windows Media Player into the Windows search bar and then hit the Enter key.
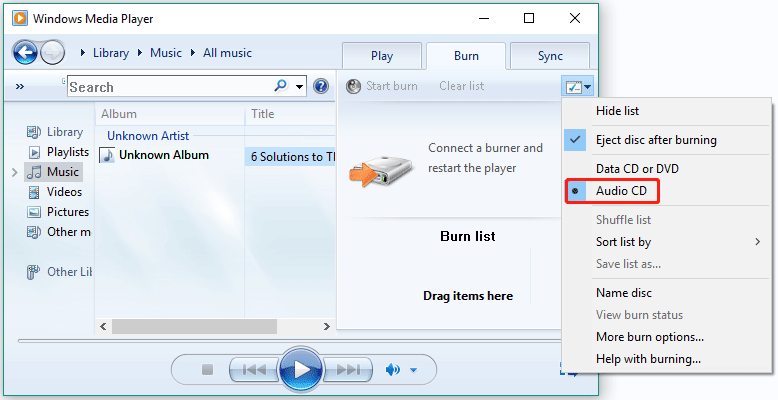
Step 4: Now switch to the Burn tab. Then, click the Burn options icon at the upper right corner and choose the Audio CD option.
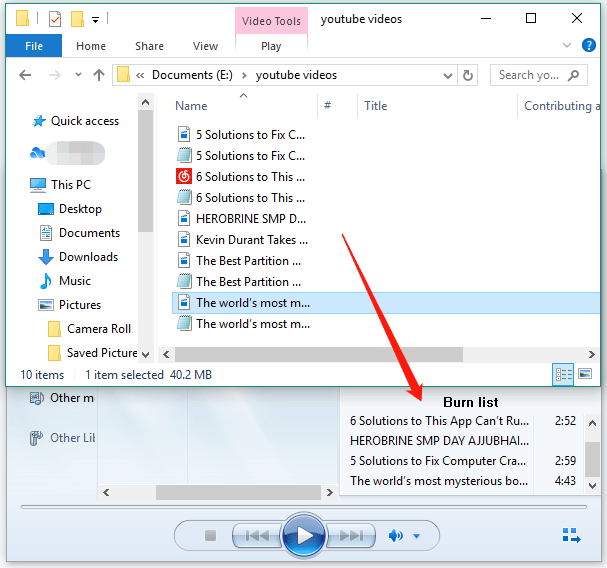
Step 5: Drag the YouTube music files from their location into the area under Burn list and then click the Start burn option next to the Clear list option.
As you see, the whole burning task is easy to be completed with the help of Windows Media Player. In fact, apart from using the Windows tool, you can also easily manage to do it with File Explorer or iTunes. So, continue to see how to use these two tools.
Use File Explorer
Here is how to burn music to a CD from YouTube via File Explorer.
- Insert the CD into the disc burner drive of your Windows computer.
- You will see an Autoplay window, on which you should choose the Burn files to disc and then set your preferences.
- Open the folder that includes the downloaded YouTube music.
- Right-click the filename, choose the Send To option, and choose your CD.
- Click the icon named My Computer or This PC on your desktop and click the CD.
- You will see the copied file of the YouTube music appear in the burner disc drive window. At this time, select the Burn to disc option and follow the on-screen instructions to set your preferences.
Your computer will start to burn YouTube music to the CD. When the burning status bat disappears, the music has been written to the disc.
Use iTunes
Besides, you can take advantage of iTunes to complete this burning task. Here is how to do that:
- Insert the blank CD into your PC.
- Get iTunes from Windows Store and launch it to access its interface.
- Click the File tab and in the upper-left corner, select the New option, and select the Playlist option.
- Give the playlist name and then click the Enter key.
- Open the created playlist and drag the YouTube music to the playlist.
- Click the File tab again and then choose the Burn Playlist to Disc option.
- Tick the Audio CD box which is in the middle of the window.
- Tick the checkbox for Use Sound Check which is under Audio CD. This is to ensure that your music stays in the same range when playing.
- Click the Burn button to let iTunes start burning the CD from YouTube.
That’s how to download music from YouTube to CD via iTunes.
Final Thoughts on Burning YouTube Music to a CD
How to burn a CD from YouTube to Windows Media Player? You just need to download the content from YouTube with MiniTool Video Converter and then burn the content to the CD with Windows Media Player. If you still have some doubts about the two steps, you can leave a comment below.
You can also send an email to [email protected] for the questions of MiniTool software, and we will reply to you as soon as possible.
Lastly, we would like to emphasize again that the downloads from YouTube cannot be used for commercial use.


