I have a great passion for creating videos and uploading them to YouTube. Recently, to ensure long-term data security, I plan to transfer YouTube to Backblaze. However, I found that I had deleted all the local files.
To achieve the data backup, I looked for a guide by reading various relevant articles on the Internet. Finally, I found the solution. In the following section, I will share it with those who need it.
Can You Transfer YouTube to Backblaze
Can users back up their YouTube videos to Backblaze? That’s for sure. If there are local YouTube video files on the PC, just directly upload the YouTube files to Backblaze. On condition that there aren’t any local files, it is necessary to get videos from YouTube first. Then, upload those videos to Backblaze.
Preparation for Backblaze Transfer
To ensure a smooth YouTube to Backblaze transfer, I’ve made some preparations.
Preparation 1. Check the Internet Connection
A stable Internet connection is indispensable for any computer activities. As such, before the transfer process, it is suggested to check whether there are any network issues or not.
To finish the checking, the online tool Speedtest by Ookla can help. It aims to help users test the Internet speed without downloading any plug-ins or software. Just go to https://www.speedtest.net to check the internet speed with simple clicks.
Preparation 2. Select a Top-Great YouTube Downloader
Since I have deleted the YouTube videos from my local drive, I have to download my videos from YouTube. In this situation, a fabulous YouTube downloader means a lot. Below is some advice on how to find a great YouTube downloader.
Firstly, check whether the program embeds a watermark into the output videos. Sometimes, the watermarks will make the videos look less professional. To remove those watermarks, although video cropping is effective, it wastes a lot of time, which makes the file backup less efficient.
Meanwhile, sometimes payment for the upgrade brings a watermark-free video, but it is not acceptable for those who are on a tight budget. In addition, to transfer YouTube videos to Backblaze more efficiently, it is advisable to choose an application support batch download. This way, getting multiple YouTube videos requires less time.

Part 1. Get Videos from YouTube
Based on the advice above, I have selected one of the best YouTube downloaders: MiniTool Video Converter.
About MiniTool Video Converter
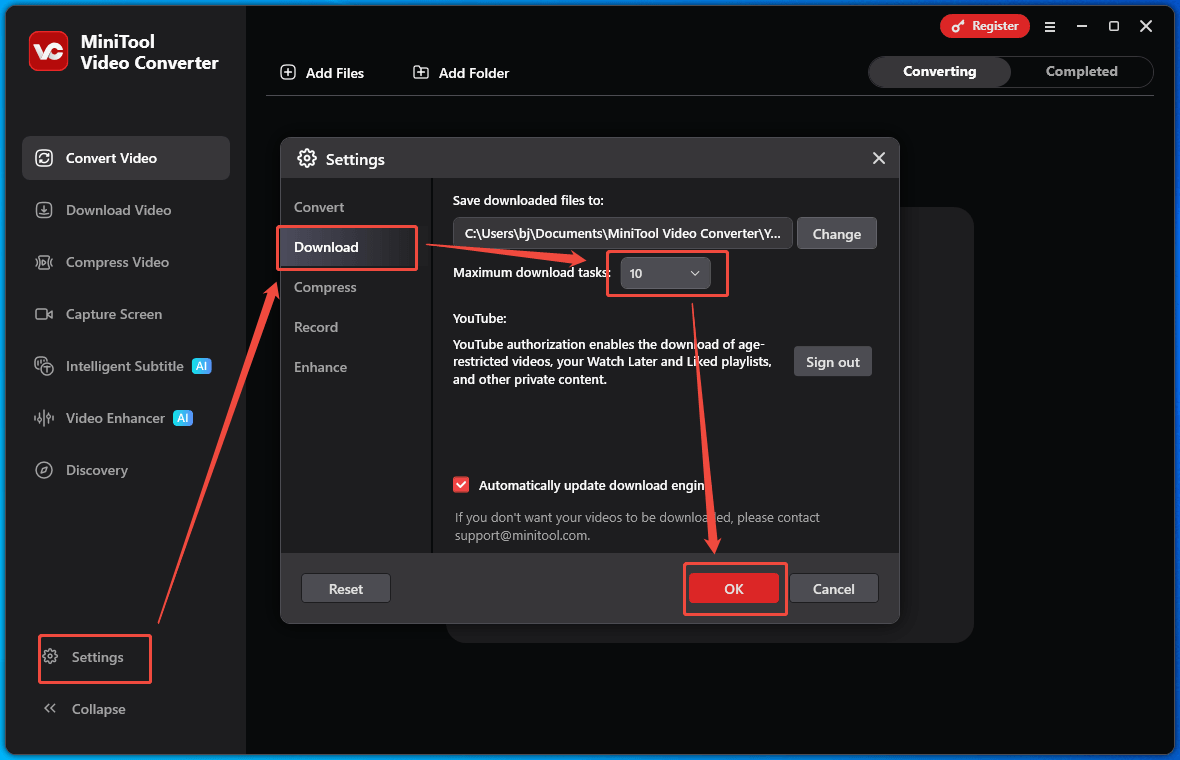
MiniTool Video Converter is an easy-to-use 4K YouTube downloader that allows me to get up to 10 videos at the same time. There are multiple video/audio output formats that I can choose, including MP4, WEBM, MP3, and WAV.
With support for other social platforms, MiniTool Video Converter also empowers me to save TikTok, Facebook, Twitter, and Instagram videos without any watermarks. More than a video downloader, MiniTool Video Converter also helps me in video conversion, video compression, video transcription, and screen recording.
How to Get a YouTube Video with MiniTool Video Converter
Below is a step-by-step guide on how to save YouTube videos with MiniTool Video Converter.
Step 1. Download and Install MiniTool Video Converter
MiniTool Video ConverterClick to Download100%Clean & Safe
Download MiniTool Video Converter by clicking on the download button above. Then, follow the on-screen prompts to install this program on the PC.
Step 2. Copy the YouTube URL
Open the YouTube website and find the video to transfer to Backblaze. Then, copy the video link from the address bar.
Step 3. Analyze the YouTube Link
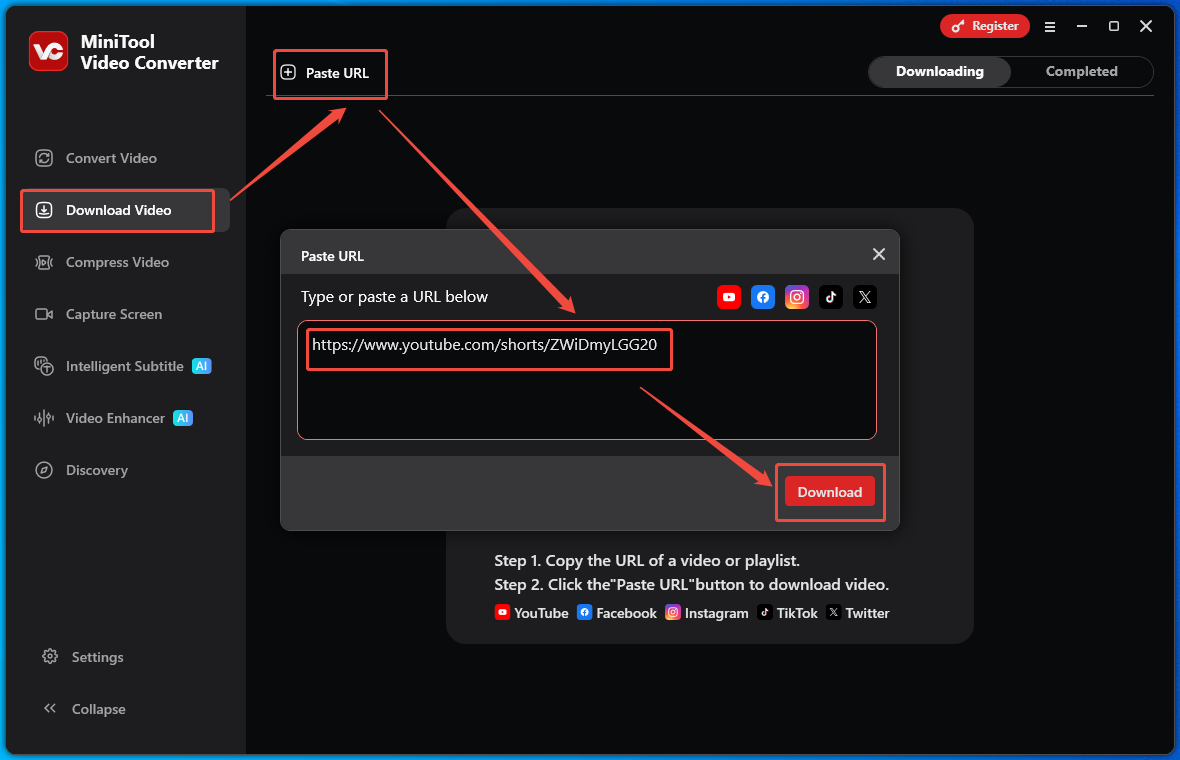
Navigate to the interface of MiniTool Video Converter. There, switch to the Download Video section. There, click on the upper-left Paste URL option to open the URL box. Then, paste the video link into the box. Next, click on the bottom-right Download option to begin the link analysis process.
Step 4. Set an Output Format and Begin Download
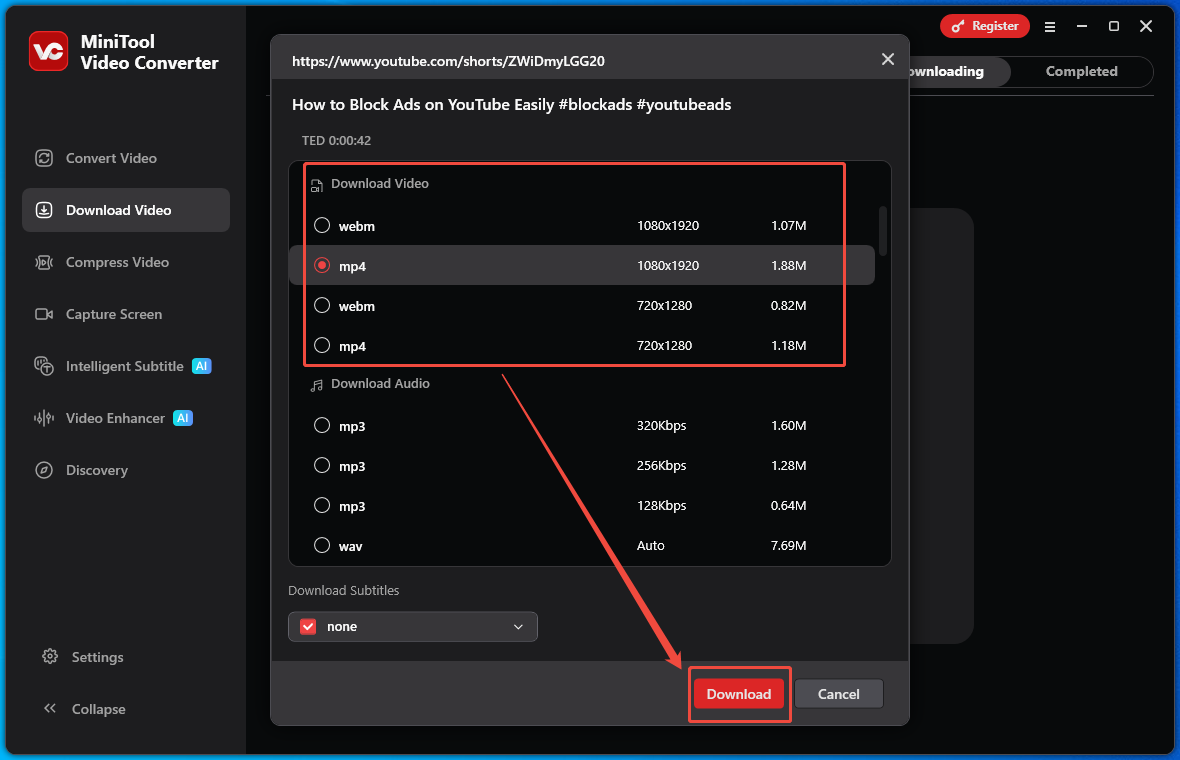
Once the link analysis ends, an output format window will appear. Then, choose a desired video format and click on the bottom-right Download option to start the download process.
Step 5. Check the Output Video
When the download process completes, MiniTool Video Converter will automatically switch to the Completed section. There, click on the Play icon to view the output video. To locate it, click on the Folder icon.
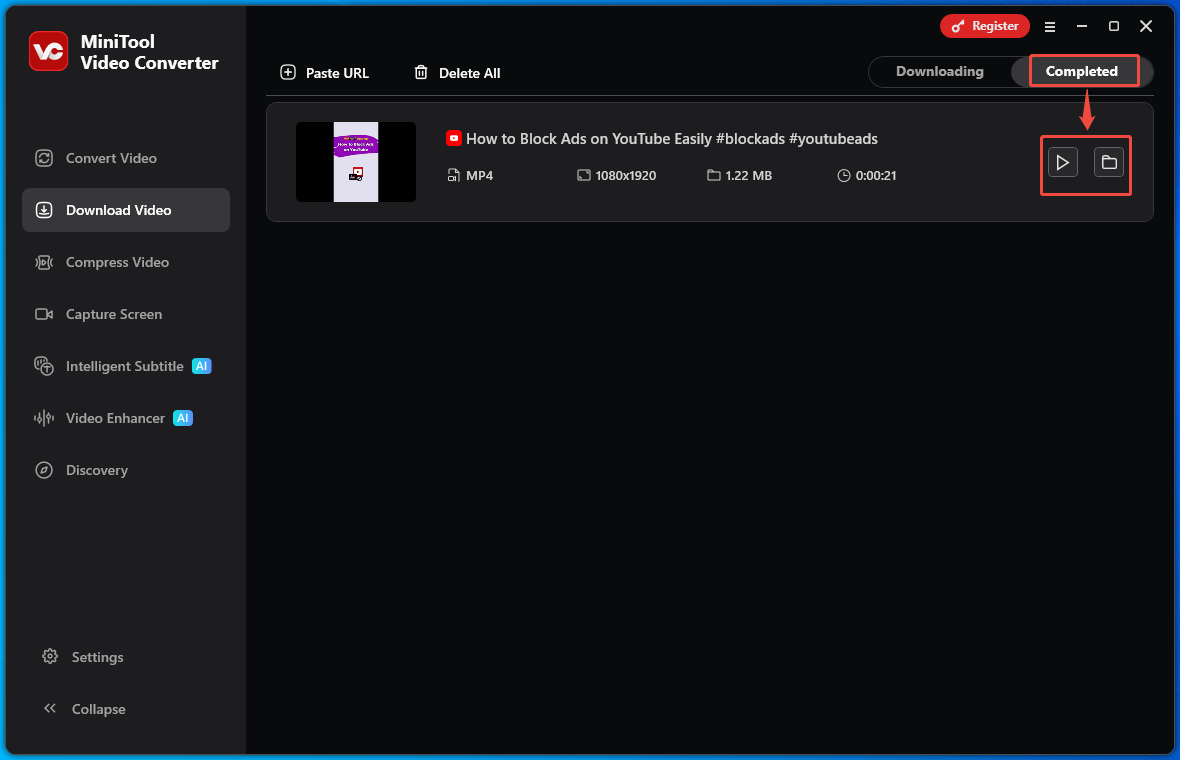
With MiniTool Video Converter, it is easy to get a YouTube video for Backblaze backup.
Part 2. Upload the YouTube Videos to Backblaze
After getting videos from YouTube, just upload the YouTube videos to Backblaze. Below is a step-by-step tutorial on how to do that.
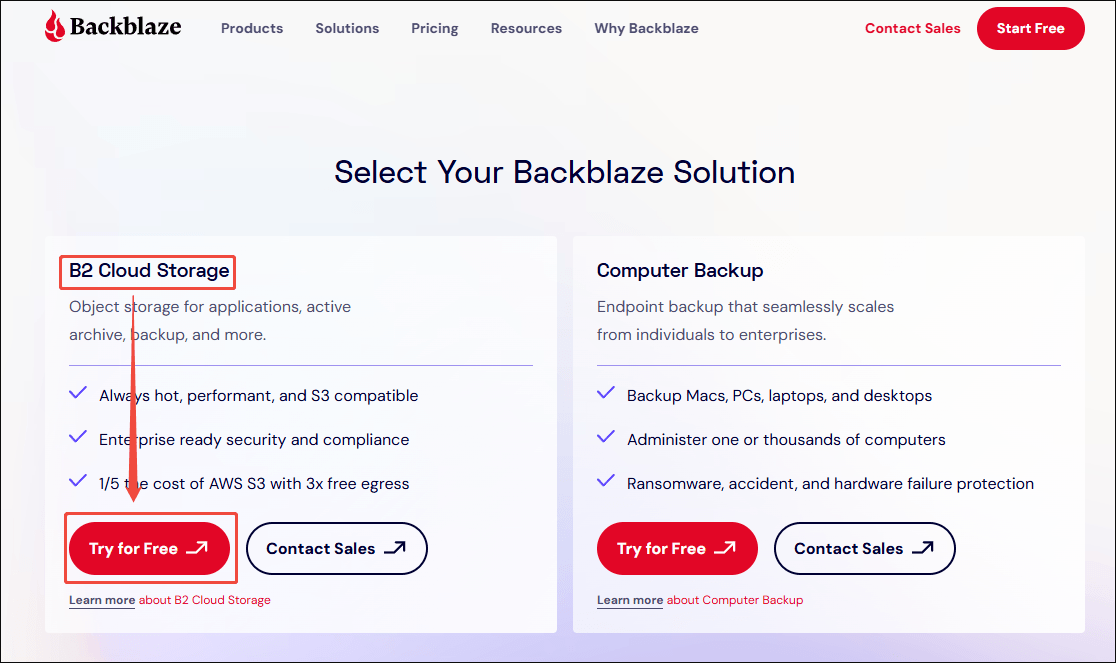
Step 1. Select Backblaze B2 (Cloud Storage)
Go to https://www.backblaze.com/get-started and click on Try for free under the B2 Cloud Storage option.
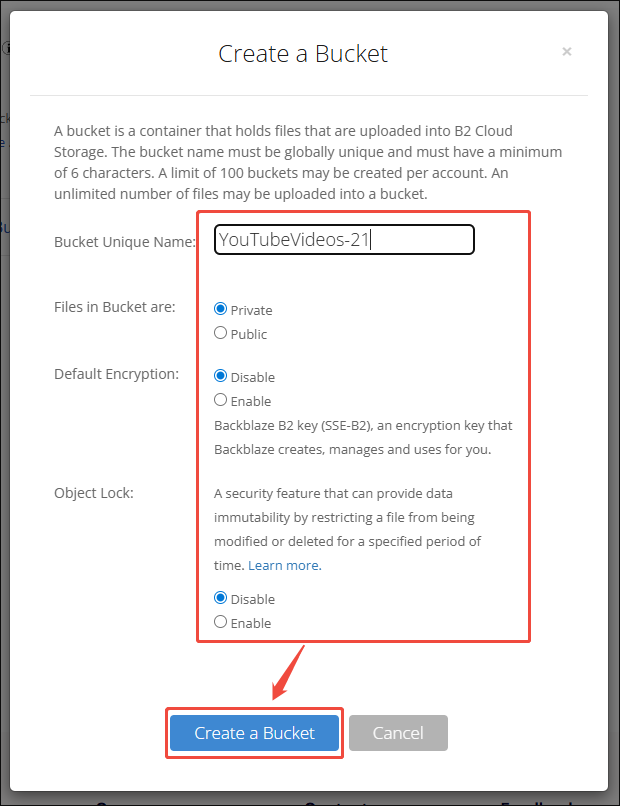
Step 2. Create a Bucket
Follow the on-screen prompts to create an account and log in to it. Under the Bucket section, click on the Create a Bucket option.

Configure the bucket settings and click on the Create a Bucket option. If there is a bucket already, just skip this step.
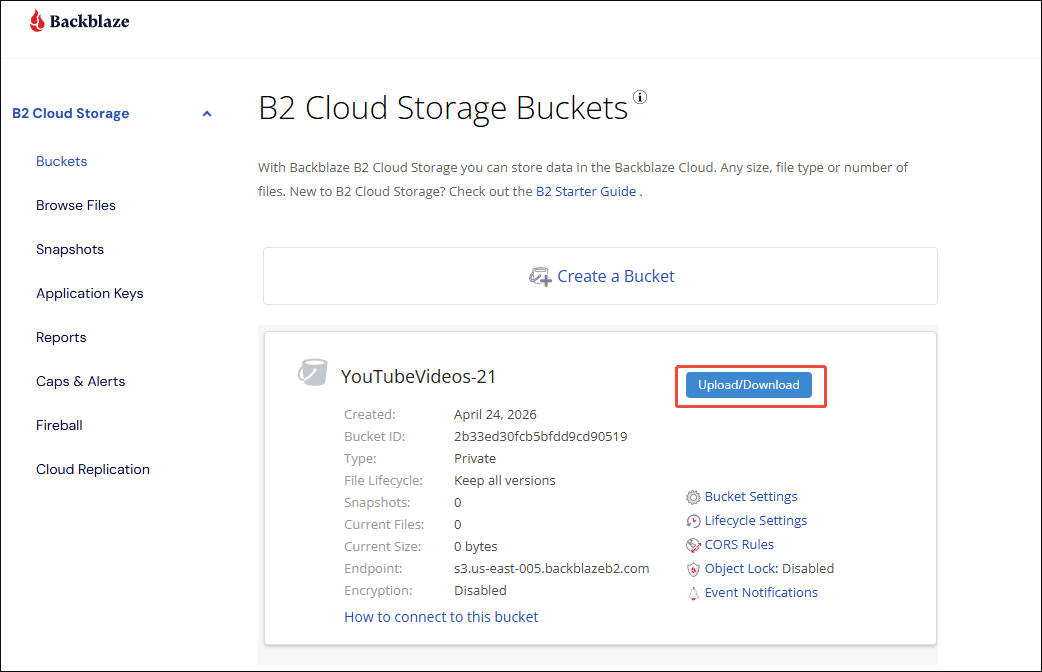
Step 3. Upload the YouTube Videos to the Bucket
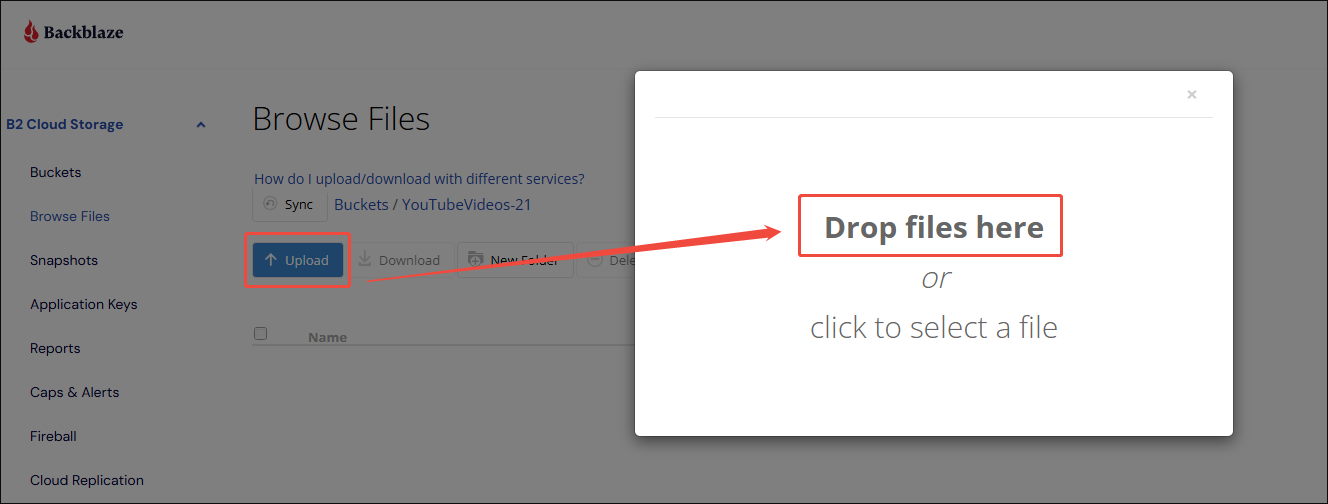
Click on the Upload/Download option to enter the next page.
Click on the Upload option and then the Drop files here option to select and upload the YouTube video.
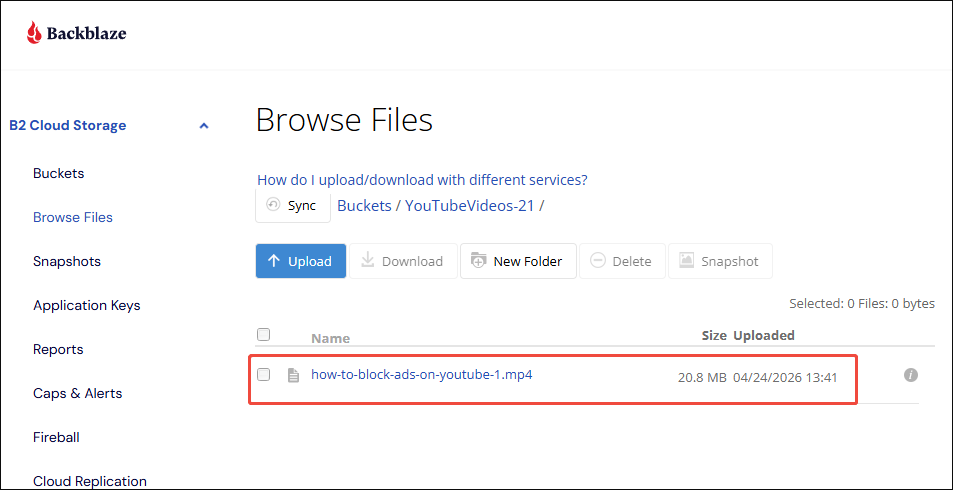
Once the YouTube video is uploaded, it will appear in the file list.
With the above-detailed steps, it is never difficult to transfer YouTube to Backblaze.
To Wrap Things Up
To finish the YouTube to Backblaze transfer, there are 2 different contexts. Firstly, if there are no local YouTube files, save YouTube videos with MiniTool Video Converter. Then, upload these YouTube videos to BackBlaze. On condition that there are local YouTube videos on the PC, just directly transfer them to Backblaze
If there are any issues when using MiniTool Video Converter, just send an email to support@minitool.com to ask for help.