People may choose to integrate their preferred YouTube music into CapCut for a variety of reasons. For example, CapCut provides a collection of editing tools that allows creators to add personalized soundtracks and customize videos. Another explanation could be that CapCut’s easy-to-use interface enables users to effortlessly import music from YouTube to make more captivating videos. In this MiniTool Video Converter article, we will focus on how to add music from YouTube to CapCut using several helpful tools.
Music has the ability to transform ordinary videos into engaging cinematic experiences. Whether you are creating tutorials, vlogs, or short films, finding the right soundtrack can advance your CapCut projects.
YouTube is a goldmine of potential audio improvements due to its massive library of music. But seamlessly adding YouTube music to your CapCut projects may seem like a daunting task.
Within this guide, we’d like to show you how to add music from YouTube to CapCut by using three decent and user-friendly tools, including MiniTool Video Converter, TunesKit Audio Capture, and NoteBurner YouTube Music Converter, as well as how to add YouTube music to an excellent video editor like CapCut.
Part 1. How to Add Music to CapCut from YouTube? (Tools Required)
If you have a YouTube Premium subscription, you might believe that downloading music is simple. Premium subscriptions provide a variety of benefits, but they don’t grant you unlimited access to YouTube music for use in unauthorized applications such as CapCut.
The majority of music on YouTube is protected by DRM (digital rights management), despite a Premium subscription. The protection is intended to prevent direct use of the music, like adding music to your CapCut projects from YouTube.
There is, however, a bigger challenge: CapCut, like many video editing programs, cannot handle encrypted video or audio files and has limitations regarding file formats. Hence, it’s necessary to convert YouTube music into CapCut-supported file formats, as shown below:
| Format type | Supported formats |
| Video | MP4, WMV, WMV HD, VOB, MOV, ASF, VRO, MOD |
| Audio | MP3, WAV, WMA |
| Image | GIF, BMP, JPEG, TIFF |
Now, you can opt for the following tools to convert YouTube music to the audio formats that CapCut supports. Then, you’re able to add the converted YouTube music to CapCut on your computer or phone.
#1. MiniTool Video Converter
MiniTool Video Converter is a multipurpose video and audio download tool that lets you convert videos and music from YouTube or YouTube Music into CapCut-compatible video and audio formats. Apart from converting video to audio (and vice versa), it can also capture all or part of your PC screen in various formats with high quality.
Main Features of MiniTool Video Converter:
- Download videos and music from YouTube or YouTube Music to MP4, WebM, MP3 and WAV.
- Support for downloading of playlists, subtitles, and music videos, too.
- Convert video and audio files in batches in a matter of minutes.
- Capture the activities happening on your PC screen without watermarks.
Here’s how to add music from YouTube to CapCut with MiniTool Video Converter.
Step 1. Download and Install MiniTool Video Converter
Click on the download button below to get this audio video downloader. Then, launch it on your computer and go to the Video Download tab.
MiniTool Video ConverterClick to Download100%Clean & Safe
Step 2. Configure Output Path and Download Number
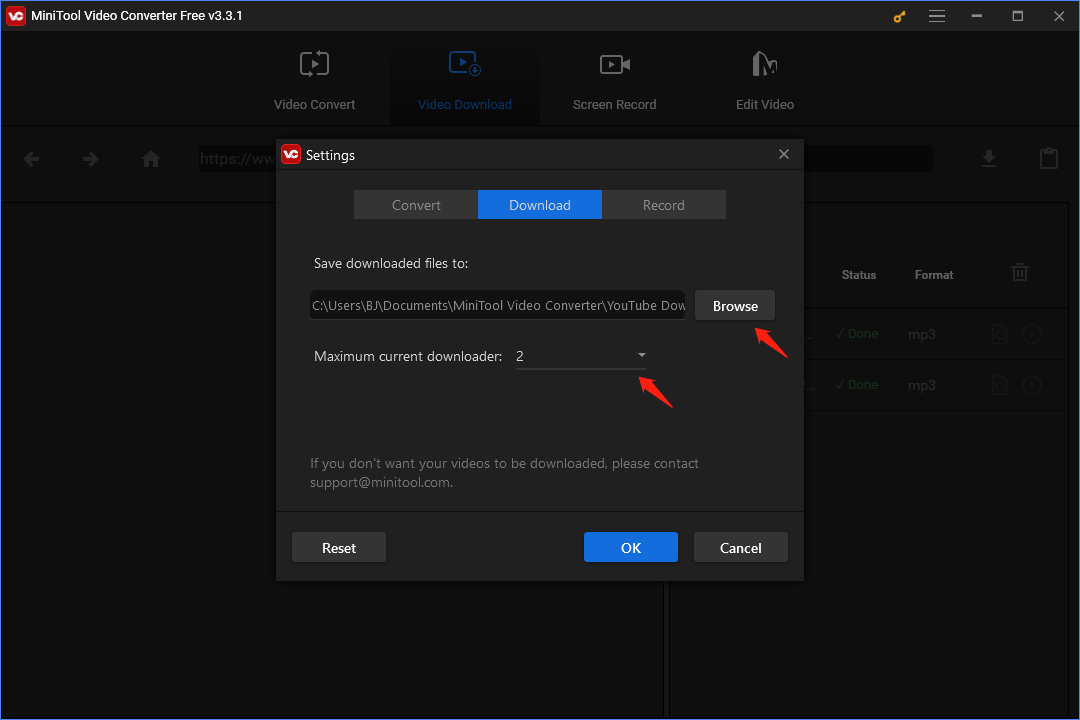
Click the Menu icon in the top right-hand corner and select the Settings option. From the new window, click on the Download tab.
Click the Browse button to choose the output path and expand the Maximum current downloader drop-down list to select the desired number of downloads. Click OK to confirm your changes.
Step 3. Download YouTube Music as MP3 or WAV Files
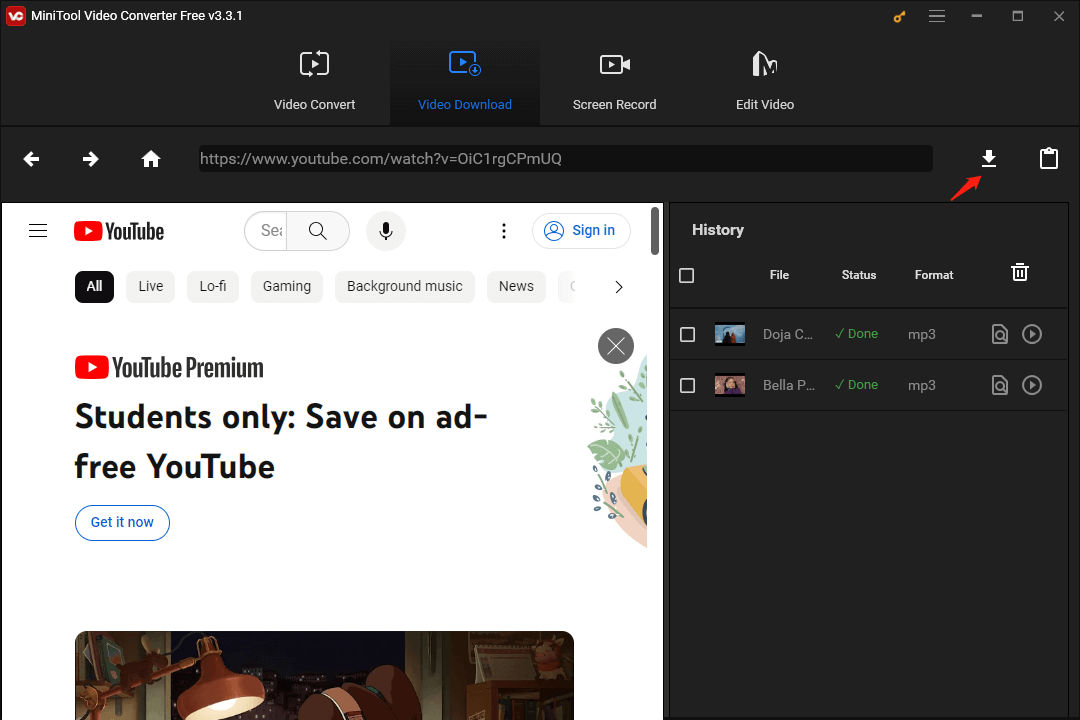
Go to the YouTube website, find the music you want to download, and copy its URL. Next, paste the URL of the music into the top search box within MiniTool Video Converter. Click on the Download button to continue.
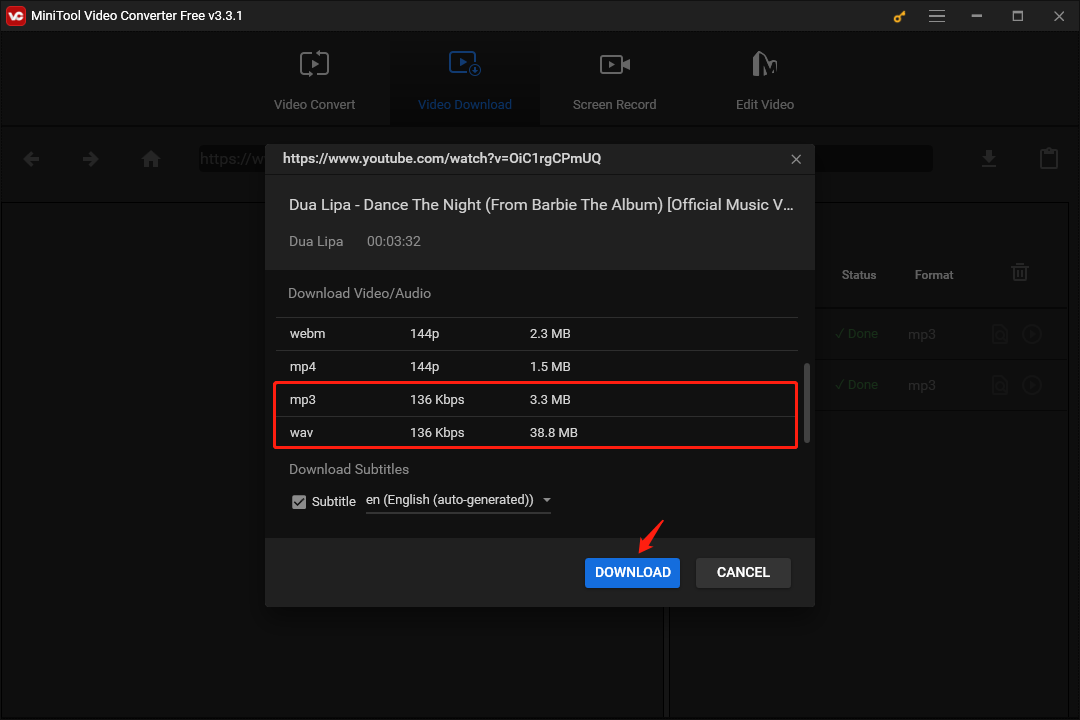
In the pop-up window, select MP3 or WAV as the output audio format and click on the DOWNLOAD button to start downloading the music.
Step 4. Locate the Downloaded YouTube Music
In the History area, click the Navigate to file icon to confirm the location of the downloaded music on your local drive. Or click the Play icon to listen to the music offline.

Step 5. Add YouTube Music to CapCut on Computer
Run the CapCut app on your computer and create a new video project. Click Media > Import in the top left-hand corner to locate the downloaded MP3 or WAV files from YouTube, then hit Open to add them to the app.
Drag and drop the imported YouTube music to the timeline and set it as the background music in your video project.
#2. TunesKit Audio Capture
TunesKit Audio Capture allows you to convert music from YouTube or YouTube Music into CapCut-compatible audio formats. The YouTube audio converter helps you record audio playback directly from your PC’s soundcard and this way guarantees high-quality recordings from YouTube. Plus, this ensures that your preferred YouTube music is seamlessly integrated with your CapCut projects while preserving the highest quality and fidelity.
Main Features of TunesKit Audio Capture:
- Convert music from YouTube to MP3, WAV, AAC, FLAC, etc.
- Record albums, songs, podcasts, playlists from YouTube Music.
- Support splitting, cutting, merging, and editing YouTube Music tracks.
- Automatically delete ID3 tags and enable manual editing of ID3 tags.
Here’s how to add music from YouTube to CapCut with TunesKit Audio Capture.
Step 1. Set Up TunesKit Audio Capture
After downloading and installing this audio capture on your computer, launch it and you will see a list of apps displayed on its interface. Check to see if your favorite web browser is listed among the apps. If not, you can drag and drop your web browser icon into the interface to add it easily.
Step 2. Customize Output Formats and Parameters
Click the Format icon at the bottom right corner of the interface. In the new window, expand the Format drop-down list and adjust the output audio format, such as MP3 or WAV.
To further configure the output audio parameters, you can optionally change the codec, channel, sample rate, bit rate, etc. Click OK to confirm your adjustments.

Step 3. Download and Convert Your YouTube Music
Open the web browser within TunesKit Audio Capture and head to the YouTube website. Start playing the YouTube music you want to convert. The tool will seamlessly download the YouTube music as it plays. The download will take a while to finish. If required, you can click the Stop button to stop the capturing process.
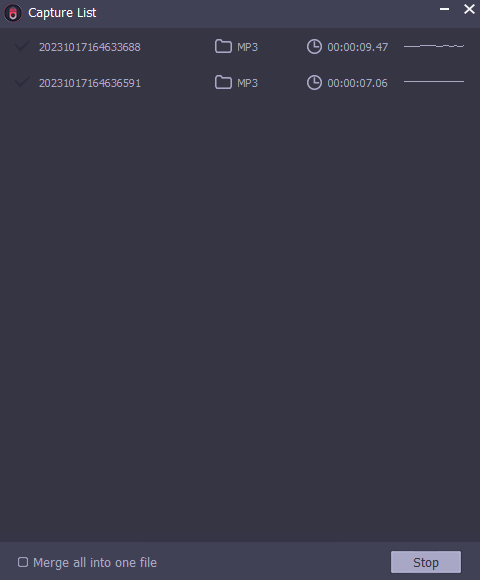
Step 4. Edit Captured YouTube Music
The captured YouTube music will be listed in the Capture area. To improve your recorded music, click the Edit button behind each piece of music. From there, you can trim, merge, and edit the downloaded YouTube music’s ID3 tags as you like.
Step 5. Save Captured YouTube Music
Once you have made the necessary edits, click the Save button to save all the edited YouTube music on your computer.
Step 6. Add YouTube Music to CapCut on Phone
Transfer the downloaded YouTube music to an Android or iPhone device using a USB cable.
On your phone, start the CapCut app, tap on New Project, pick the video or picture that you would like to add background music to, and then tap on Add to create a new video project.
Tap on Add audio in the Tracks section and select Sounds. Next, hit the file icon and choose From device. From there, you’ll see all the music stored on your phone, then pick the desired YouTube music and add it to your CapCut project.
#3. NoteBurner YouTube Music Converter
NoteBurner YouTube Music Converter is a robust streaming music download tool that enables users to specifically download and convert YouTube music to regular MP3, WAV, AAC, FLAC, ALAC, or AIFF audio format at 10X faster speed.
You can also add a variety of playlists from YouTube Music web player to this program easily, then download them in bulk to the local drive of your computer in just a few simple steps.
Furthermore, you would have access to a few free tools on it, including a CD burner, local music converter, and ID3 tag editor, which will make management and organization a breeze.
Main Features of NoteBurner YouTube Music Converter:
- Download music videos from YouTube in up to 4K quality.
- Preserve ID3 tags & 100% original audio quality.
- Simple to use through an intuitive user interface.
- Keep YouTube Music after a free trial or subscription.
Here’s how to add YouTube Music to CapCut with NoteBurner YouTube Music Converter.
Step 1. Sign In to YouTube Music Free or Premium Account
Download, install, and launch NoteBurner YouTube Music Converter on your computer. You'll then need to sign in to your YouTube Music Free/Premium account.
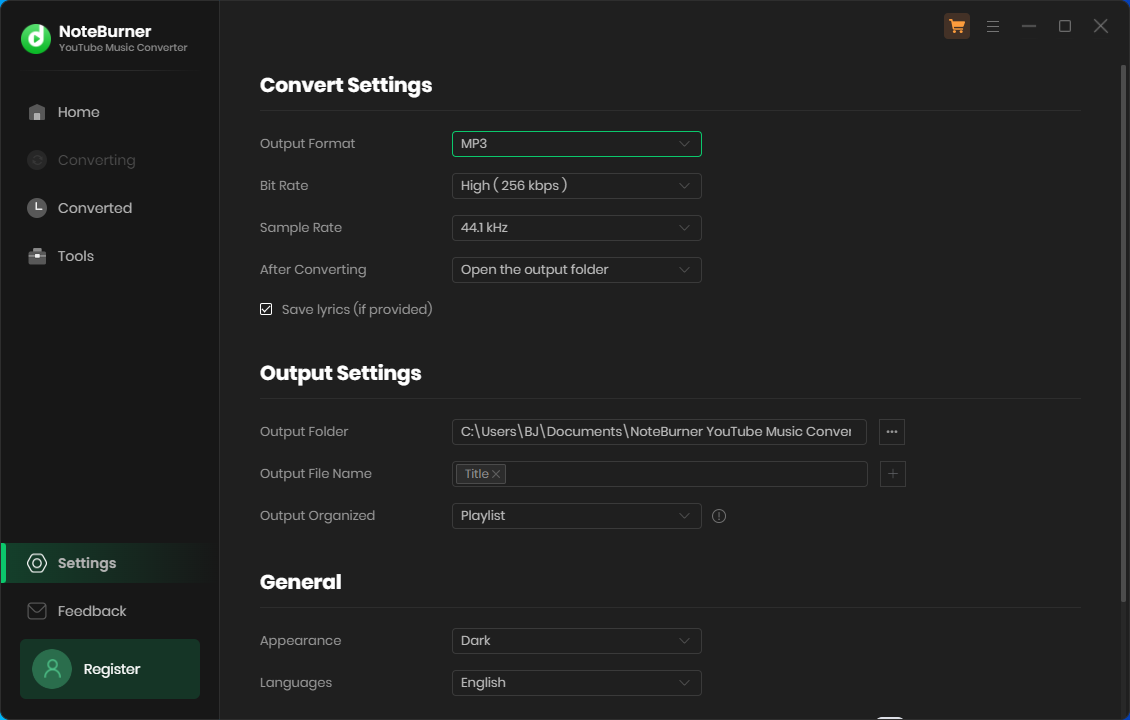
Step 2. Set YouTube Music Output Format
Click on Settings in the bottom left-hand corner, select MP3 or WAV as the output audio format, and even customize the bit rate, sample rate, output folder, output file name, and more.
Step 3. Add YouTube Music Tracks to NoteBurner
In the YouTube Music web player window, simply open the music you want to download, then click Add in the bottom right-hand corner. Or, click Add More to add multiple music tracks.
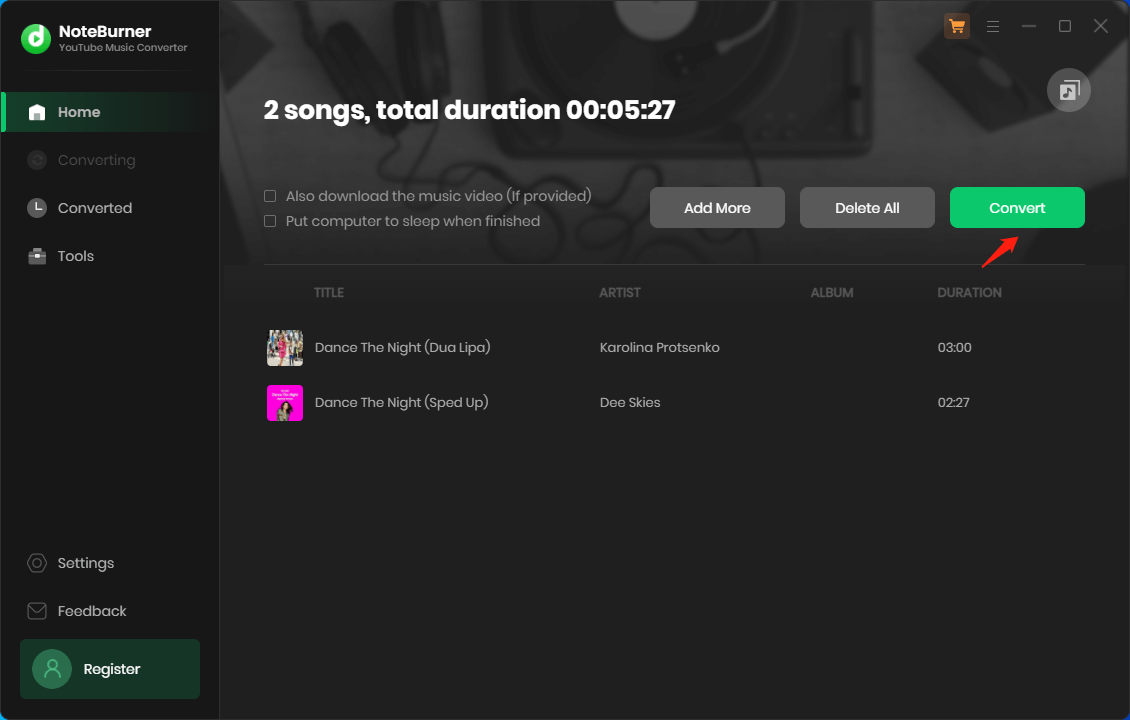
Step 4. Download YouTube Music to Your PC Offline
Once you have added music, just click on the Convert button to start downloading YouTube Music tracks to your computer offline. The process will be finished soon.
Step 5. Locate Offline YouTube Music Tracks
Go to the Converted module and locate the downloaded music tracks by clicking the file icon.
Step 6. Add YouTube Music MP3 or WAV Files to CapCut
As mentioned above, you will be able to add the YouTube Music MP3 or WAV files to CapCut on your computer or phone depending on your needs.
Part 2. How to Add YouTube Music to a Great Video Editor Like CapCut?
If you are thinking of using another video editing app to add music from YouTube to your video projects, MiniTool MovieMaker is an ideal choice, and it also features an extensive library of royalty-free music to use.
Moreover, it provides you with popular aspect ratios and allows you to perform various video editing tasks, for example, applying transitions, motions, filters, captions, and animated elements to video clips; changing the video playback speed; splitting, trimming, cropping, flipping or rotating, and reversing videos.
Here’s how to add music from YouTube to a video project with MiniTool MovieMaker.
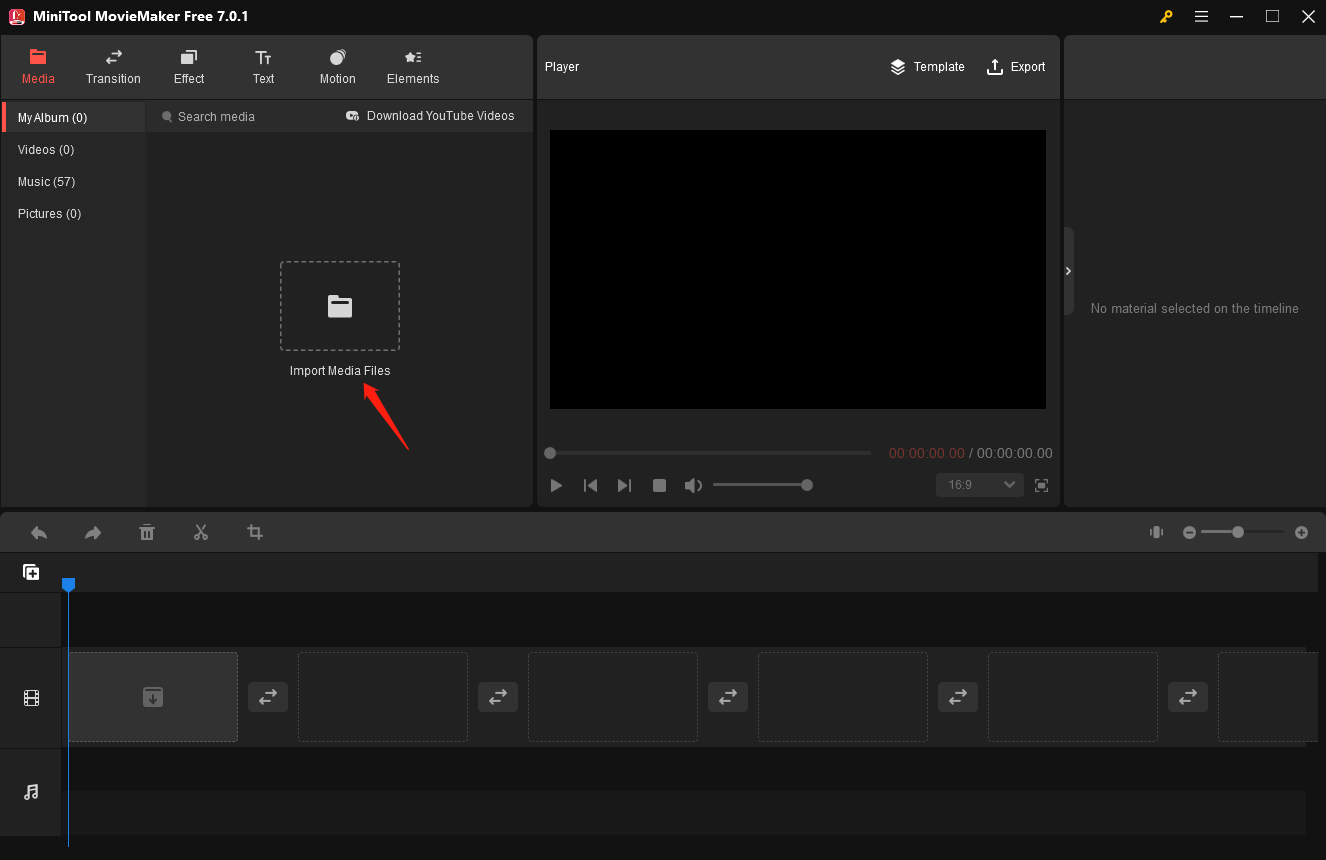
Step 1: Download and install MiniTool MovieMaker on your PC by clicking on the below download button. Launch this video editor and click New Project to create your video project.
MiniTool MovieMakerClick to Download100%Clean & Safe
Step 2: Click Import Media Files to import your videos, images, and YouTube music to the app.
Step 3: Drag and drop the imported media files onto the timeline below.
Step 4: Edit your video project at will, such as speeding up or slowing down the videos, fading in or out the added YouTube music, etc.
Step 5: Click Export in the top right corner to adjust the output settings, then save the video project to your PC.
Conclusion
Now that you have an understanding of how to add music from YouTube to CapCut, your imagination is free to run wild. Whether you're producing educational content, creating stunning visuals for social media, or telling engaging stories, the tools in this article will help you harness the power of music.
Please contact us at support@minitool.com if you have any questions while using MiniTool Video Converter or MiniTool MovieMaker.