

This article shows how to convert YouTube to WAV with the YouTube downloader. The general steps include inputting the YouTube URL, selecting the output format, and beginning the download process.
I always like finding my favorite background music on YouTube. To get a high-quality auditory experience, I desired a method to convert YouTube to WAV. After reading a lot of articles, I have grasped how to accomplish the audio extraction. Next, I will share the method with those who need it.
What Is WAV
WAV is an audio file format standard developed by Microsoft and IBM. The format uses containers to store audio data, track numbers, sample rate, and bit rate. A WAV file is an uncompressed lossless format that contain audio files, thus they are generally going to be much larger than other popular audio file types, like MP3. Therefore, they are mainly used in the professional music recording industry to retain the maximum audio quality.
How to Convert YouTube to WAV (Offline)
More than a watermark-free 4K YouTube downloader, MiniTool Video Converter enables you to convert YouTube to high-quality WAV audio with simple clicks. Meanwhile, it supports batch download, allowing for saving up to 10 files simultaneously. This converter also supports other platforms, including Facebook, Instagram, TikTok, and Twitter.
1. Get MiniTool Video Converter.
MiniTool Video ConverterClick to Download100%Clean & Safe
Download, install, and open this YouTube to WAV converter.
2. Analyze the YouTube URL.
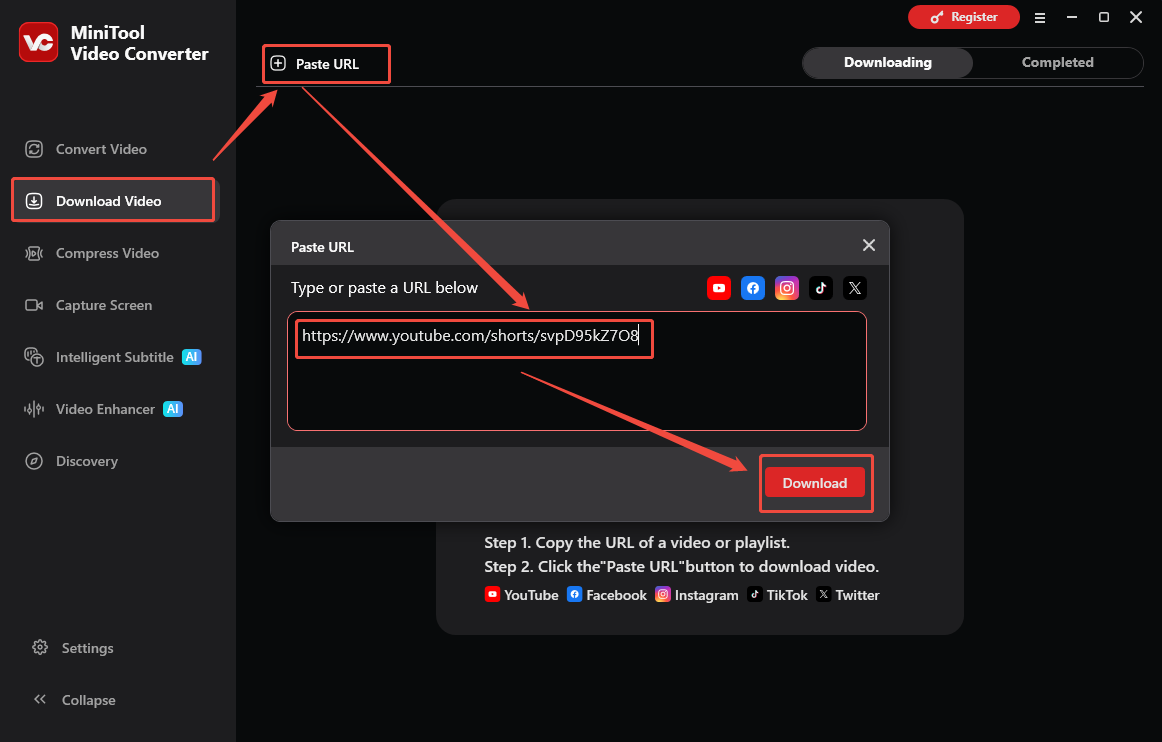
Visit the YouTube website and find the content you want to save. Then, copy the YouTube URL and move to the Download Video section of MiniTool Video Converter. After clicking on the upper-left Paste URL option, paste the YouTube link. Then, click on the Download option to analyze the YouTube URL.
3. Set the Output Format and Begin Download.
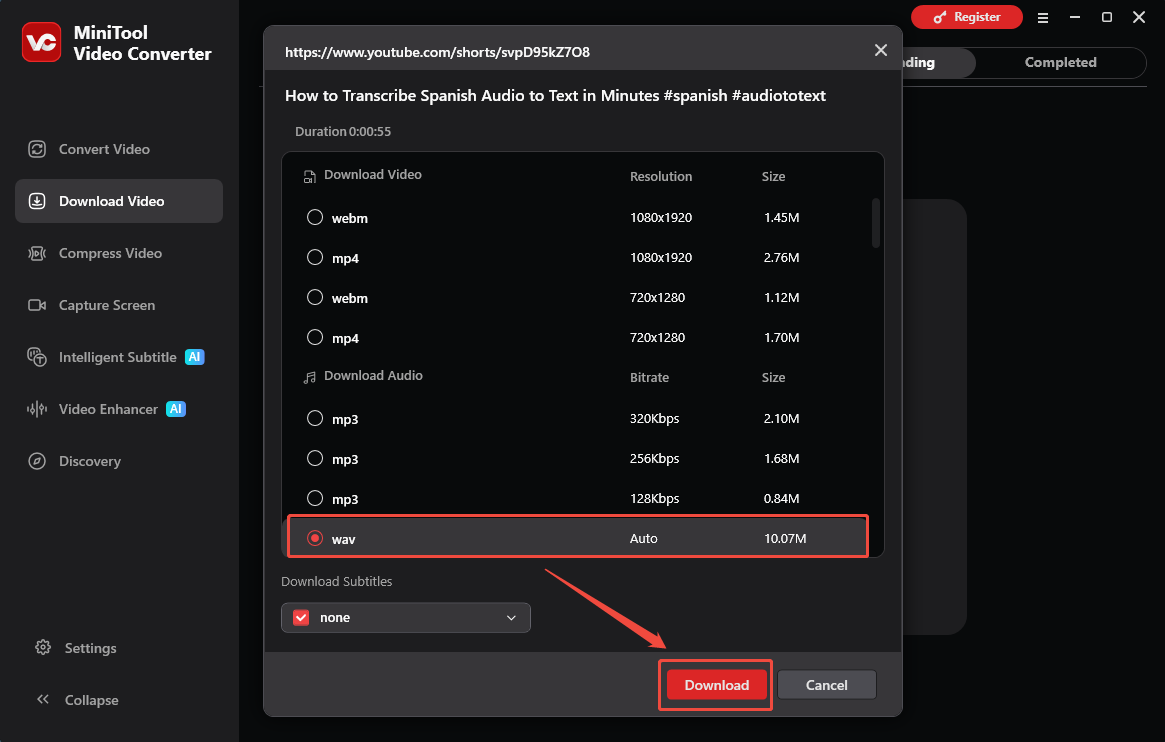
In the pop-up output format window, select WAV as the output format and click the Download option to start the download process.
4. Check the Output Audio.
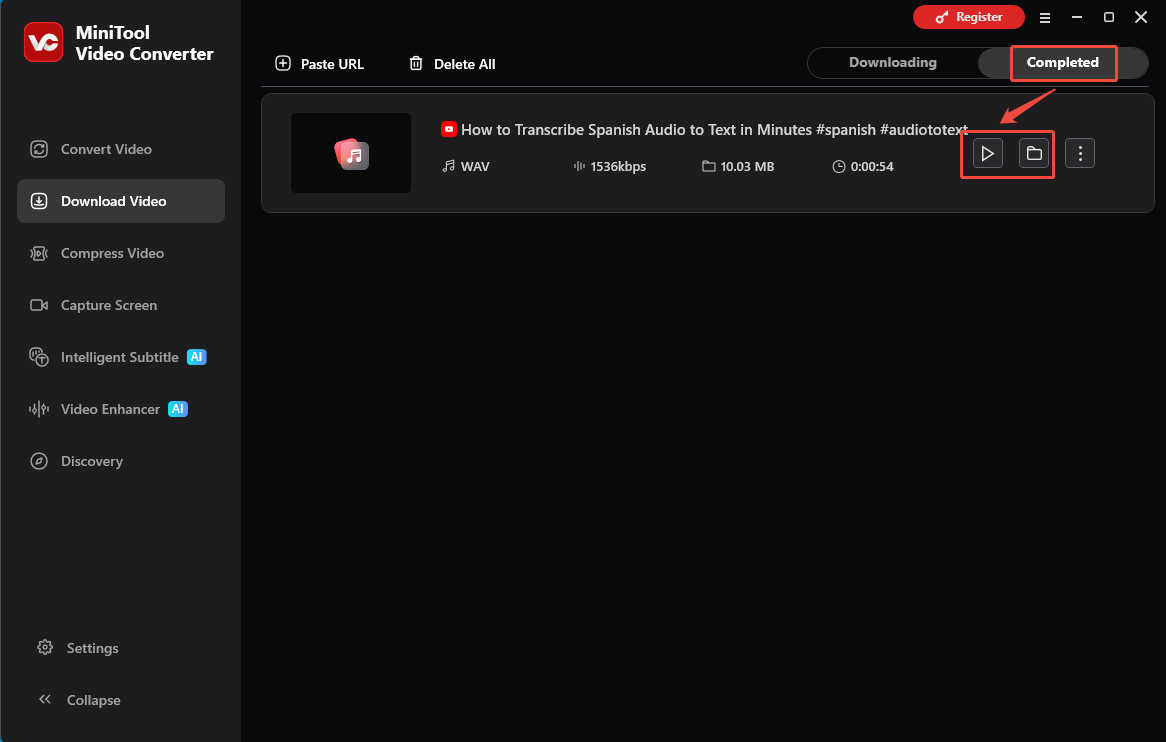
As long as the download process finishes, this tool will automatically switch to the Completed section. There, click on the Play icon to view the output file. To locate the output audio, click on the Folder icon.
Currently, you can extract WAV audio from YouTube effortlessly.
How to Convert YouTube to WAV (Online)
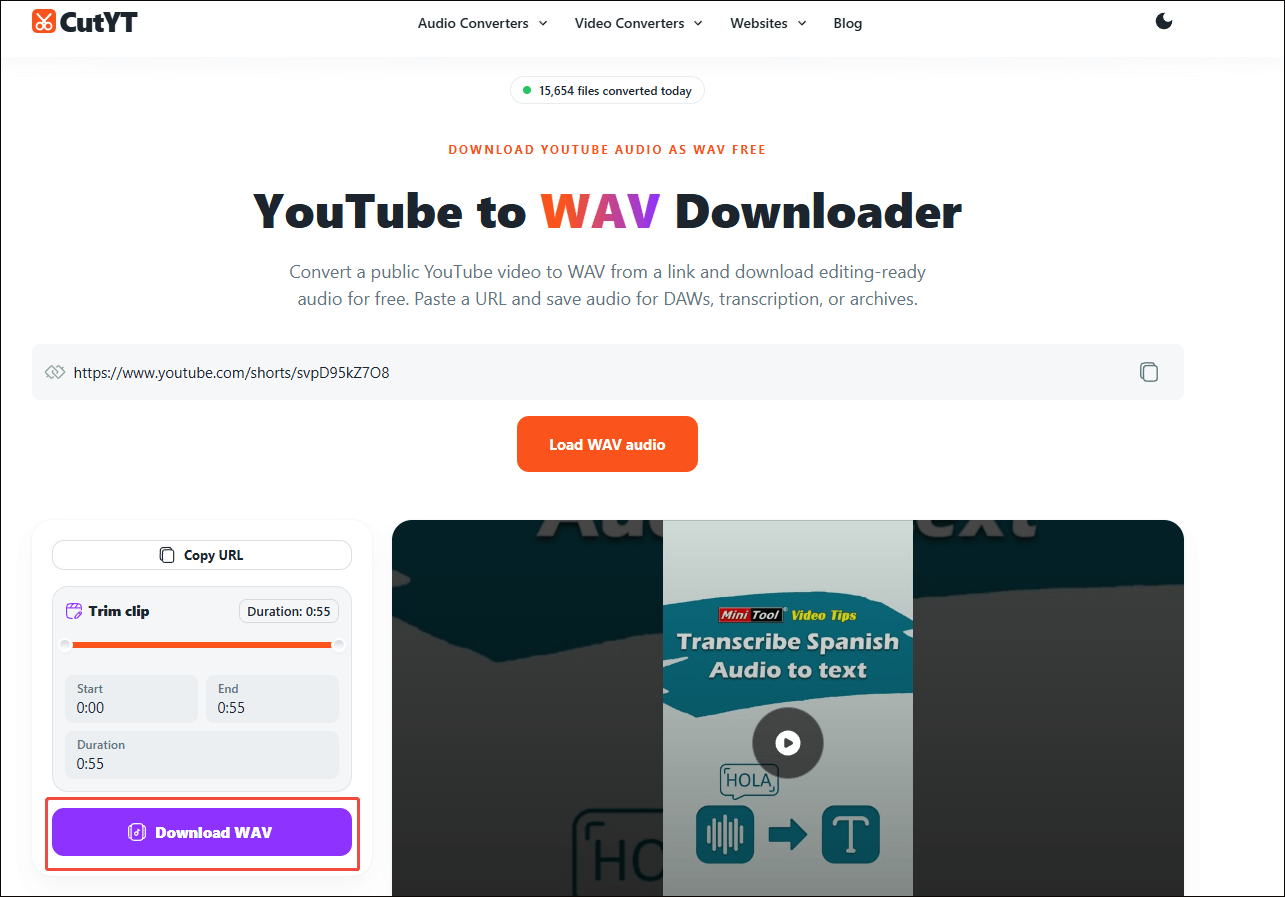
CutYT is an easy-to-use online YouTube to WAV converter. It has a 100% clean interface. In addition, it features a well-organized interface. Even if you are a beginner in YouTube to WAV conversion, you can use this tool to accomplish the task easily.
1. Copy the YouTube URL
2. Get the WAV Audio
Go to https://www.cutyt.com/yt-wav and paste the YouTube URL into the URL box. Then, the download option will pop up automatically. Then, click on the Download WAV option to start the download process.
3. Check the Output Audio
When the download process ends, check the output audio in the browser.
Now, it is easy to convert YouTube to WAV without any installation.
What Are Useful Tips for Downloading WAV Files
When saving YouTube to WAV instead of a standard MP3 format file, pay attention to the quality of your file no matter what you’re actually planning to do with the downloaded track. As we know, YouTube videos, even sound-only ones, have different bitrates depending on how the file was uploaded.
If you want to convert YouTube to WAV in high quality, you need to find files that are, at the very least, uploaded at a 480p resolution because they often contain higher bitrates and better-sounding audio. In addition, after getting the WAV file, you can right-click on this file and choose Properties to ascertain its bitrate if you like.
Final Words
Just choose a suitable tool to complete the conversion from YouTube to WAV. If there are any problems when using MiniTool Video Converter, just send the problem description to support@minitool.com to ask for help.