Live streaming on YouTube is a powerful tool for content creators, educators, businesses, and influencers to engage with their audience in real time. Many live streamers may want to archive their streams for future viewing, repurposing, and analysis. Whether you want to preserve your content, make it accessible to viewers who missed the live broadcast, or use it later for other purposes, archiving is essential. In this article, I will tell you everything about archiving your YouTube live streams. Let’s get started!
What Does “Archiving" a YouTube Live Stream Mean
Archiving a live stream means saving a recording of the stream to your YouTube channel or offline storage. This way, viewers can watch the video later, and creators can reuse or repurpose the content.
Does YouTube Archive Live Stream Automatically
Does YouTube archive live streams automatically? Yes, YouTube can automatically archive your stream, but it depends on certain settings and time limits. By default, streams under 12 hours are automatically saved and appear in your “Videos” tab after the broadcast ends.
This option applies to all types of live streams, including encoder, webcam, and mobile. Also, YouTube will automatically archive your streams of 1440p and 2160p (4K) video resolution. However, if your stream is longer than 12 hours, it may not be captured at all.

How to Adjust Your Archive Settings (Step-by-Step)
If you haven’t changed anything, YouTube usually saves your live streams automatically. Here’s how to adjust your archive settings:
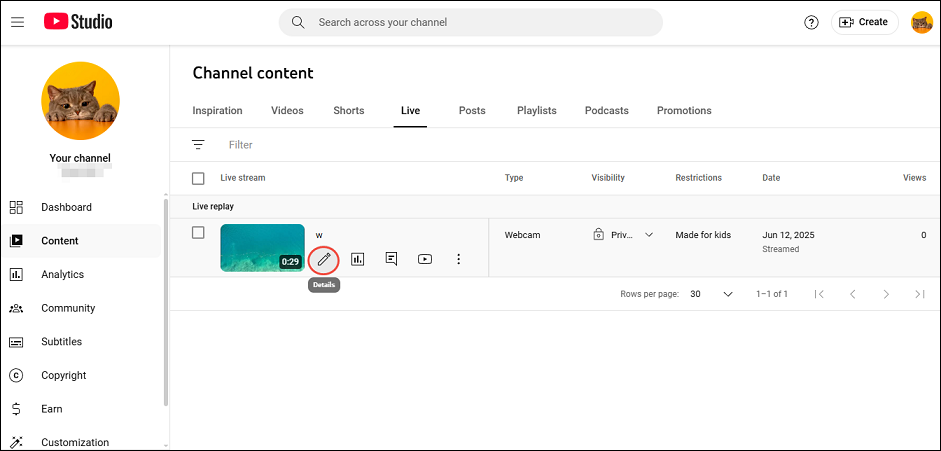
1. Go to YouTube Studio and log in to your account.
2. Select Content from the left-hand menu.
3. Click on the Live tab.
4. Click the Details button (a pen icon) on the video you’d like to change.
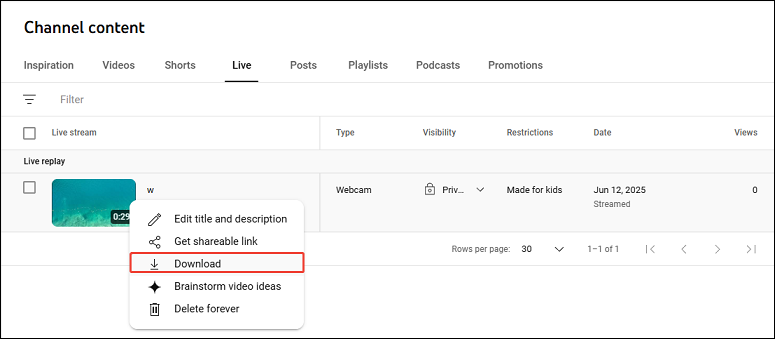
- To change the stream privacy setting: Select Visibility and choose from Public, Private, or Unlisted. Once you’ve selected, click Done.
- To delete the video: In the upper corner, click the three-dot icon and then Delete. In the pop-up that appears, confirm your deletion. Then, click the Delete forever button.
5. Click on Save.
Do you know that you can also download your archived live streams directly? Simply hover over the archived video, click the three-dot menu, and select Download.
How to Archive YouTube Live Stream Manually
Want to archive your full YouTube live streams that exceed 12 hours? Since YouTube won’t archive live streams longer than 12 hours, a great solution is to use a screen recorder to capture the entire stream and save it locally on your computer.
MiniTool Video Converter includes a screen recorder that has no time limit, making it ideal for archiving live streams longer than 12 hours. This tool allows you to record anything on your computer screen, including your live streams. You can record the video as long as you want. Most importantly, there's no annoying watermark on the recorded video. Here are the steps to get started:
1. Download and install MiniTool Video Converter on your computer.
MiniTool Video ConverterClick to Download100%Clean & Safe
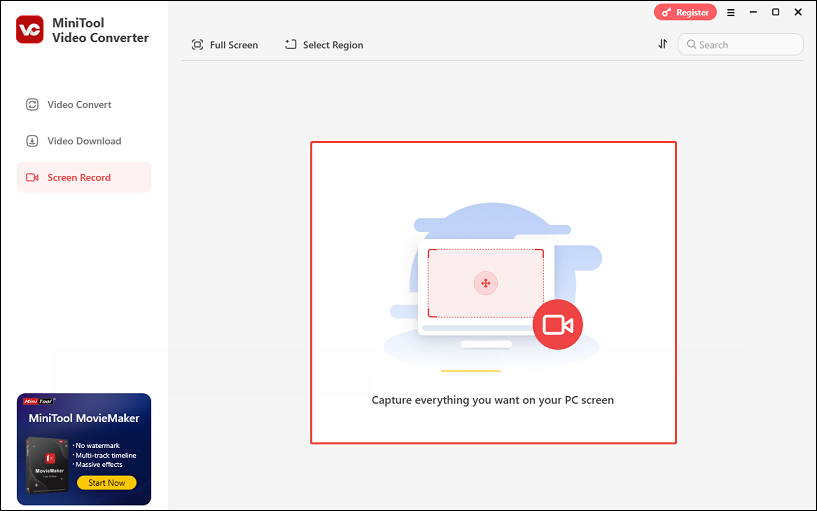
2. Open the app and go to the Screen Record tab.
3. Click anywhere within the circled square below.
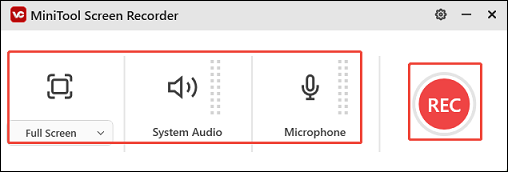
5. Select the recording area and audio settings. Click the REC button, and it will have a 3-second countdown.
6. Go to YouTube to start your live stream.
7. After the stream ends, press F6 to stop recording.
You can also use MiniTool Video Converter to download your favorite YouTube live streams!

Final Thoughts
Archiving your YouTube live stream is a vital step in maximizing the value of your content even after the stream has ended. If you’re unsure how to archive YouTube live stream, you can utilize YouTube’s built-in archive option. Alternatively, if your stream is longer than 12 hours, you can use a screen recorder to capture the entire event.