If you ever uploaded a video to YouTube only to find it darker than expected, you’re not alone. Why are my YouTube videos dark, and how can I fix it? Let’s dive into the common reasons behind dark YouTube videos and actionable solutions to ensure your footage shines from MiniTool Video Converter.
Why Are My Videos Dark on YouTube
The following are some of the reasons for dark YouTube videos.
1. Poor Lighting Conditions During Recording
The most frequent reason behind dark videos is inadequate or poor lighting during recording. If you’re in low light or facing a bright source of light, the video might appear darker than it really is.
2. Incorrect Camera Settings
A narrow aperture reduces the amount of light hitting the sensor, leading to darker footage. Some cameras automatically lower ISO in bright environments to reduce noise—but this can overcompensate, making the video darker than intended.
3. Low Video Quality
YouTube automatically adjusts video quality based on your internet speed. Lower video quality might enhance pixelation and make videos appear darker.
4. Accidental Activation of Dark Theme
Why are my YouTube videos so dark? The last reason is the accidental activation of the dark theme. Dark Theme (or Dark Mode) converts YouTube’s interface to a black/dark-gray background. It deactivates pixels in dark areas, which can create an illusion that the entire screen – including videos – is darker.

How to Solve YouTube Video Dark
To address these issues that cause YouTube videos to be dark and improve the overall brightness and quality, try the solutions below.
1. Editing Technique to Adjust Brightness and Contrast
For poor lighting conditions and camera setting mistakes, the simplest solution is to adjust the lighting before uploading it to YouTube if you don’t want to re-record the video. Here, I recommend an editor I have used many times – MiniTool MovieMaker.
MiniTool MovieMaker is a free video editor without watermarks. You can input video formats, including MP4, WebM, 3GP, WMV, MOV, MKV, FLV, AVI, etc. It supports a wide range of editing features, such as trimming, splitting, cropping, changing video speed, adjusting video brightness, contrast, and saturation.
Here’s how to brighten dark videos using MiniTool MovieMaker.
1. Install and launch MiniTool MovieMaker
Download and install MiniTool MovieMaker on your computer. Then, launch it.
MiniTool MovieMakerClick to Download100%Clean & Safe
2. Import the dark video to MiniTool MovieMaker
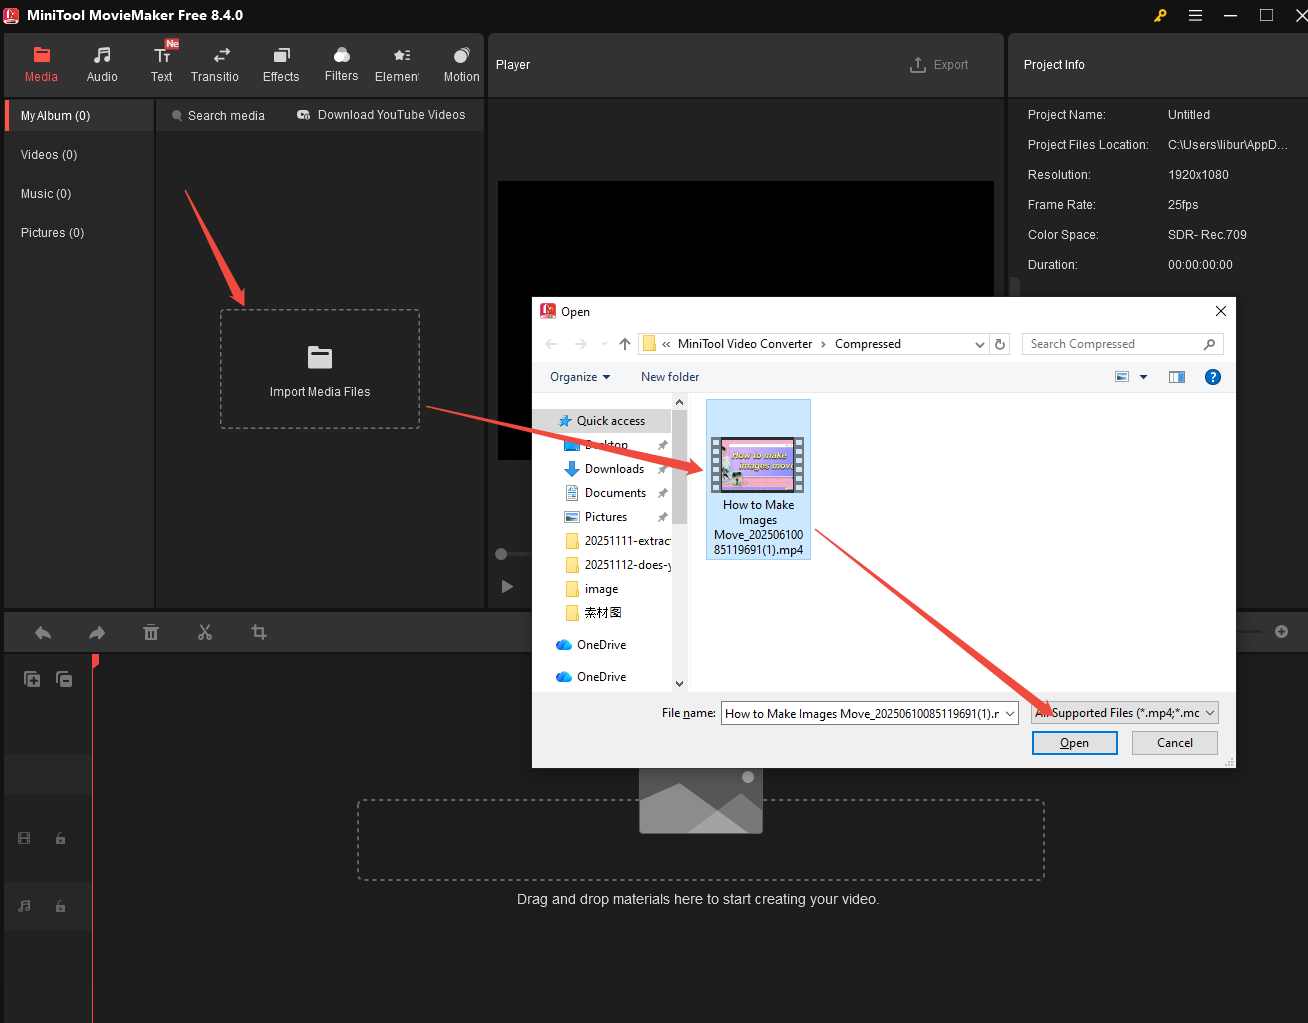
Close the promotion window, click Import Media Files to find the video you want to edit, and hit Open to upload the video file.
3. Add the dark video to the timeline and adjust the brightness
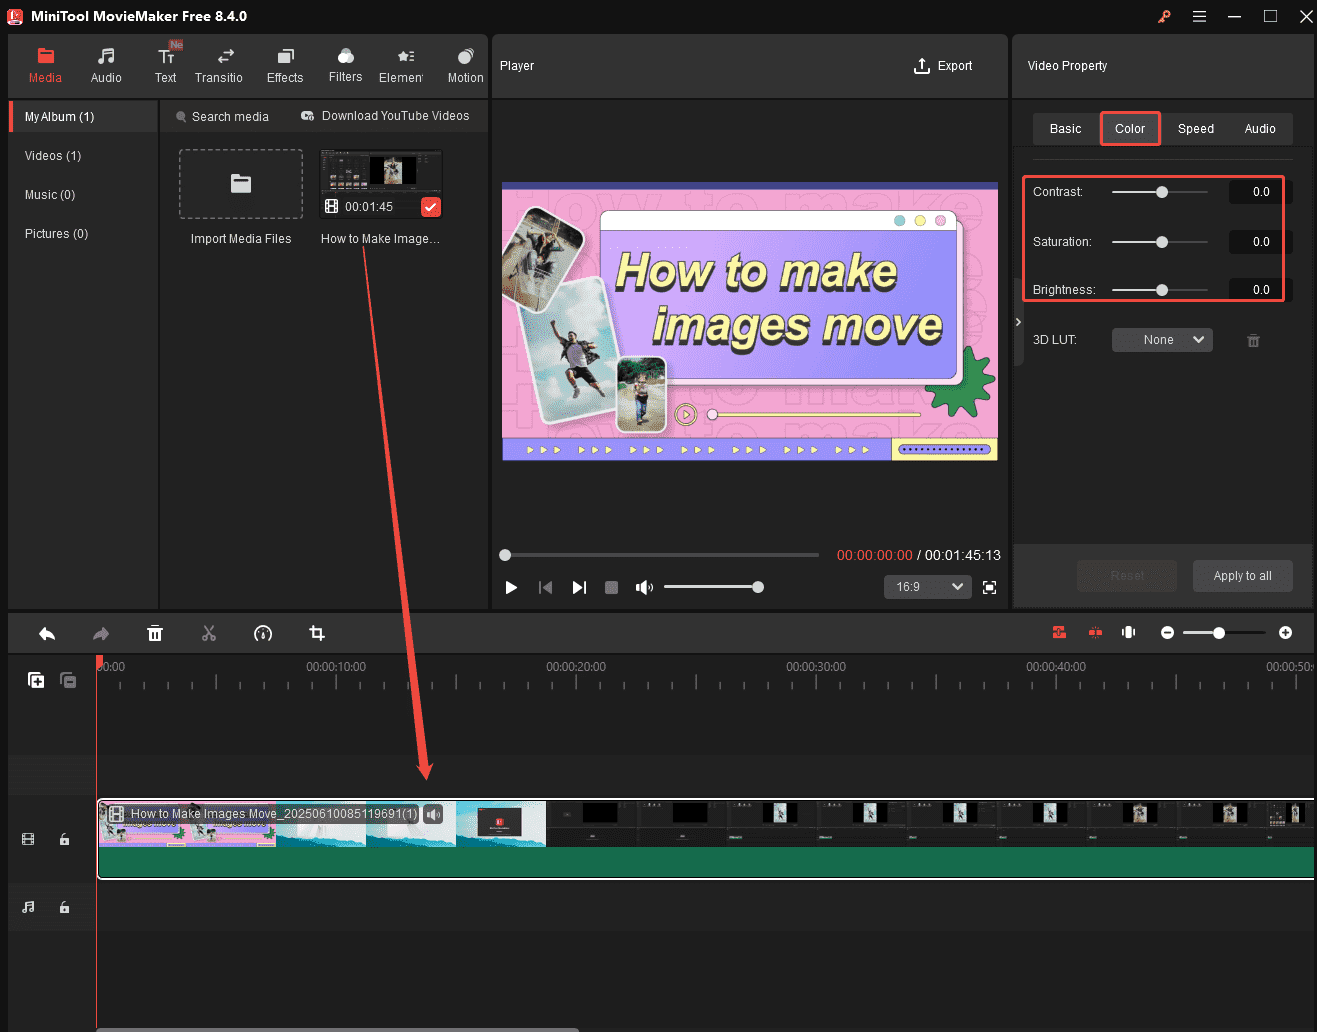
- Drag and drop the video to the timeline and select it to open the Video Property window.
- Switch to the Color tab and you’ll see the Contrast, Saturation, and Brightness options.
4. Export the bright video
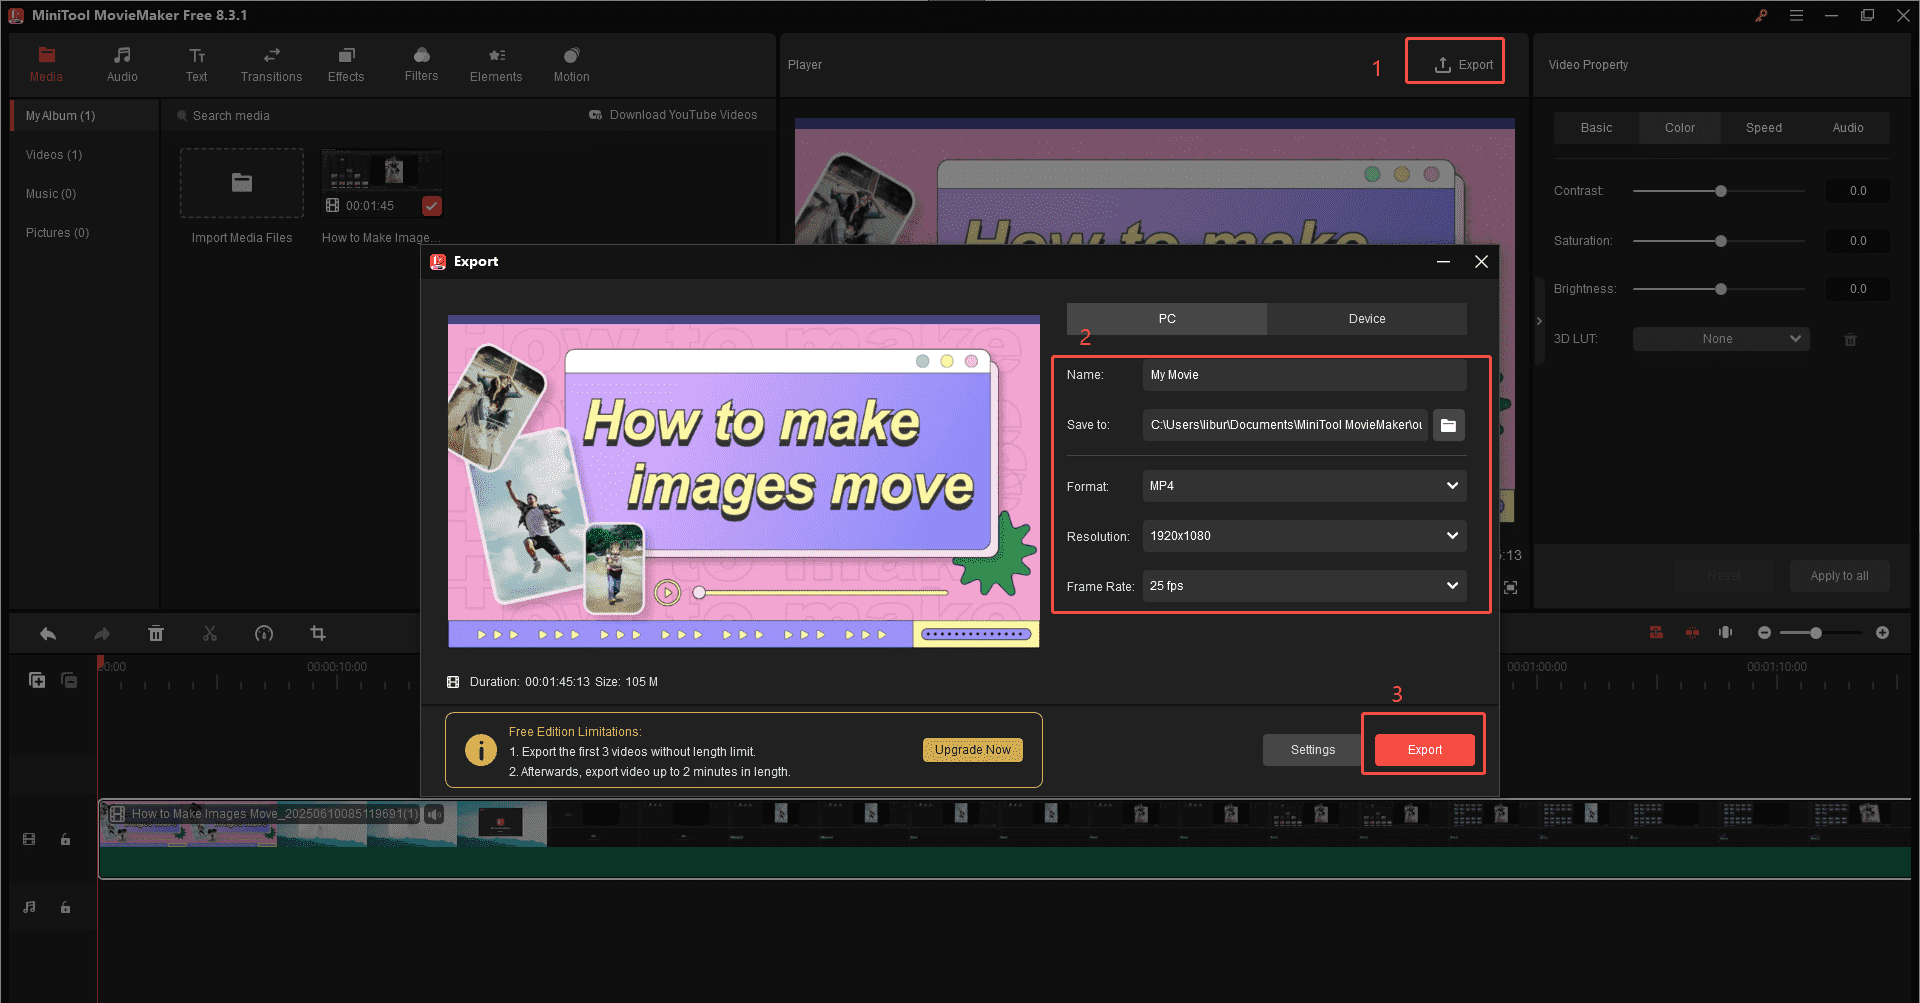
- After finishing the editing, click Export at the top of the player to open the Export window.
- You can then configure the output path, video format, resolution, and frame rate, and click Settings for more options.
- Finally, click the Export button to save the bright video on your computer.
2. Improve Lighting or Adjust the Camera Settings
If you want to re-record your video and make it become more lighter, firstly, you need to find a good place where the light hits the object directly.
In addition, even with decent lighting, incorrect camera settings can turn your video dark. Cameras have auto-exposure modes, but they don’t always get it right. Widen the aperture to let more light in. Don’t use too low an ISO to avoid noise, and don’t hesitate to raise it slightly in dim environments.
3. Improve Video Quality
Here’s how to improve video quality for a YouTube video.
1. Go to YouTube and log in to your account.
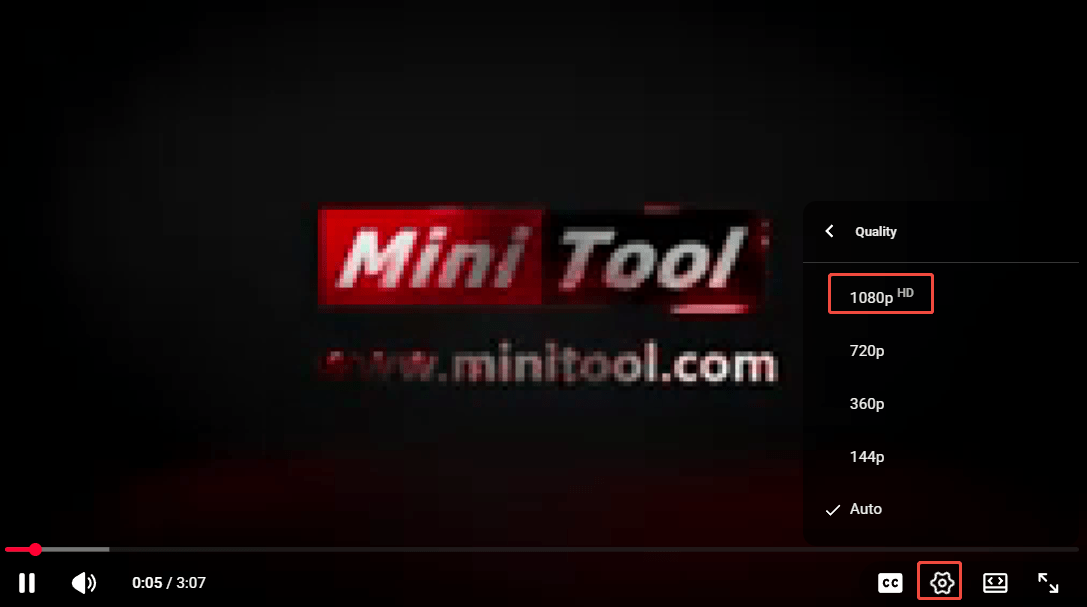
2. Play the dark video and click on Settings below the video.
3. Expand Quality and choose a high resolution.
MiniTool Video ConverterClick to Download100%Clean & Safe
4. Adjust Device Mode
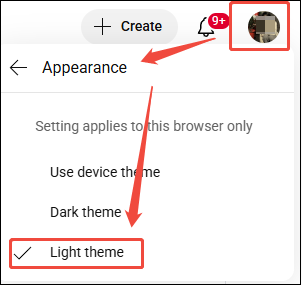
Here’s how to adjust device mode from dark to light on a computer.
1. Go to YouTube and log in to your account.
2. Click on your profile and click on Appearance: Device theme.
3. Choose Light theme.

Bottom Line
Why are my YouTube videos dark? Dark YouTube videos are caused by a single issue. They’re often the result of poor lighting, misconfigured camera settings, low video quality, or incorrect device mode. By addressing each step of the process, you can ensure your videos stay bright, clear, and engaging for your audience.
About The Author

Position: Columnist
Libur is always willing to try new things and full of enthusiasm for life. At the same time, she is passionate about making fantastic movies. Now, she has become an English editor about multimedia in MiniTool. She is good at writing articles about video editing, video conversion, and screen recording. During her spare time, Libur loves climbing mountains and listening to music. By the way, her favorite singer is Taylor Swift.