Do you find that YouTube videos always open in low quality? This could be because you haven’t turned off YouTube’s auto quality feature. This post will give you step-by-step instructions on how to turn off auto quality on YouTube. Read on to find out more!
When you open a video on YouTube, you may notice that the video quality is low. That’s because YouTube tends to automatically adjust the video quality to match the speed of your internet connection. If your internet connection is unstable, a low video quality can ensure a smooth viewing experience. However, many people would like to have a better resolution when watching a video. Fortunately, there are a few ways to adjust the quality of a video. Find the answer below!
Also read: Why Is YouTube Video Blurry? How to Make It Clear?
How to Turn off Auto Quality on YouTube
Here are 5 ways to change the video quality so that you don’t have to suffer from low video resolution due to internet speed issues.
Method 1: Turn off YouTube Auto Quality Via Video Settings
You can change the resolution on any video from its settings and disable auto video quality. Here are steps:
Step 1: Open the YouTube app, log in to your YouTube account, and select any video.
Step 2: Tap on the Settings icon in the top right corner of the video.

Step 3: Choose the Quality option.
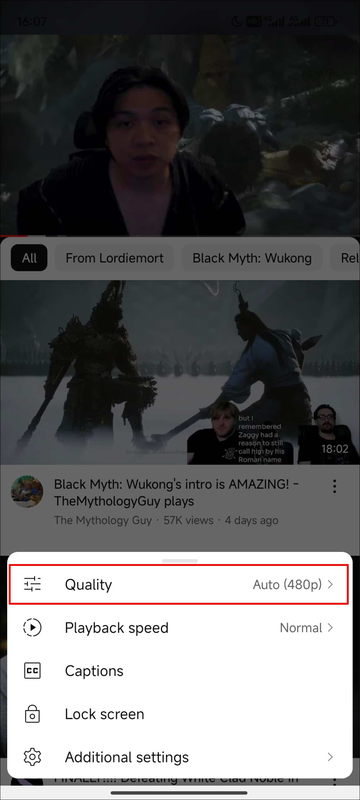
Step 4: Now, you can select Higher picture quality, Data saver, or Advanced.
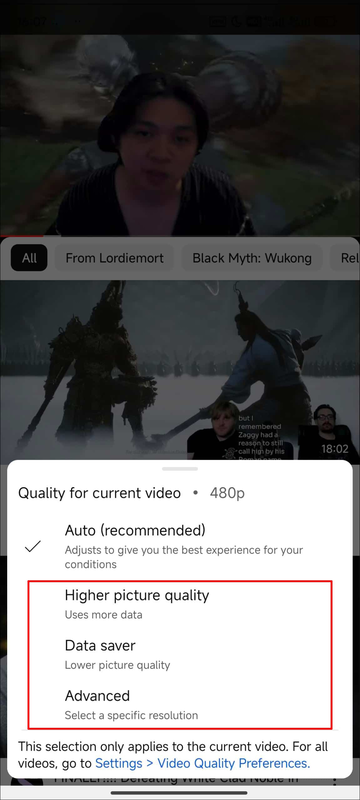
The higher picture quality option will give you a higher resolution video but use more data, the data saver option will save data but the video quality will be lower, and the advanced option allows you to choose your preferred video resolution.
After setting the quality up, reopen the video and you will find that the video is not automatically set to a lower resolution.
Method 2: Turn off YouTube Auto Quality Via Settings
If you don’t want to open a video to change the resolution, you can also turn off the auto quality in the YouTube app settings. Follow the steps below:
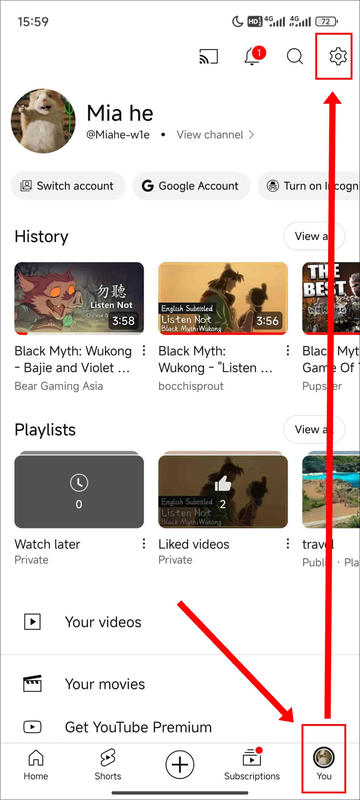
Step 1: Open the YouTube app and tap the You tab in the bottom right corner.
Step 2: Tap on the Settings icon at the top right corner.
Step 3: Choose Video quality preferences.
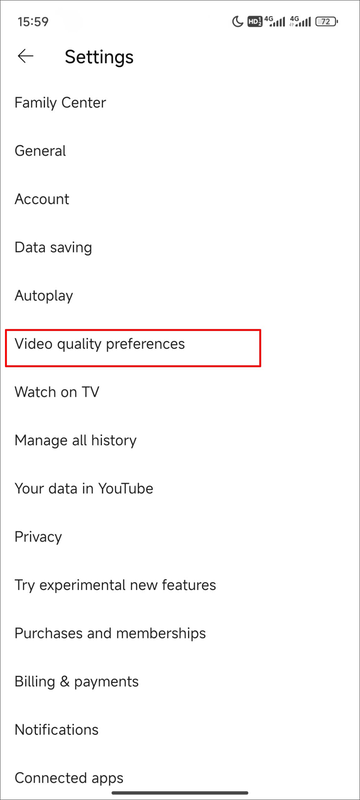
Step 4: Select either Higher Picture Quality or Data Saver under the VIDEO QUALITY ON MOBILE NETWORKS option and the VIDEO QUALITY ON WI-FI option.
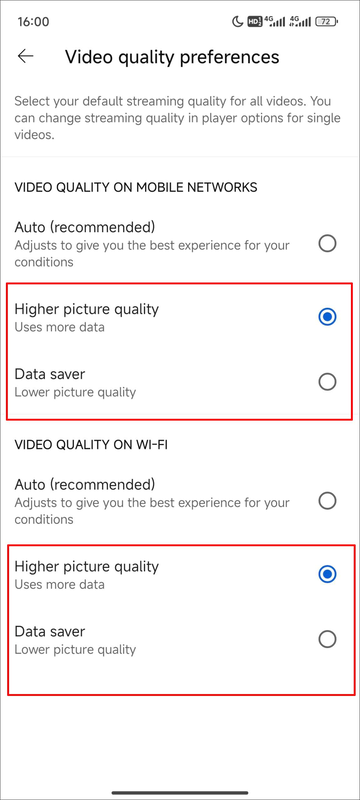
This is a practical method to disable auto video quality on YouTube.
Method 3: Set YouTube Video Quality with Chrome Extensions
If you are watching YouTube videos in a computer browser, you will notice that there is no auto quality option that you can turn off. The only option is to manually adjust the resolution each time you play the video, which will interrupt your viewing. Although you can’t disable auto quality on YouTube, you can use YouTube Chrome extensions to solve low-resolution problems.
Now, follow these steps to turn auto quality off on YouTube using a good browser extension:
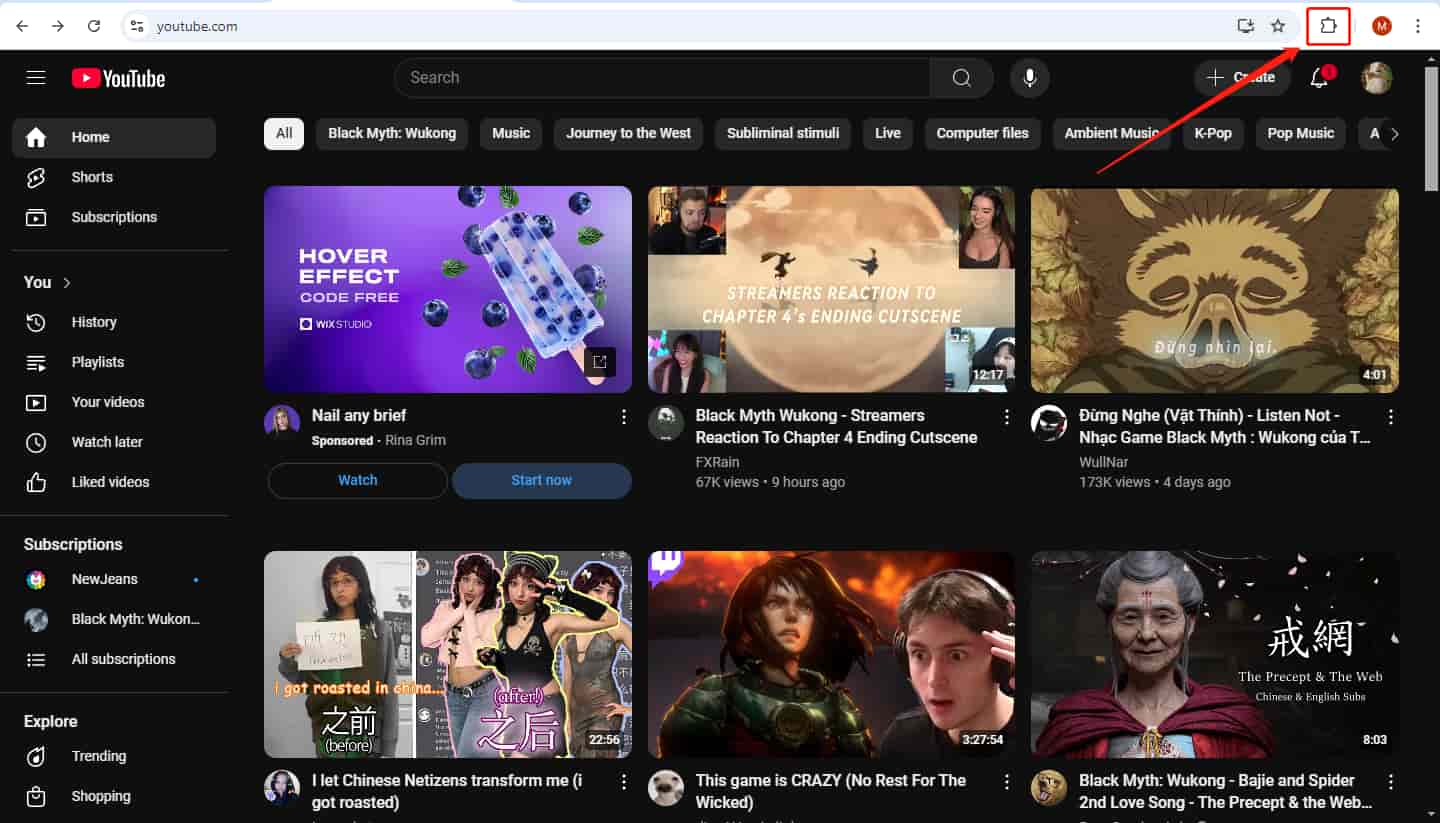
Step 1: Click the Extensions icon at the top right corner of Google Chrome.
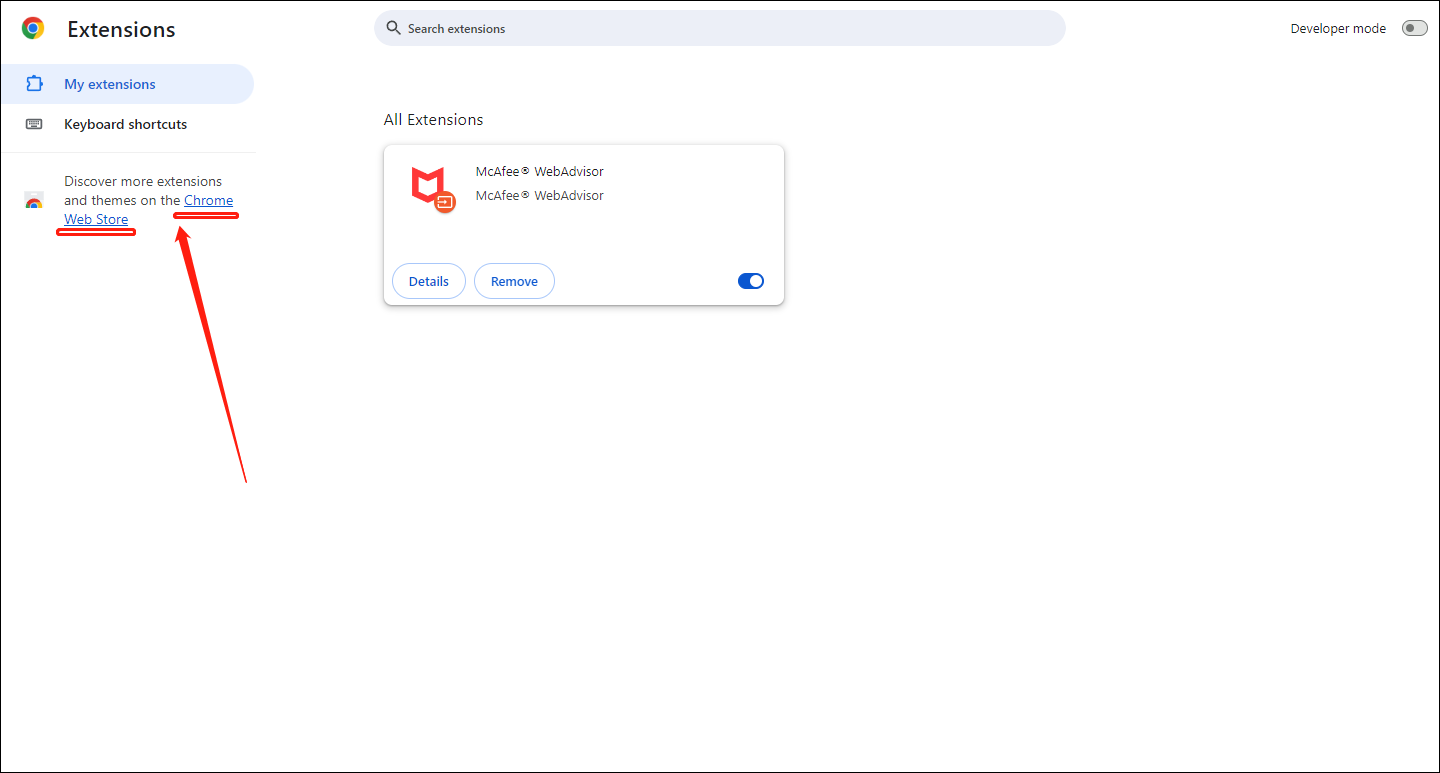
Step 2: Click on the blue font Chrome Web Store on the left.
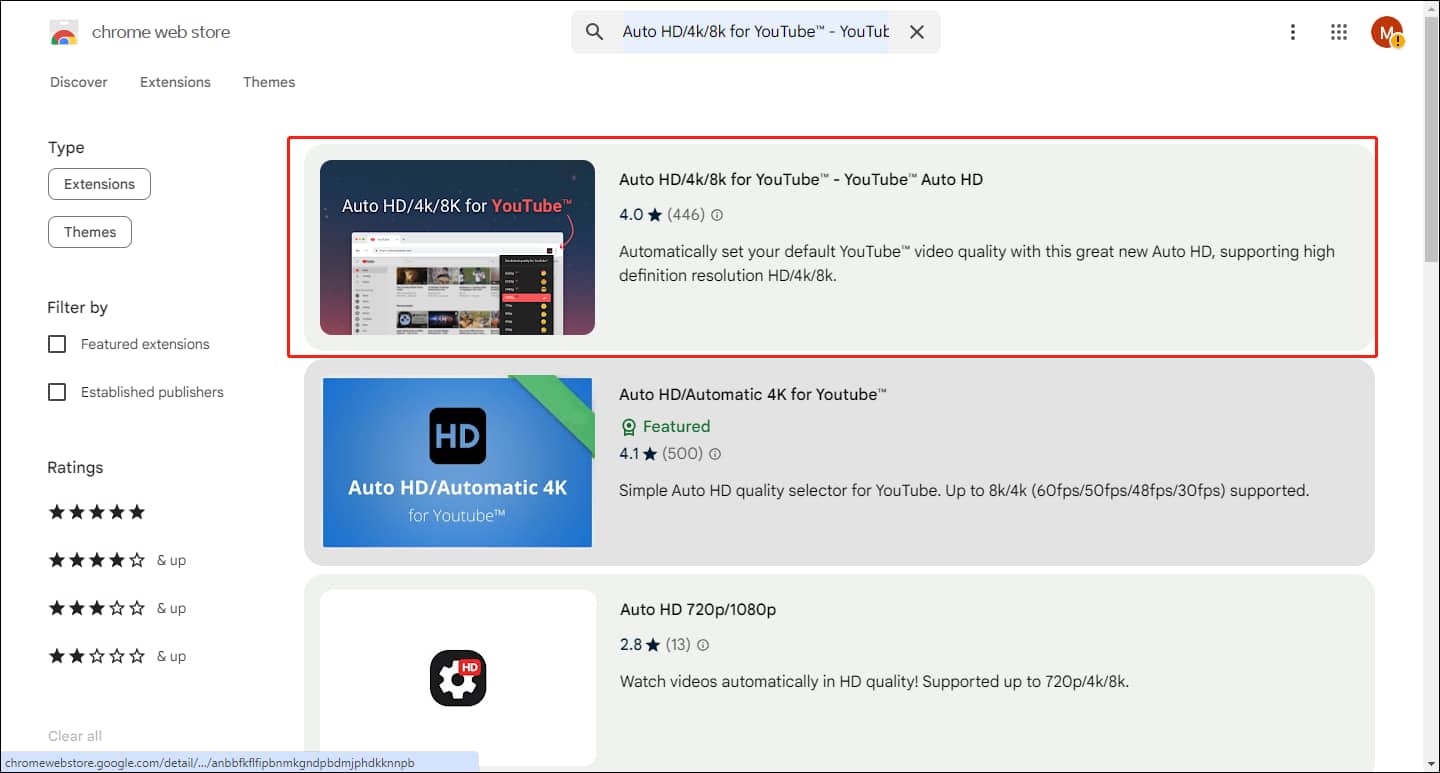
Step 3: Type Auto HD/4k/8k in the search bar and press Enter on your keyboard.
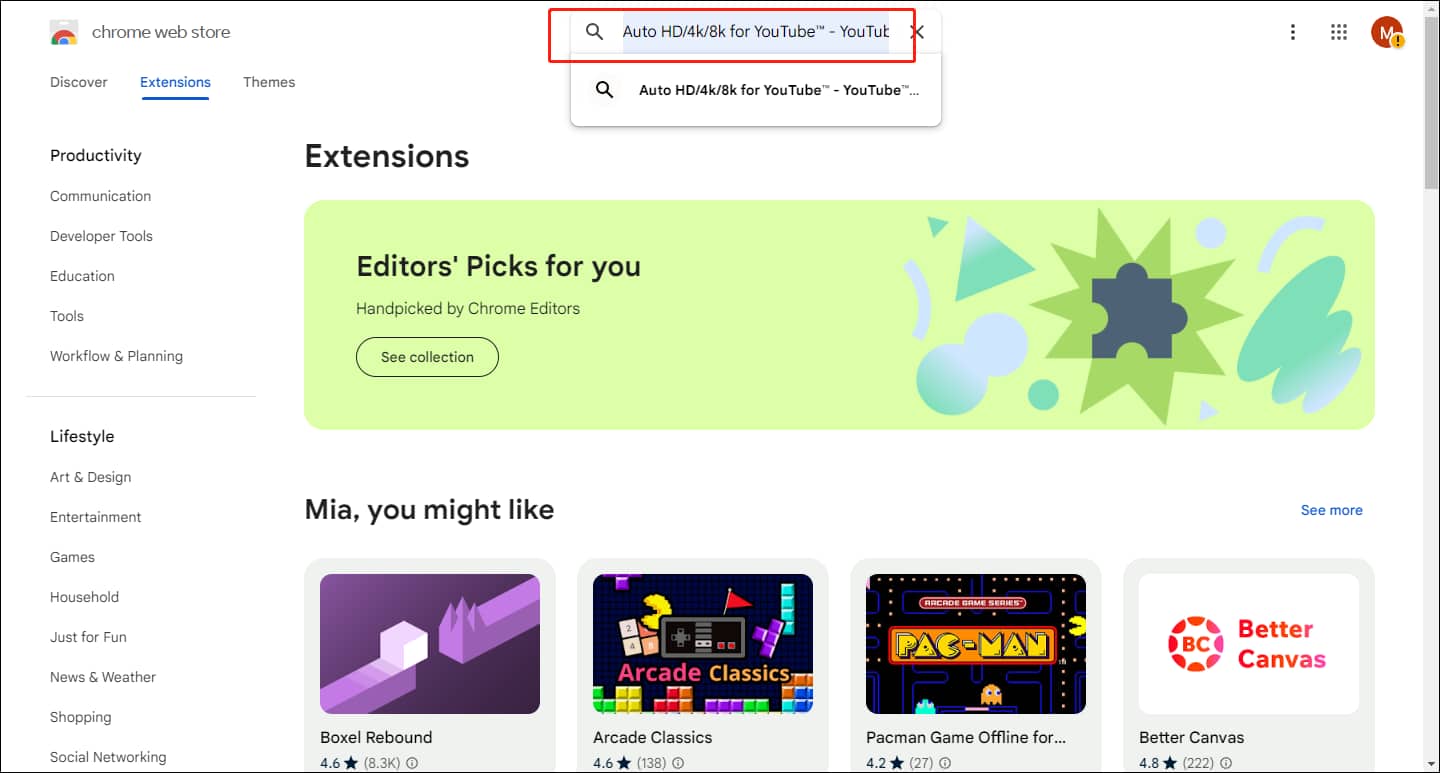
Step 4: Choose the first extension.
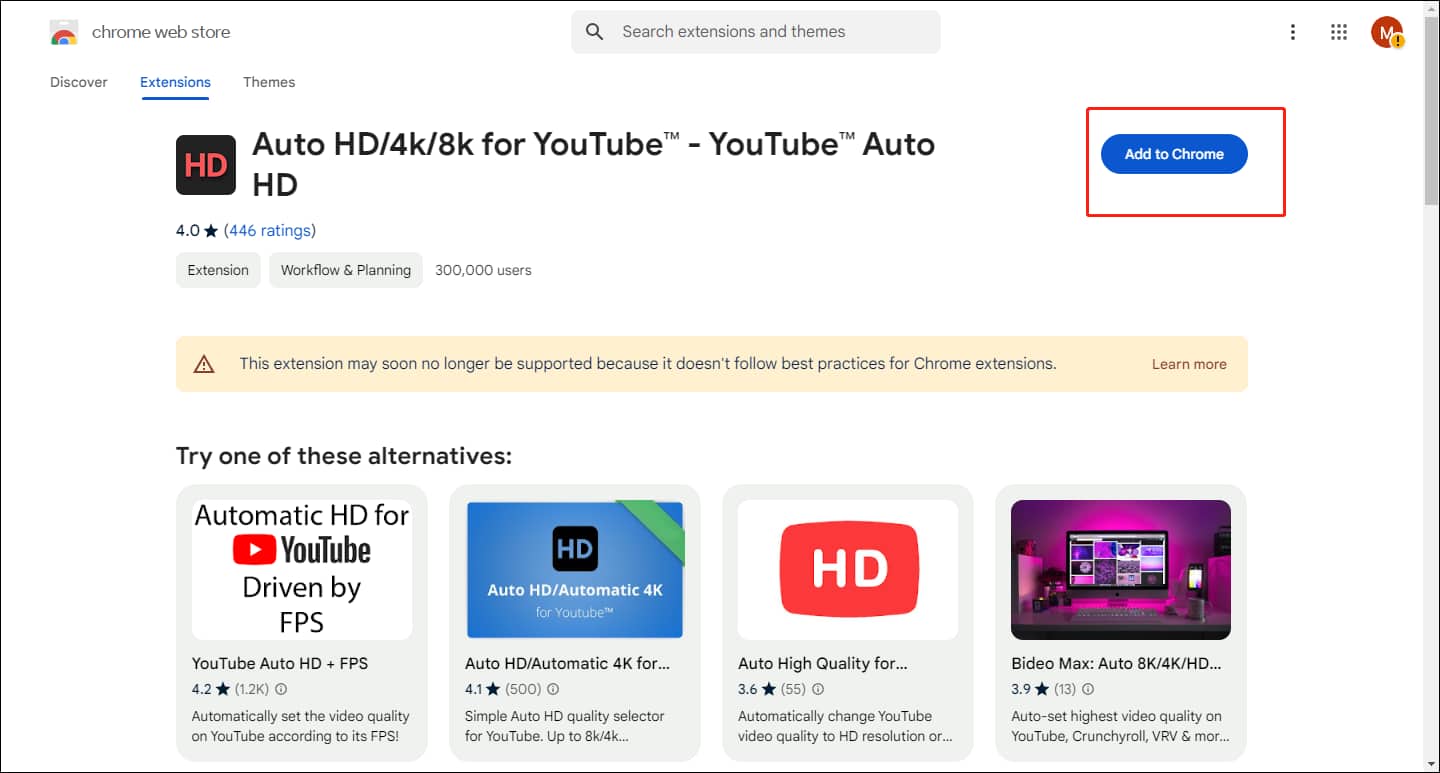
Step 5: Click the Add to Chrome button.
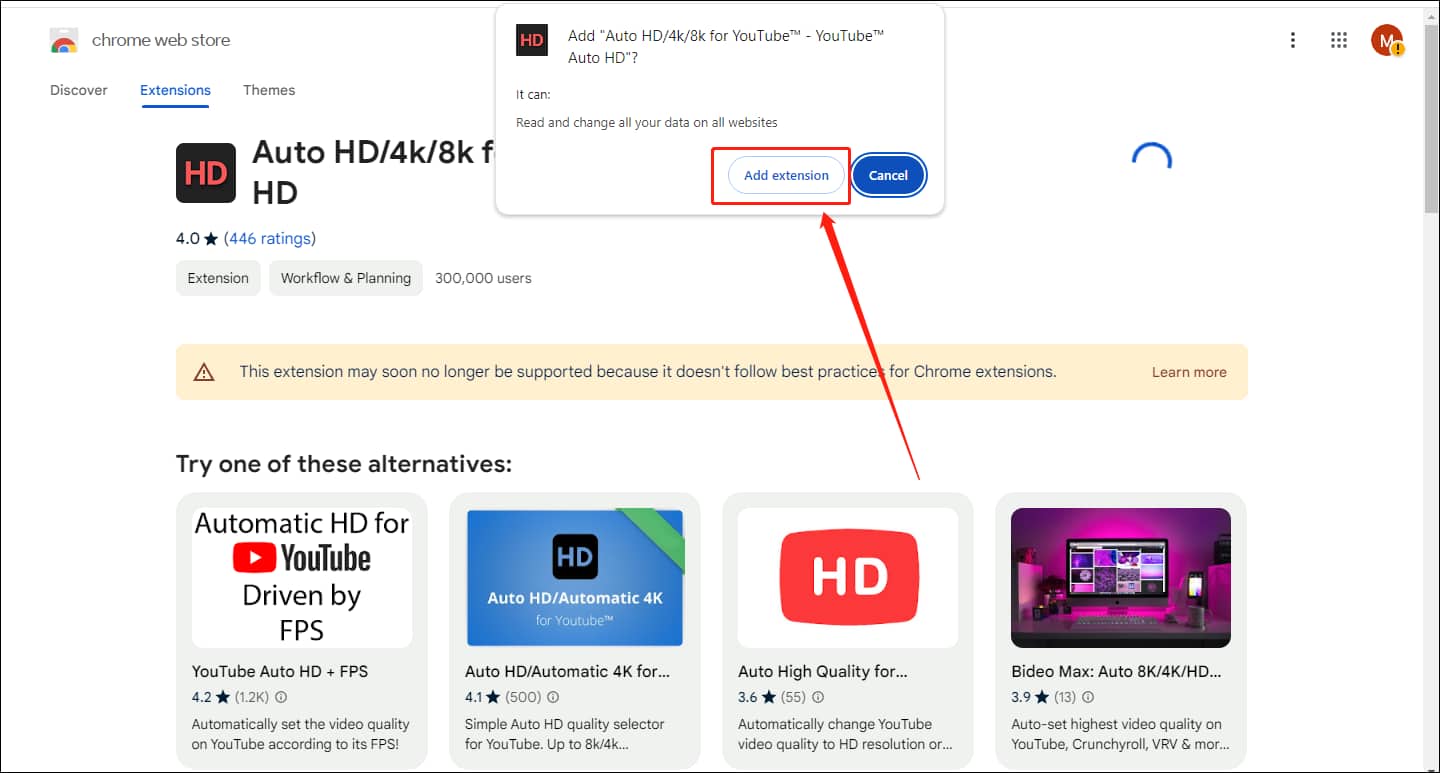
Step 6: Click Add extension in the pop-up message box.
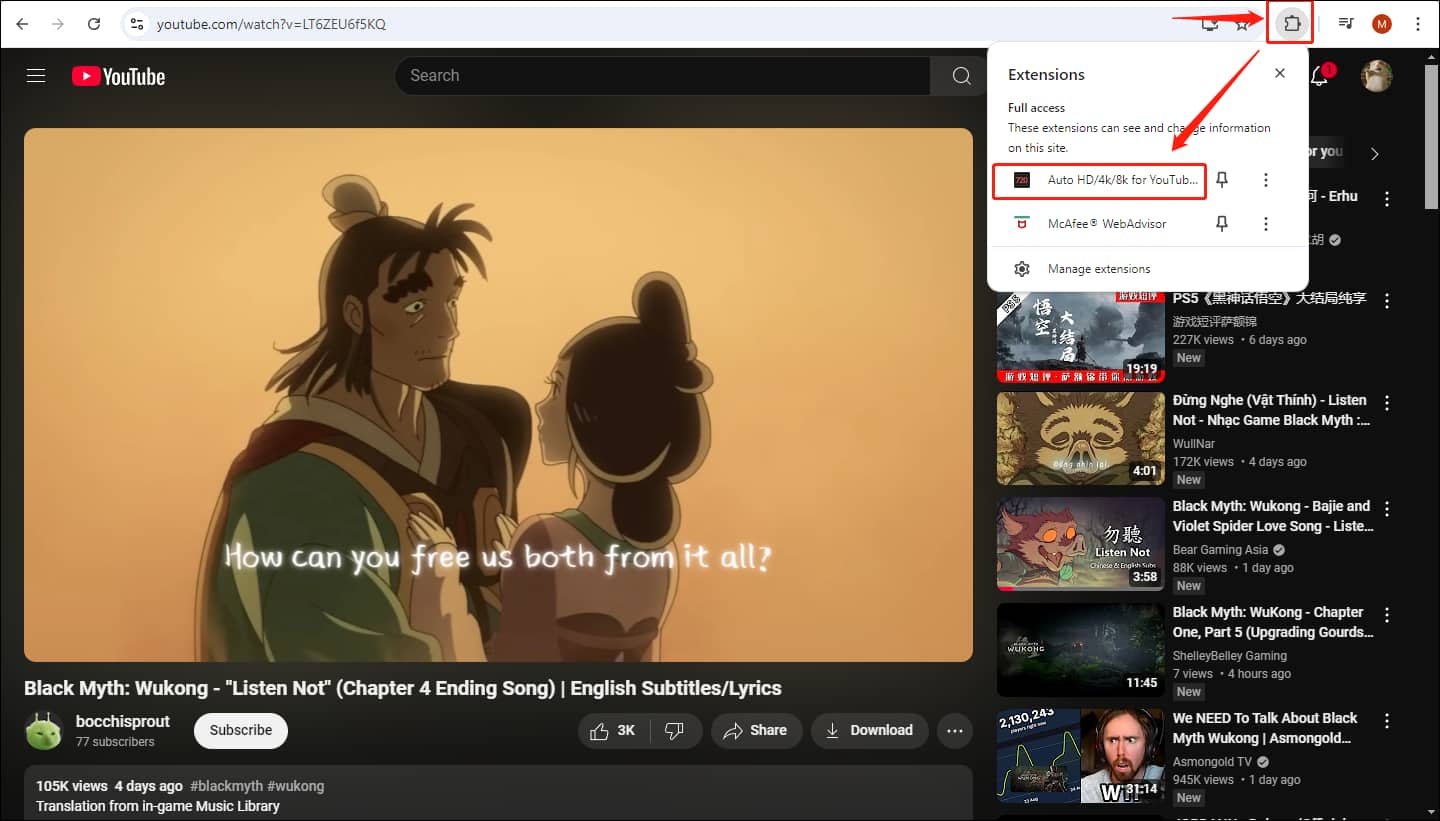
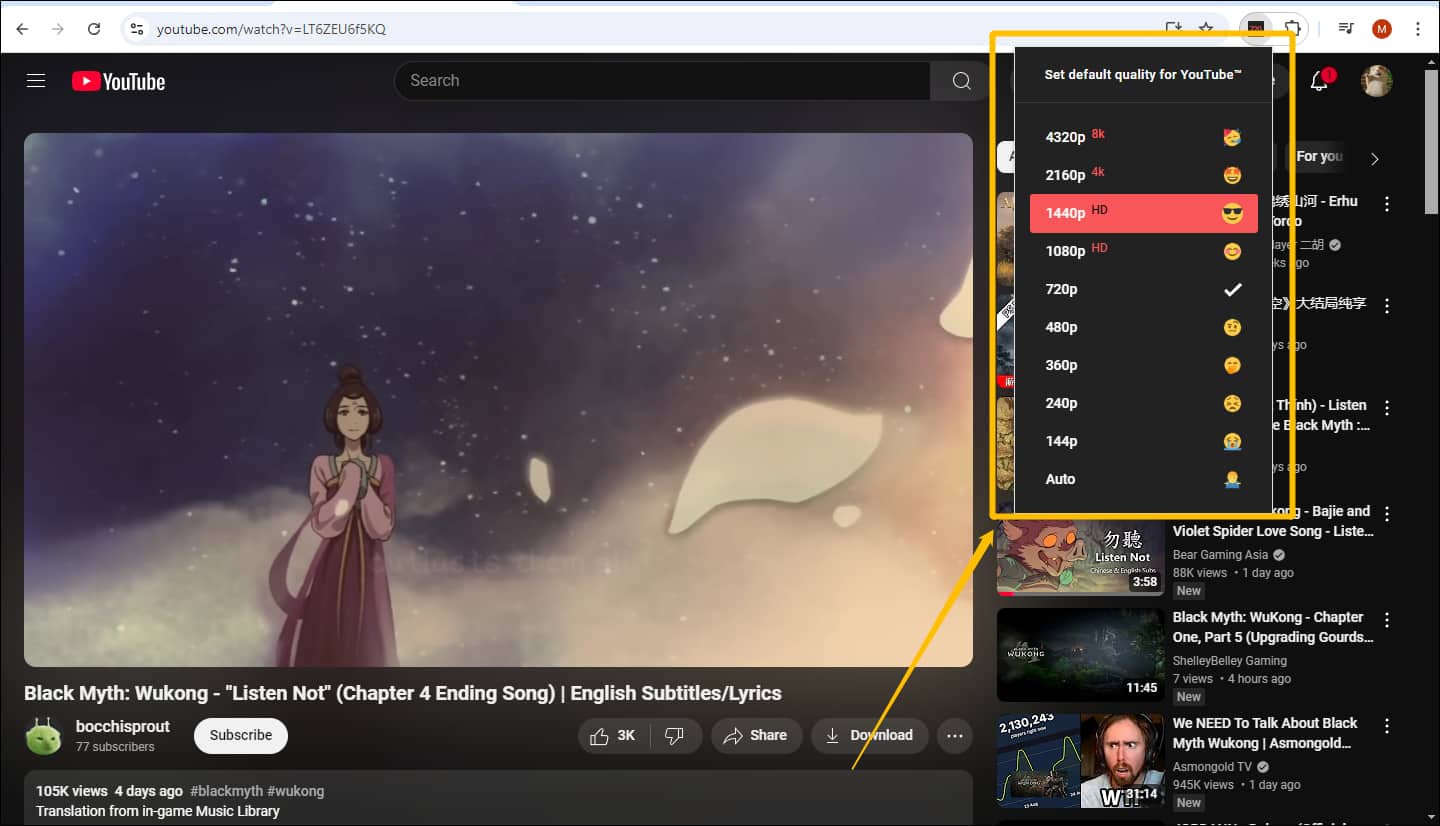
Step 7: Go to YouTube and select any video to play. Click the Extensions icon and choose the Auto HD/4k/8k extension.
Step 8: Choose a video resolution and the extension will remember your choice. When you play a YouTube video next time, the resolution will not be as low as before.
Method 4: Turn Off the Graphics Acceleration Option
Graphics acceleration can also cause unstable quality when watching YouTube videos in Google Chrome. You can turn this off in Google Chrome. Check out the steps below to turn the graphics acceleration option off:
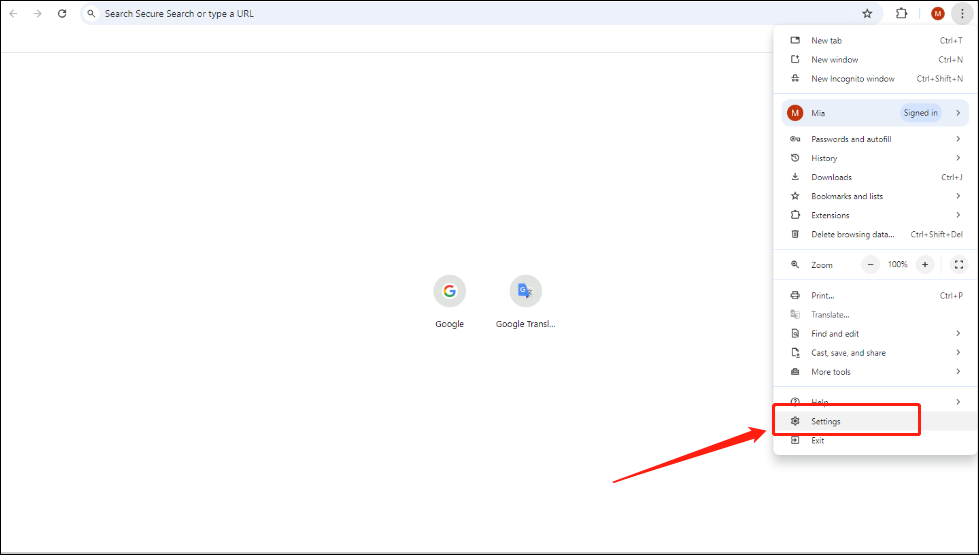
Step 1: Sign in to your Google account in Google Chrome and hit the three dots icon in the top right of the browser. Choose Settings in the dropdown menu.
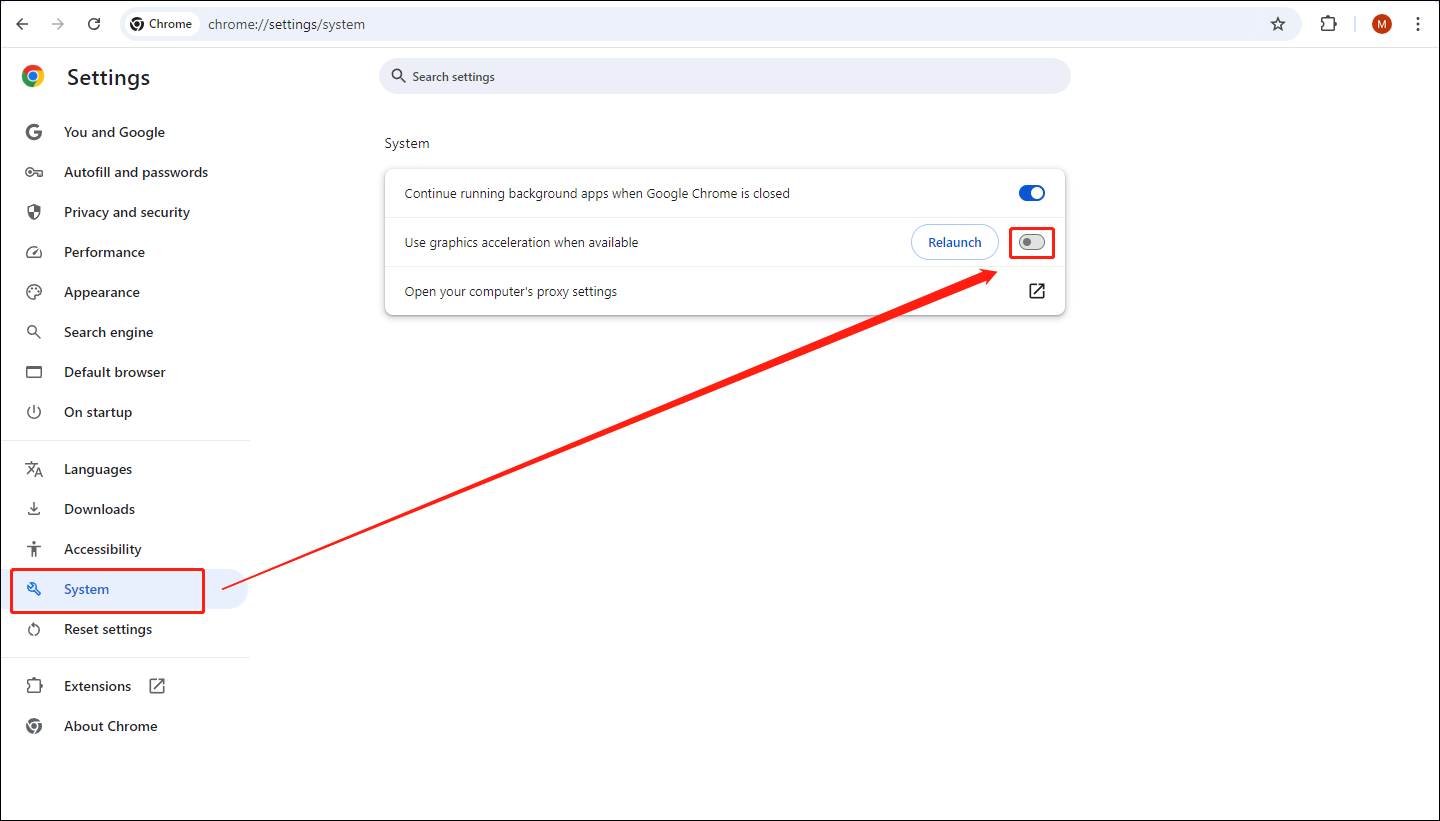
Step 2: Next, you will access a new page. Select System on the left side and turn off the Use graphics acceleration option.
Method 5: Turn on the AV1 Settings
AV1 is a video codec with a compression function that allows videos to play more smoothly and in a higher resolution. You can find this option in the YouTube settings when watching YouTube in your browser:
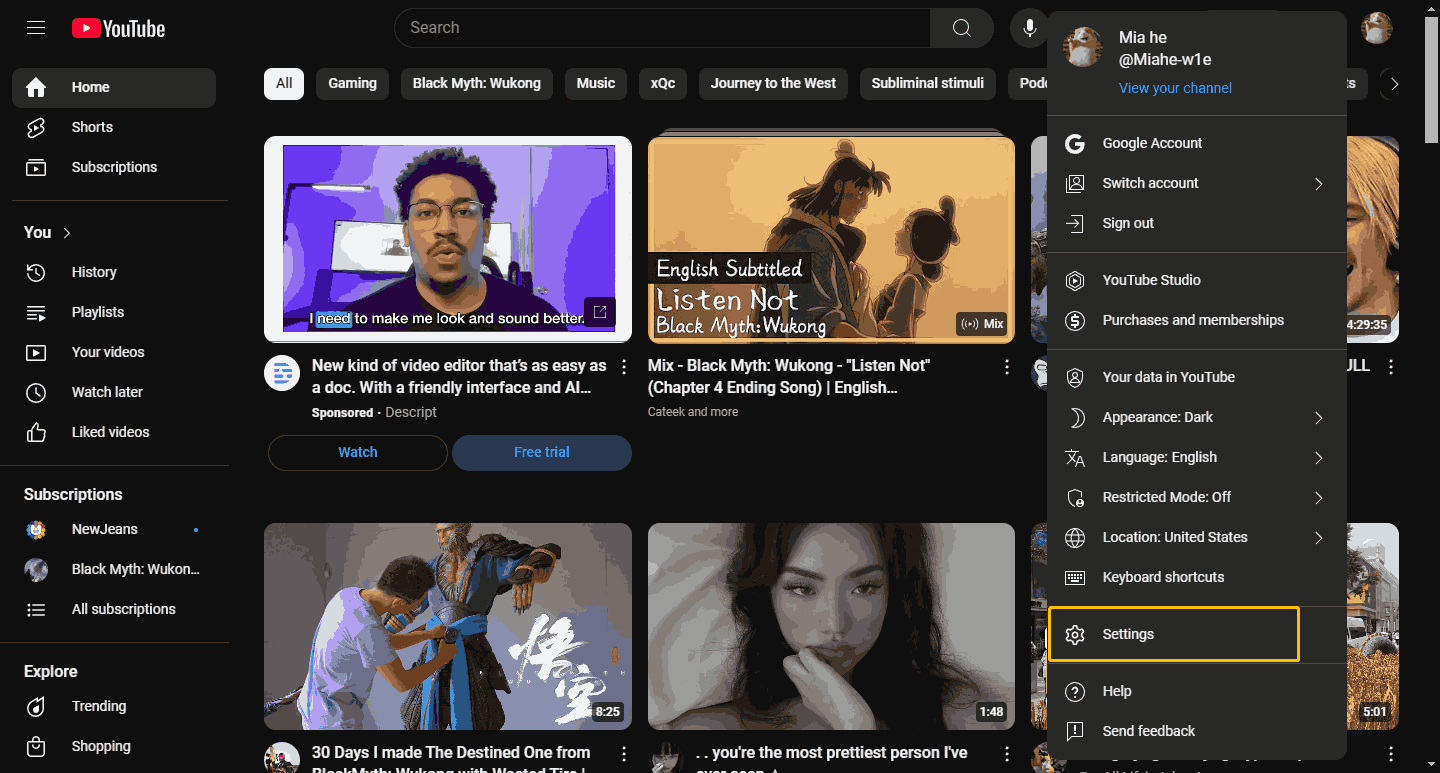
Step 1: Go to YouTube and sign in to your account. Click your profile at the top right corner and choose Settings on the dropdown menu.
Step 2: Click the Playback and performance option and find AV1 settings on the right. Select the Always prefer AV1 option and replay a YouTube video to enjoy a better experience.
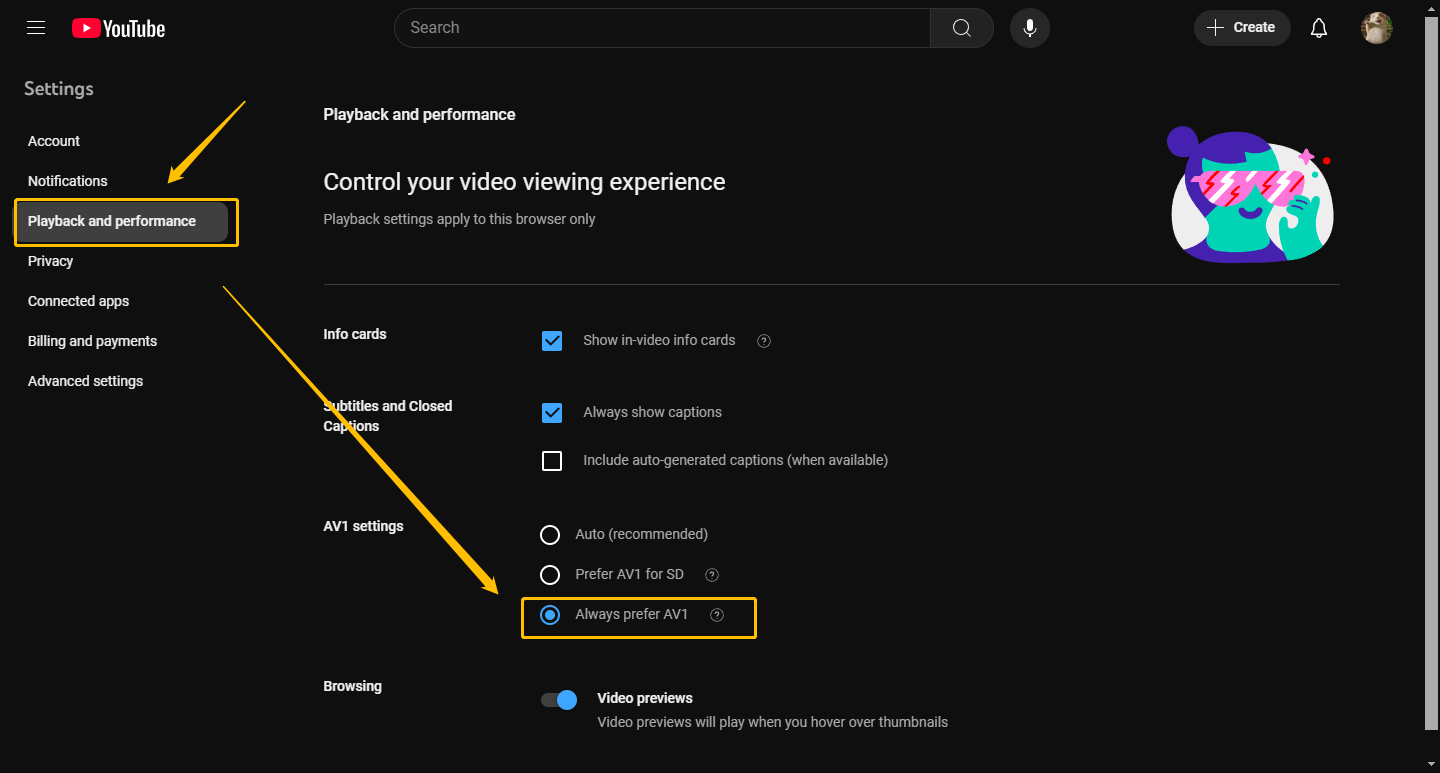
This method also helps you disable auto video quality on YouTube.
MiniTool Video ConverterClick to Download100%Clean & Safe
Conclusion
The 5 methods in this post teach you how to disable the auto quality feature on mobile devices and computers. We hope you enjoy a smoother viewing experience after trying the above methods.

