What Is Paint.net
Paint.net is a free image editing software for Windows. Its interface is simple and intuitive, and users can quickly learn to use the software. Although Paint.net does not have as many functions as professional image editing software such as Adobe Photoshop, Paint.net includes some basic image processing tools, including area selection tools, magic wand tools, drawing tools, text tools, fill tools, etc. You can quickly make YouTube thumbnails with Paint.net.
Best YouTube Thumbnail Size
Generally speaking, the ratio of long YouTube videos is 16:9. This is also the ratio used by the YouTube player and preview. Although the video thumbnail appears smaller in the search results, it will be enlarged on the recommendation page and the playback page. You should make sure the thumbnail is large and clear enough. Therefore, the best size of your thumbnail is 1280 x 720 pixels.
How to Make a YouTube Thumbnail in Paint.net
Paint.net is great for editing images. You can use it to create YouTube thumbnails. Here is a tutorial on how to use Paint.net to make a YouTube thumbnail:
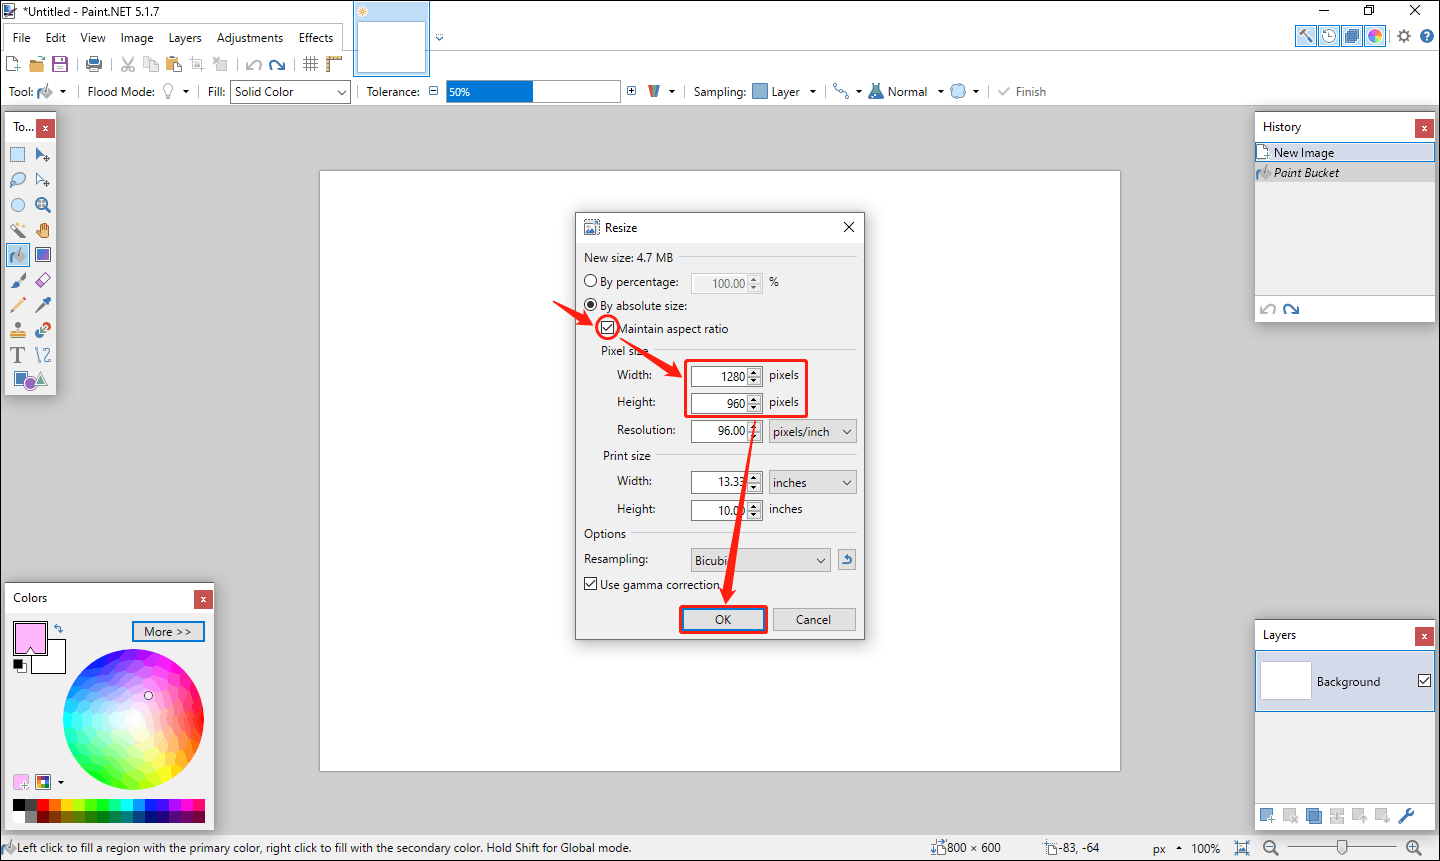
Step 1: Open Paint.net on your computer. The first thing you need to do is resize the canvas. Choose the Image tab at the top left corner and select the Resize option. In the next pop-up window, uncheck the Maintain aspect ratio option, modify the length and width as you want, and click OK.
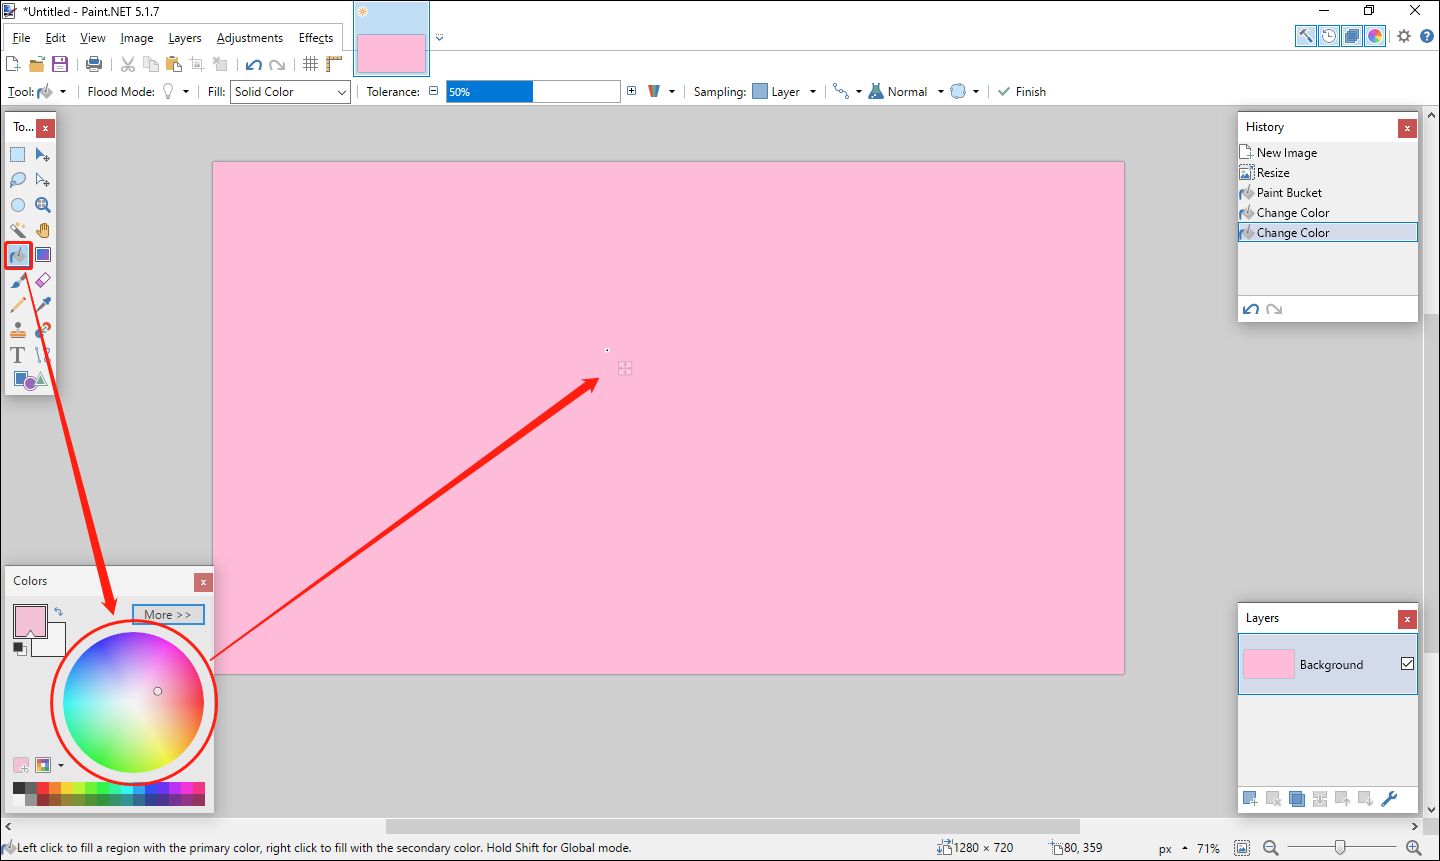
Step 2: Then, let’s set the background color. Choose Paint Bucket from the toolbar, select a color you like from the color palette on the bottom left, and click on the canvas to set the background to the color of your choice.
Step 3: Want to add a subject to your thumbnail? You need to create another layer above the background. You can do this by clicking on the Layers tab, selecting the Import From File option, choosing the image from your local files, and clicking Open.
Step 4: The image you added will then appear in the center of the canvas. You can drag the image to place it in a specific location.
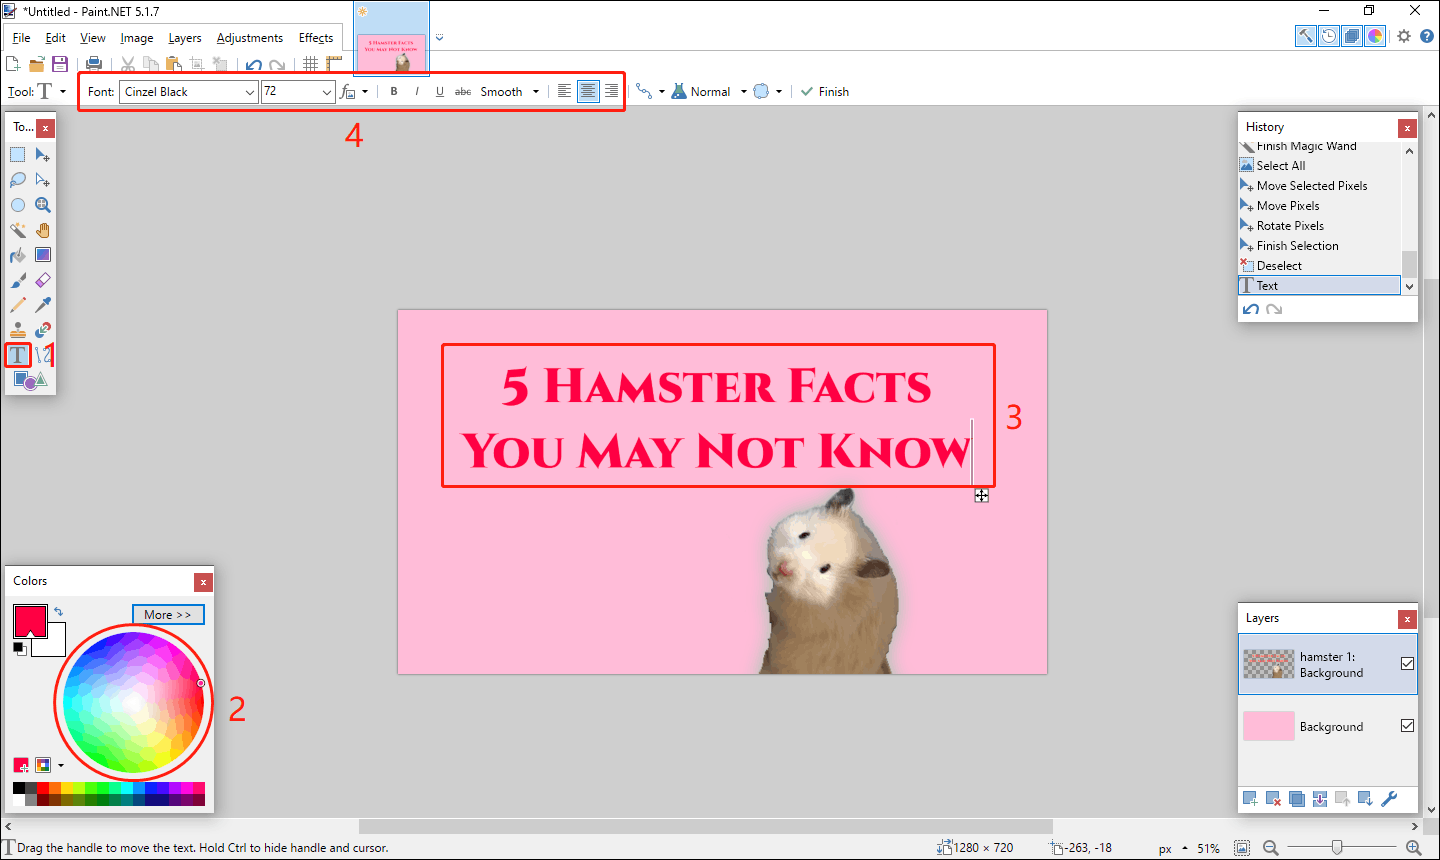
Step 5: It’s time to add text. Go to the right, where you will see a small toolbar, and click the Text tool. Then, select a font color from the color palette and enter your YouTube video title in the editing area. After that, you can change the font, font size, etc. of the text in the font area on the upper left of the interface.
Step 6: At this step, you have a basic thumbnail. Want to add some more images to your thumbnail? You can go to the File tab, choose Open from the drop-down menu, select the image file you want in the pop-up window, and click the Open button.
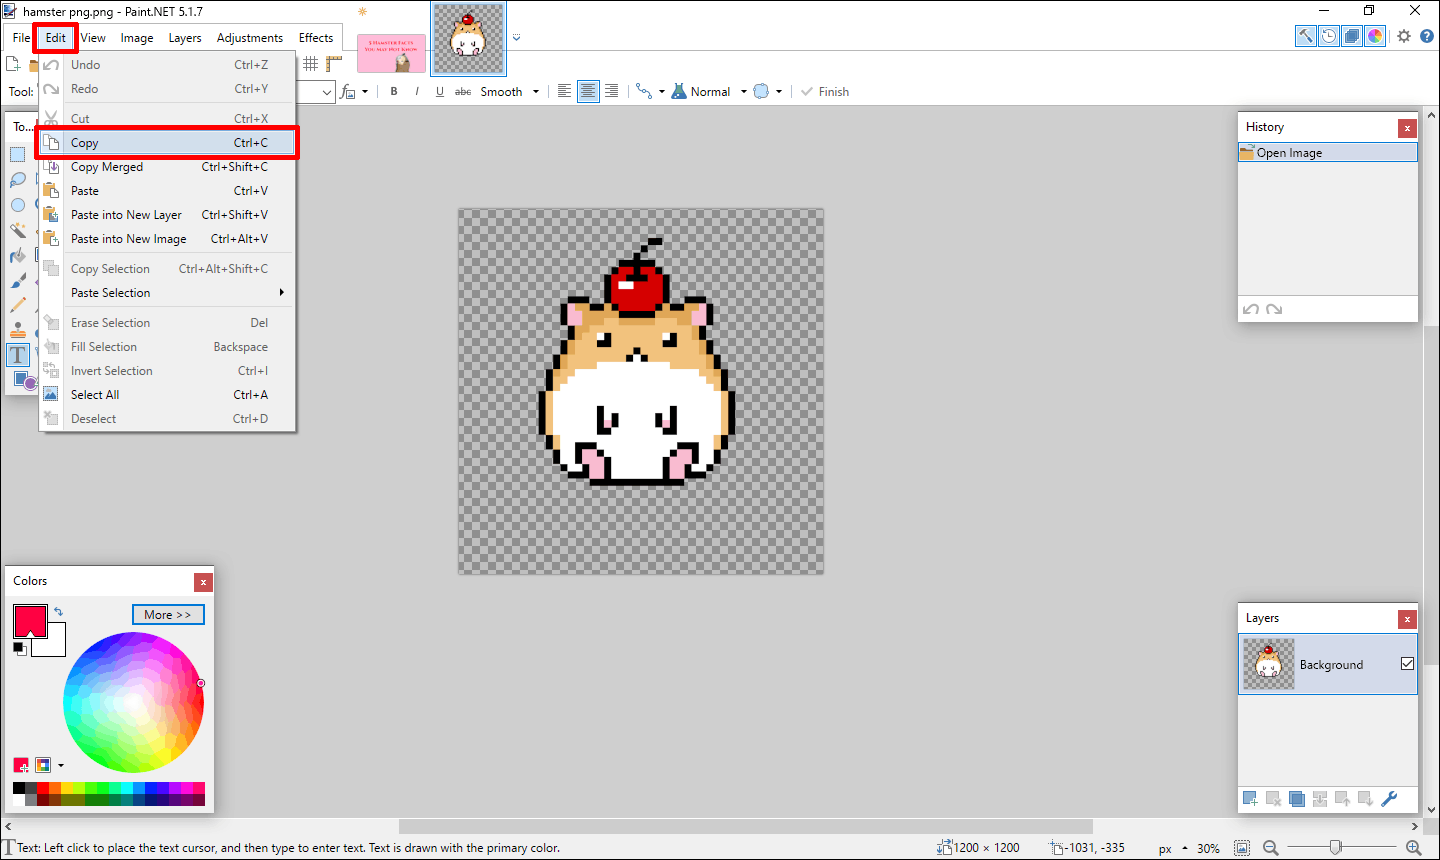
Step 7: The image file you selected will open in another window. Then, select the Edit tab and click on the Copy option.
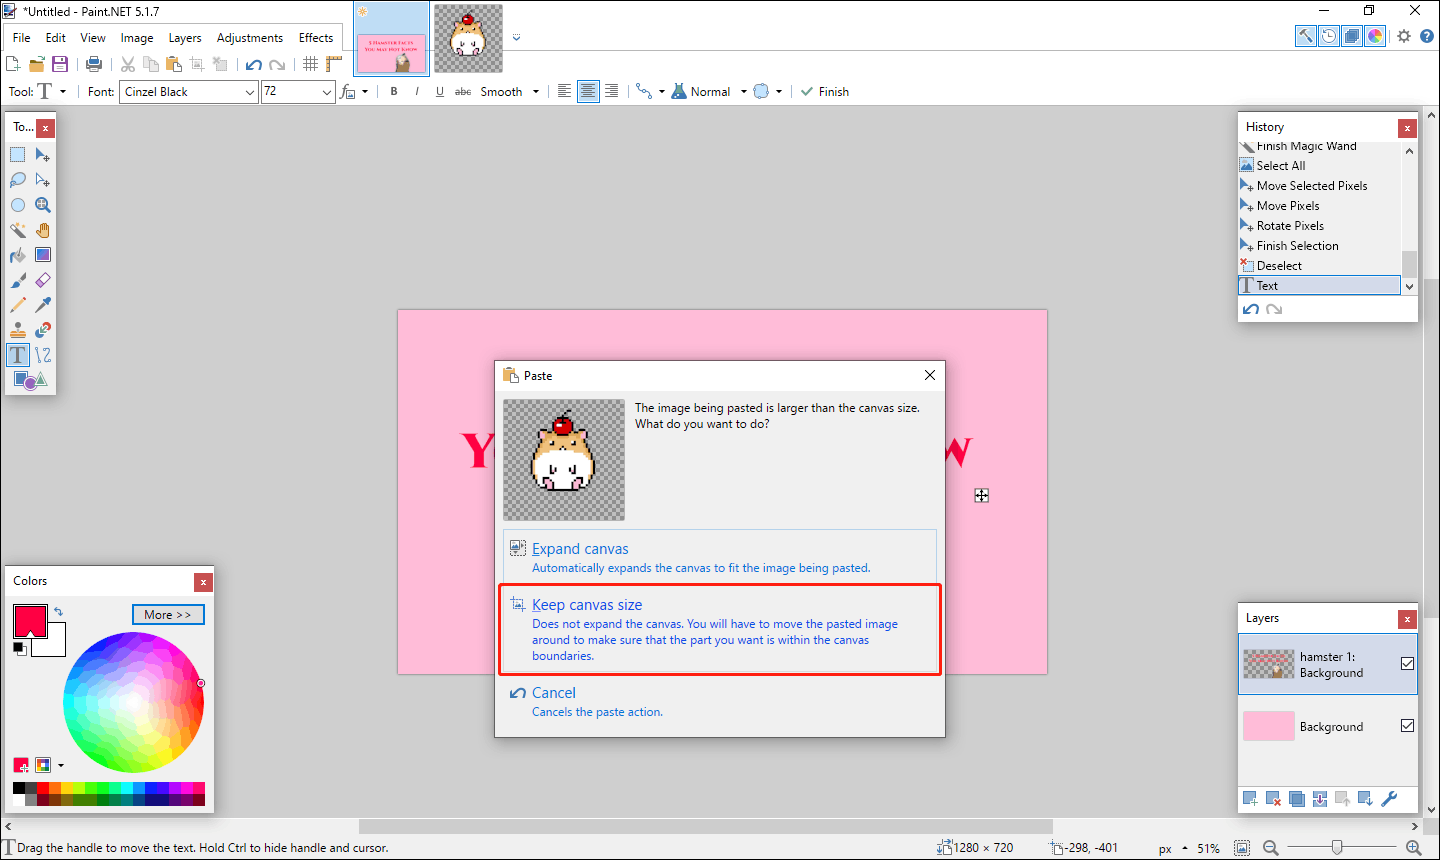
Step 8: Back in your thumbnail creation window, click the Edit tab and select the Paste option. You may see a pop-up window asking if you want to “Expand canvas” or “Keep canvas size”. This window appears because the image is larger than the canvas size. If you don’t want to change the canvas size, select the Keep canvas size option. Then, the image will be added to the picture, and you can resize it and drag it to the appropriate position on the canvas.
Step 9: When you’re done, click the File tab, choose the Save As option to save the thumbnail picture to your computer.
MiniTool Video ConverterClick to Download100%Clean & Safe
Conclusion
Paint.net is so simple and easy to use. Follow the guide in this post and you can make a YouTube thumbnail in Paint.net successfully. By the way, don’t forget that you can download videos from YouTube with MiniTool Video Converter.
About The Author

Position: Columnist
Mia joined MiniTool as an SEO editor following her university graduation, bringing a strong foundation in digital content optimization. She has since developed extensive expertise in creating technical articles and delivering practical solutions for video conversion, video compression, and audio transcription. She remains current with emerging software trends and continuously refines her content strategy based on real user feedback and industry developments.