How to remove breathing from a YouTube video? This post gives you 2 methods: prevent breathing noise during recording and manually delete breaths in the video.
Why You Should Remove Breathing from Your Videos?
Due to microphone issues, you may record your heavy breathing during recording. This can be distracting to viewers and even affect their listening experience. Therefore, it’s important to avoid breathing sounds when recording videos, especially podcasts.
Generally speaking, if there are breathing sounds in a video, other noises may also be recorded. Removing breathing sounds and other noise from a video can improve audio clarity. With a clearer voice, viewers can better understand what you’re saying.
Furthermore, for short videos like YouTube Shorts and TikTok, removing breathing sounds can shorten the video duration, allowing you to say more and convey more information within a limited time frame.
How to Remove Breathing from YouTube Videos?
Here are 2 effective ways I’ve tried to remove breathing sounds from videos. Now, I want to share with you.
Method 1: Prevent Breathing Noise During Recording
Before shooting a YouTube video, record a sound with your microphone and check if there is breathing in the recorded audio. If so, try the following:
- Use a windscreen: Placing a windscreen in front of the microphone can reduce breathing and plosive sounds during recording.
- Maintain a certain distance from the microphone: Avoid placing your mouth too close to the microphone. You can place the microphone below or to the side of your mouth.
- Control your breathing: The most direct way to reduce breathing sounds in recorded audio is to avoid rapid breathing. Try to breathe in and out slowly and gently.
Paying attention to the above details can largely avoid breathing sounds in the final video. However, if you have already recorded the video, you can only use tools to remove the breathing sounds.
Method 2: Manually Delete Breathing in the YouTube Video
If you have already posted a video to YouTube, you can remove the breathing from the video according to the following steps.
Part 1. Download YouTube Video (Optional)
If your video has already been uploaded to YouTube and the original file is no longer available on your device, you can first download your own YouTube videos using MiniTool Video Converter. Of course, if you have the backup video, you can skip to Part 2 to learn how to remove vocals from your video.
MiniTool Video Converter is a very useful video downloader. It can quickly download content from YouTube. Here’s how:
Step 1: Download and Install MiniTool Video Converter
Click this download button to get MiniTool Video Converter.
MiniTool Video ConverterClick to Download100%Clean & Safe
Step 2: Copy the YouTube Video URL
Go to YouTube and copy the YouTube video URL from the address bar.
Step 3: Analyze the URL
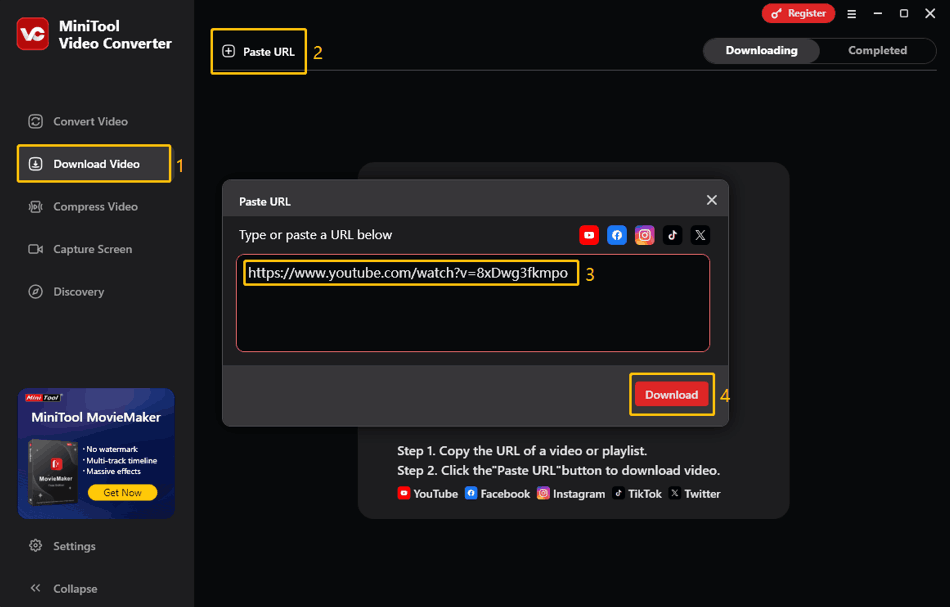
Launch MiniTool Video Converter, switch to the Download Video tab, and click the Paste URL option. Once the window pops up, paste the URL into the box and click Download.
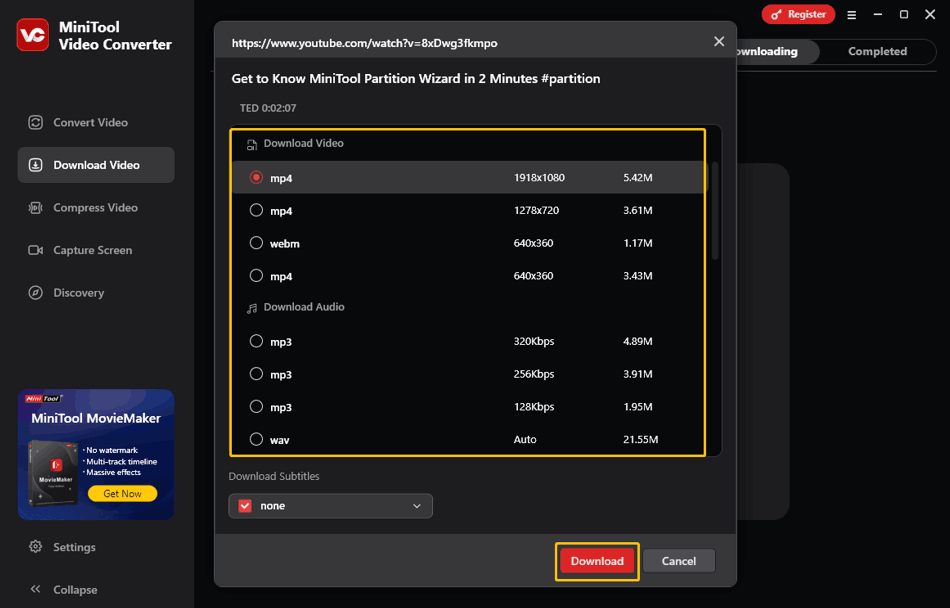
Step 4: Select the Output Format
Next, select the output format and click Download.
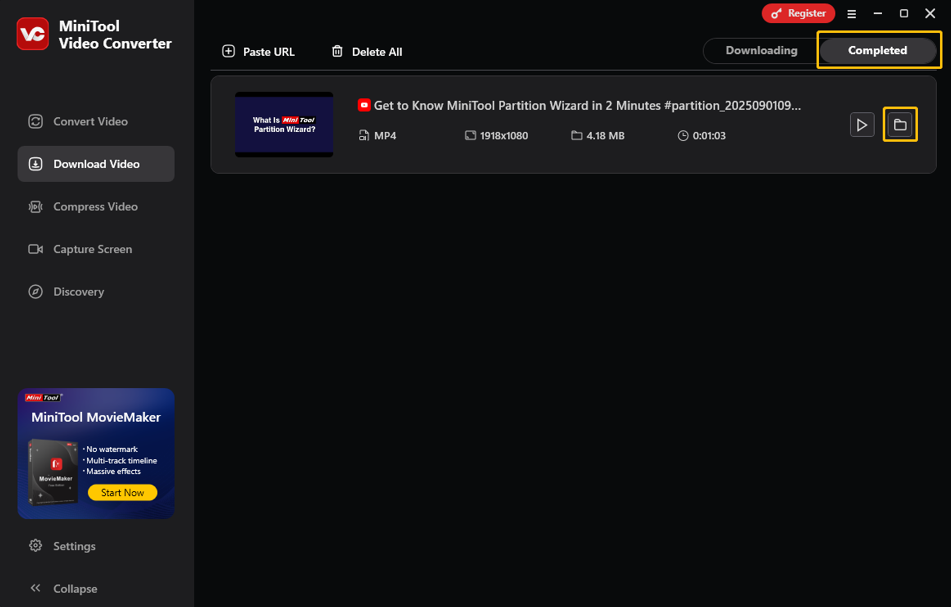
Step 5: Locate the Download Video
Under the Completed tab, click the folder icon to navigate to the saved file.
Next, you need to use a video editor to delete the breathing sounds from the video.
Part 2. Delete Breathing in the Video
MiniTool MovieMaker is a simple video editor. It can display the audio waveform of the video, so you can identify breathing sounds and remove them manually. Here are the steps:
Step 1: Download and Install MiniTool MovieMaker
Download and install MiniTool MovieMaker by clicking the button below.
MiniTool MovieMakerClick to Download100%Clean & Safe
Step 2: Import the Video
Click Import Media Files to import your videos. Then, drag and drop it into the video track.
Step 3: Zoom in on the Video Clip
Click the plus icon in the upper-right corner of the track to zoom in on the video clip. This way, you can see the audio waveform more clearly.
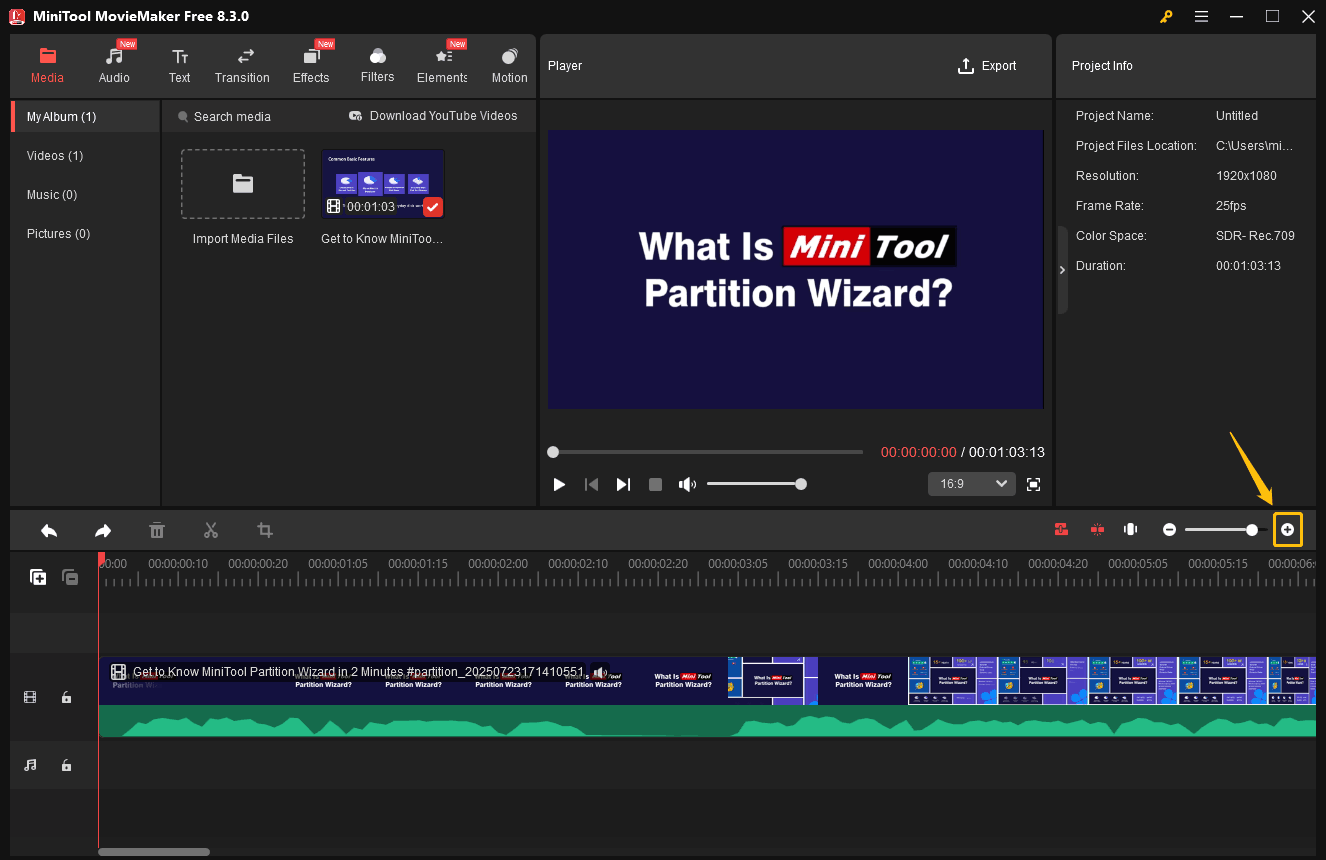
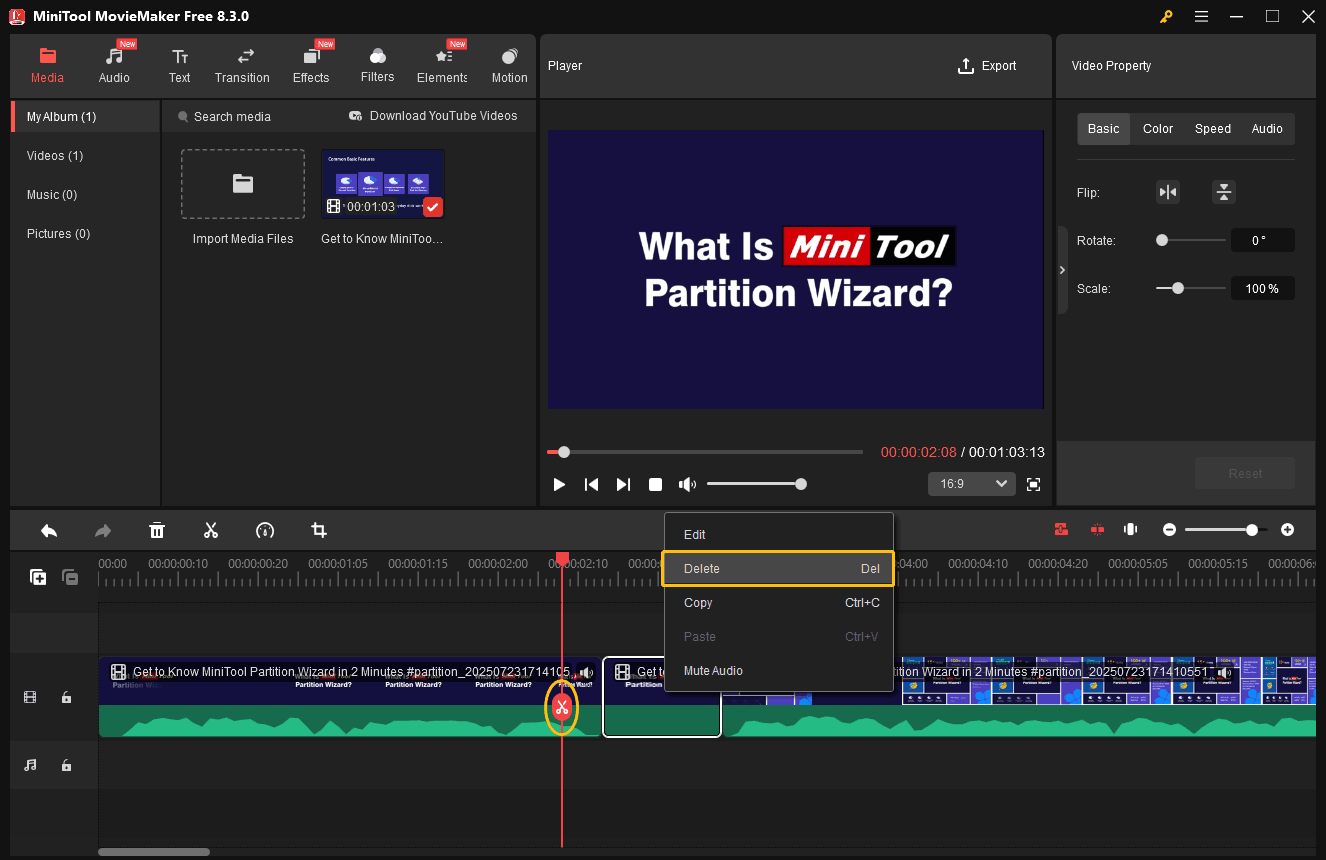
Step 4: Remove Video Clips with Breathing Sounds
Slow fluctuations in the audio waveform are likely breathing sounds. Drag the playhead to this segment and listen. If it’s breathing, click the Split icon to clip the segment. Then, select this segment, right-click, and select Delete. Repeat this step to remove other breathing sounds in the video.
Step 5: Export Your Video
Click the Export option at the top-right corner of the Player section. Then, click the Export button in the pop-up window.
In general, although manually removing breathing sounds is time-consuming, it can make the video more refined. This method is suitable for editing short videos with time limits.
To Sum Up
This article tells you how to remove breathing from a YouTube video. The best method is to control your breathing while recording the video or add a windscreen to your microphone. You can also use MiniTool MovieMaker to remove breathing sounds from a recorded video.
About The Author

Position: Columnist
Mia joined MiniTool as an SEO editor following her university graduation, bringing a strong foundation in digital content optimization. She has since developed extensive expertise in creating technical articles and delivering practical solutions for video conversion, video compression, and audio transcription. She remains current with emerging software trends and continuously refines her content strategy based on real user feedback and industry developments.